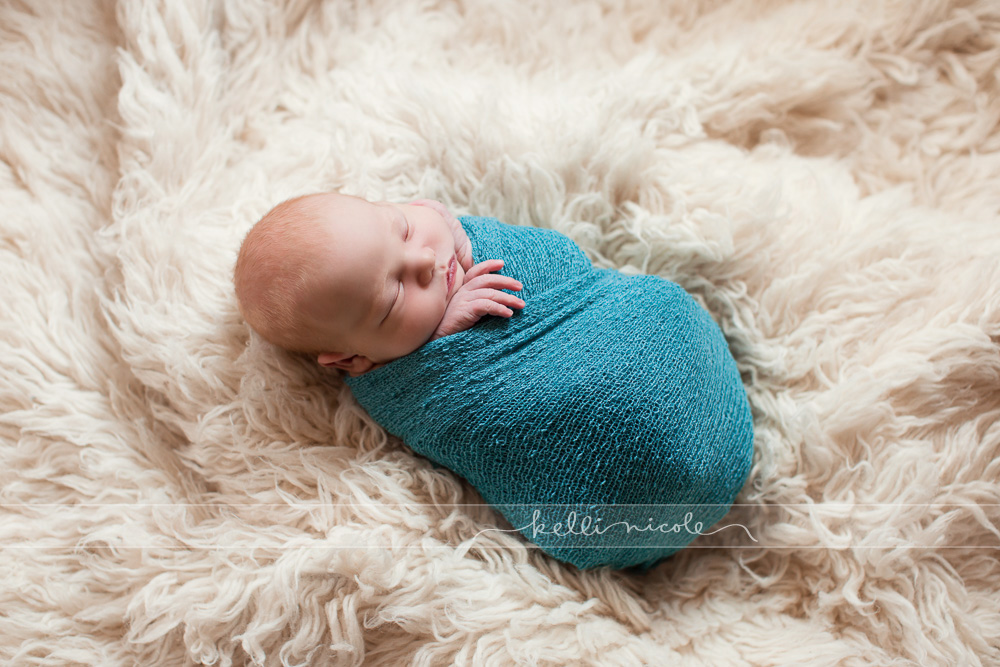
Years ago I did a tutorial for natural light newborn photography, but I use studio light now so I thought I’d make a tutorial for that as well! If you’d like to see my first tutorial you can see that here. Also, so that this post wouldn’t be too overwhelming, I have a separate post on the studio lighting I use and how to set it up. You can see that post here!
If you’re interested in knowing where I got certain props or blankets just ask! Some came from destash groups or antique sales.
*Disclaimer: I am not the best newborn photographer out there and I am well aware of that, haha. If you have a different lighting setup and you’re happy with it, that’s great! I used to be a natural light only newborn photographer and I still use natural light at times in the homes of clients, but I am happy with my current setup. I’m sure I will adjust and adapt at the years go on, but I know that this can help someone who is starting out or unsure of just how to use studio lighting. I hope this will help anyone who looks at it! Oh, and I’ve linked many of the items I use or mention below. I don’t get any kickbacks from any of the companies, I’m just doing it so you know what I’m talking about.
Every newborn will be different, but the usual sweet spot in newborn photography is 7-14 days. I don’t recommend photographing a baby that is exclusively nursing (not taking a bottle at all) before about 7-9 days or before the mother’s milk fully comes in and they have a well established nursing relationship. Breastfeeding is often a stressful part of new motherhood and the mother and baby will be better off if you wait a few days to make sure things are going well and the baby can go at least 2 hours between feedings. In the first days many newborns will cluster feed while they try to get the milk to come in and that can make a newborn session difficult. Tongue ties have become more common and sometimes need to be taken care of before a newborn session if the baby is nursing. Right around the 2-3 week mark is when many newborns will start getting baby acne and flaky skin, which is another reason to try and get the baby in a few days sooner. That said, the little girl in this post was 2 weeks 6 days for her newborn session and one of the best newborns I’ve ever had! She had beautiful skin, though I did have several babies recently between 2-3 weeks that had very bad baby acne or peeling. The little boy in this post was one month old, but was also born a bit early. For preemies I do recommend waiting to do the session until the baby is home from the hospital (obviously) and about 6 lbs. They seem to do a little better with a little more chub on their bodies.
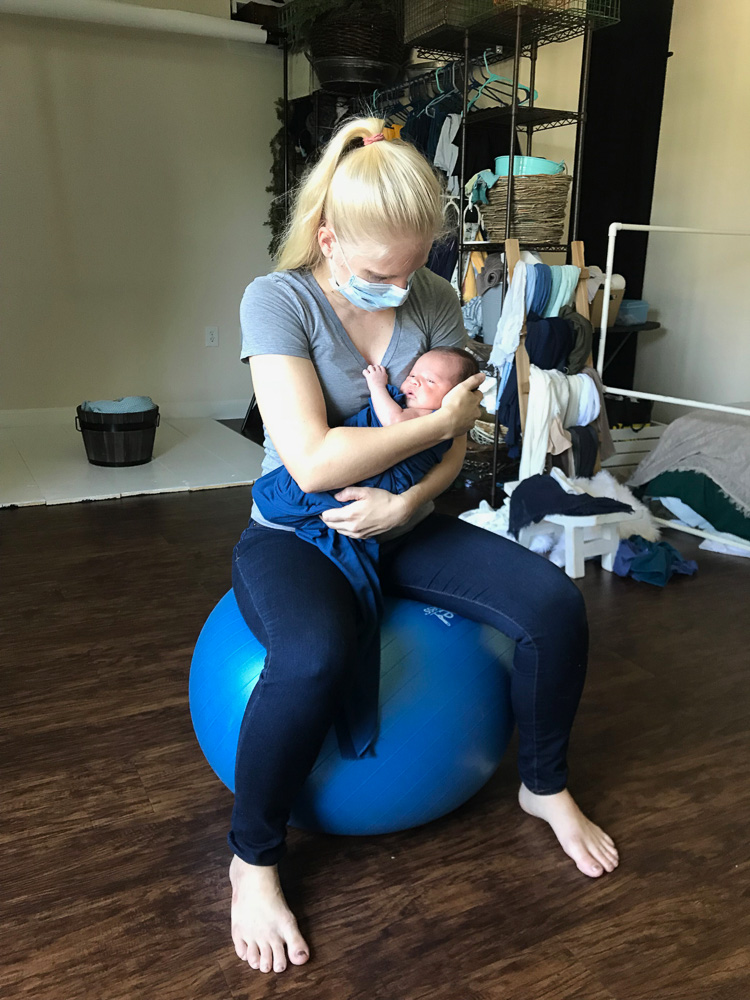
One thing I often use to calm a baby or help them to get sleep is a yoga ball! I sit on the yoga ball, hold the (typically) swaddled baby close to my chest with their head by my heart, and bounce. It mimics the motion in the womb when the mom walks around and the baby bounces in the amniotic fluid. Babies love this. I think I’ve only ever met one or two babies that didn’t seem to like it or didn’t calm down immediately. Another trick I use is to pull a soft hat over their eyes. Occasionally, this will make a baby angry (in which case I remove the hat if they don’t settle immediately once I start bouncing), but typically it helps the baby fall asleep. I remove the hat after they’re posed in the prop.
Oh, and one thing you’ll notice in the behind the scenes pictures is that I’m wearing an anti-viral face mask. I started wearing them for all my newborn sessions in 2018 as a precaution due to how bad flu and RSV have been and have continued to do it as a policy, especially with preemies or during flu season. One of my clients had to reschedule their session because their baby contracted RSV and was hospitalized. I’m grateful I wasn’t exposed, but it was scary to think that I could have been and not known immediately. I wear the mask because when I handle the babies they’re often very close to my face and I’m paranoid about breathing germs on them that I may not know I have as I know you can spread germs without even showing symptoms of illness. It also prevents me from touching my face during the session. I obviously take other precautions as well, such as hand washing, sanitizer, and sanitizing/disinfection items with safe products. This is a personal preference and I did newborn photography for years without using a mask and to my knowledge I never got any clients sick, so I don’t judge anyone who doesn’t do this. I’m just becoming a little bit of a germaphobe in my old age ;).
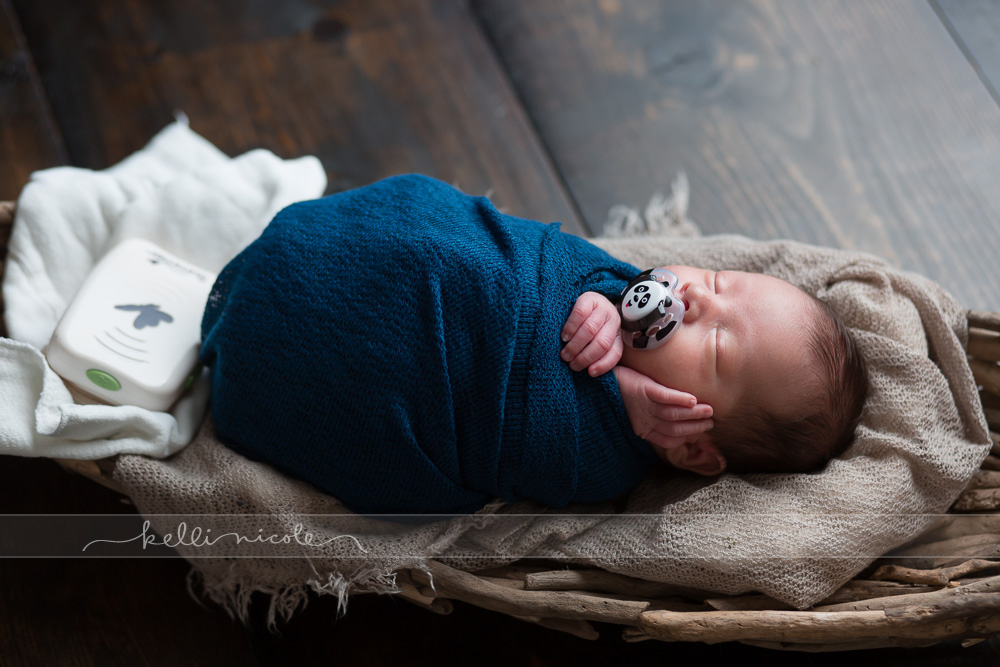
Another thing that is also great for calming fussy babies during a newborn session is a pacifier. I highly recommend allowing the use of a pacifier during the session, even if you don’t usually allow one, though I completely defer to the parents as many aren’t comfortable allowing their baby to use one. Letting the baby suck on one for a minute or two at a time during the session is unlikely to cause any harm to the baby or breastfeeding relationship and you can easily just never use it again if that’s your preference. Newborns find sucking to be a very soothing thing to do and often prefer to do so even if they’re not hungry. I recommend the soothie kind of paci as they’re made of hospital-grade silicone, sized and shaped for baby’s mouth, and will not leave hard plastic lines on the baby’s face. They should give one of these to you in the hospital if you ask so you don’t need to purchase one if you don’t plan to use it further. I do not recommend hard plastic pacis during a newborn session because of the lines it may leave on the cheeks. A pacifier is often the key to calming a baby during difficult poses. You’ll see a hard plastic pacifier in many of the pictures; just be aware that’s not what I typically recommend. This baby was a little older and that’s what he was used to and what the parents had on hand.
I keep the room around 77-80 degrees and have a white noise machine blasting at full volume. This is the one I’ve been using for the last 8-10 years and it’s still going strong. Babies are used to a lot of noise in the womb and sleep more deeply with white noise going. Often, when I want to get some awake pictures at the end of the session and the baby is still sleeping I’ll just turn the white noise machine off and the baby often wakes up! Newborns don’t have active sweat glands in the all places you would think just yet, so if you’re worried about baby being too hot check the forehead for sweat, which will indicate that the baby is trying to cool down its body. They’re used to very warm temperatures inside mom, though, so they’ll probably be pretty comfortable in the heat! It’s usually mom and dad’s sweat that wipes off on baby during family pictures :). Another thing I use is this soother. It vibrates and plays white noise and a heart beat sound (among other noises), though the white noise is not loud enough and will turn off after a time so I don’t rely on that alone. I’ll usually wrap it up in a burp cloth and put it inside a basket or next to the baby’s bottom to help them relax. You can see it in some of the images below, like this one. Most babies enjoy this. Update, this is the one I currently use and I love it (Munchkin Lulla-Vibe)!!
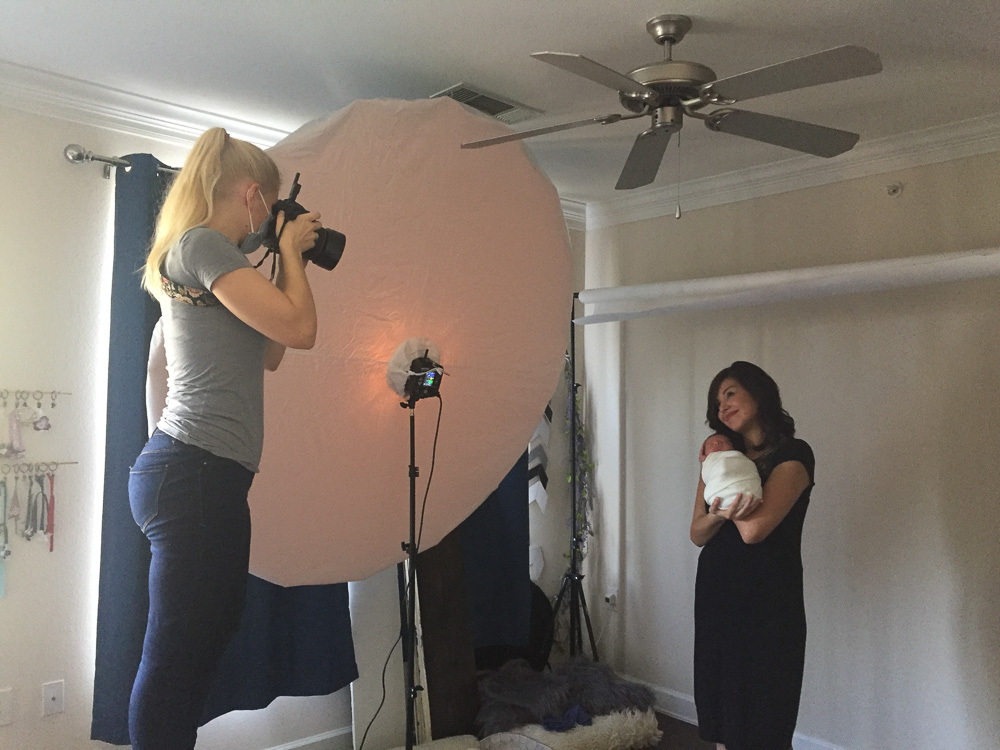
When I begin the session I usually start with family pictures. Since it’s so warm I like to do these first so mom and dad can relax and change into something cooler and more comfortable. Dad or grandma can also then take any older children out (home, to the park, out to lunch, etc). Most siblings won’t be thrilled about spending the next 2 hours hanging out at the studio. I usually do swaddled pictures, but will do naked poses if the parents request it. Before each session I have a phone consult and discuss the types of images, poses, colors, etc that the parents want.
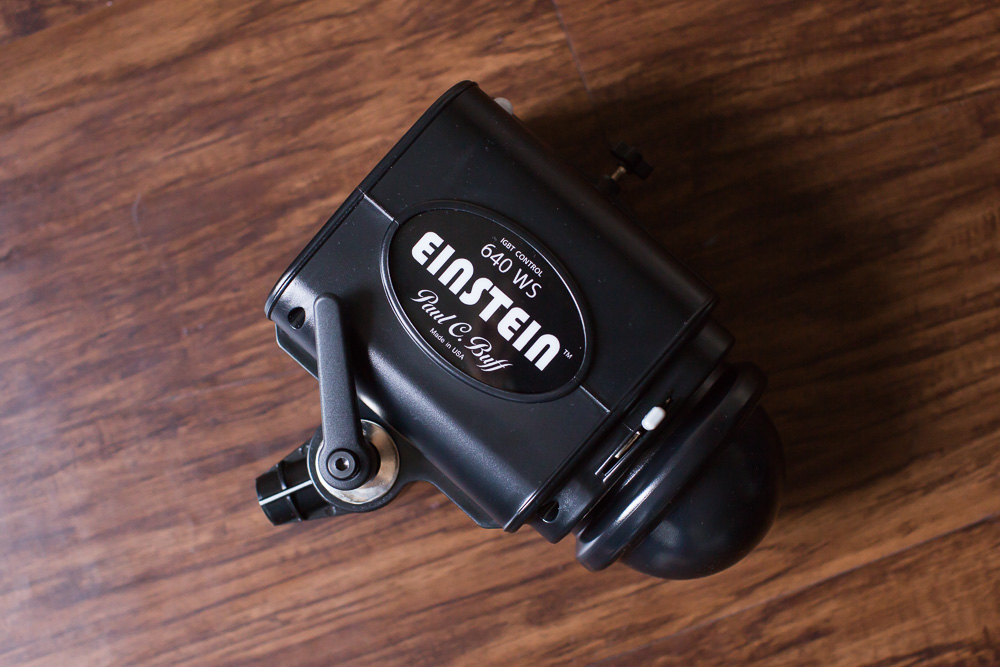
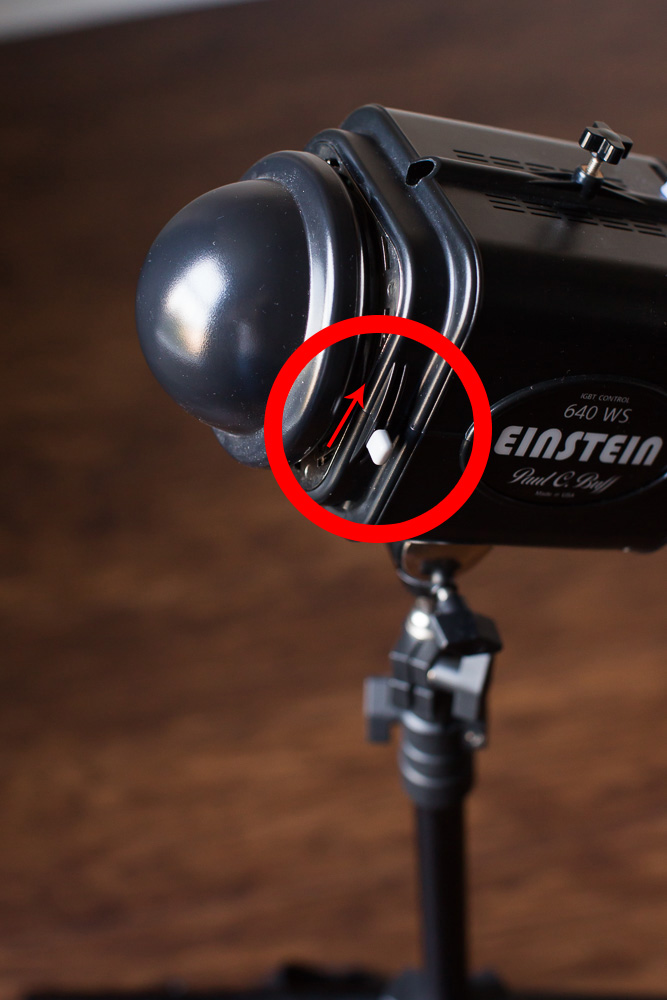
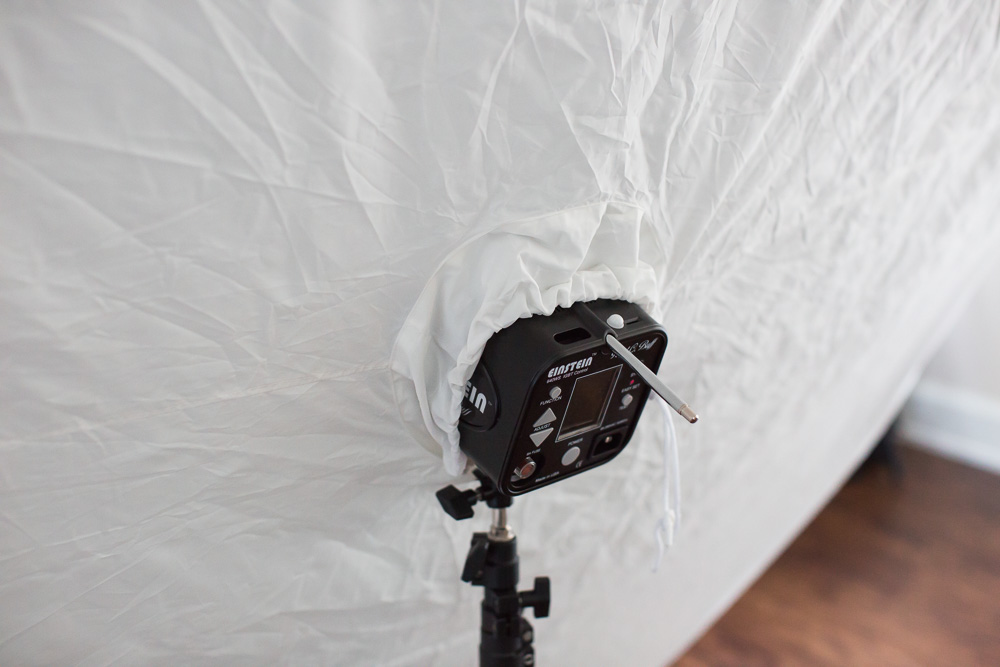
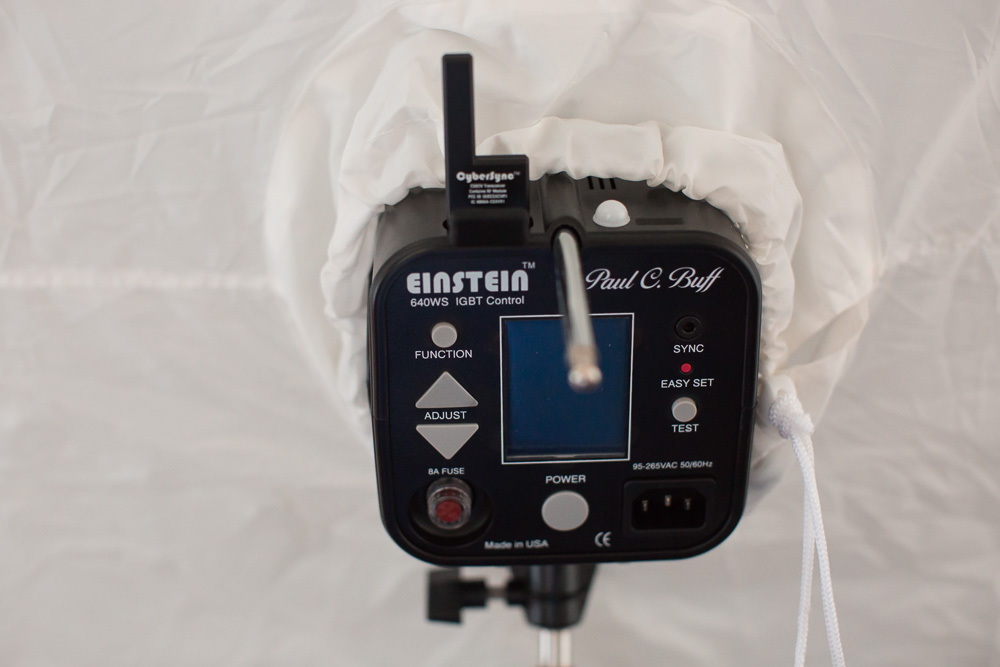
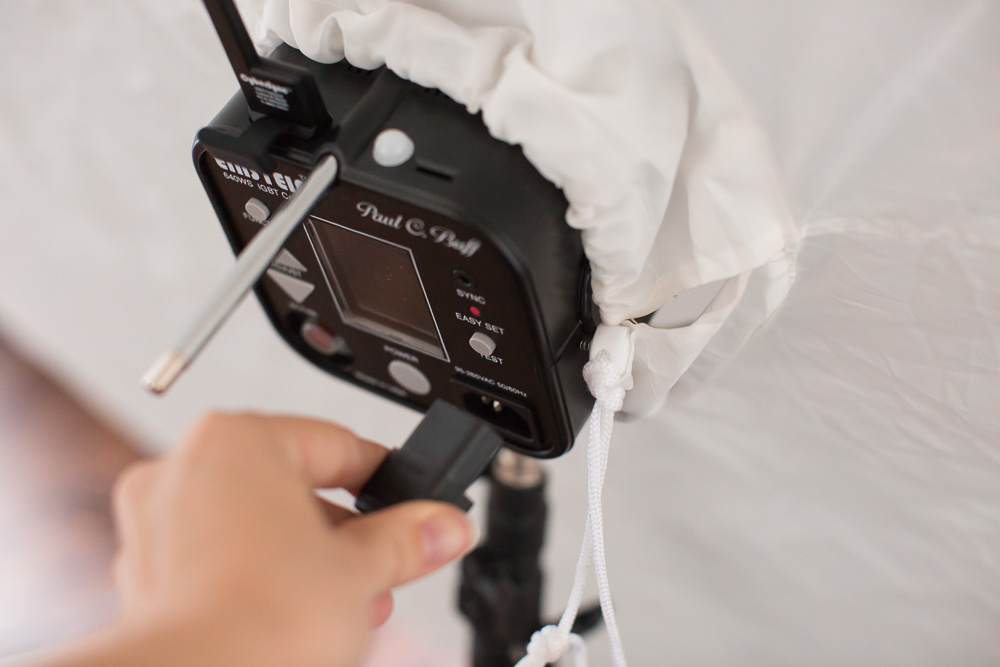
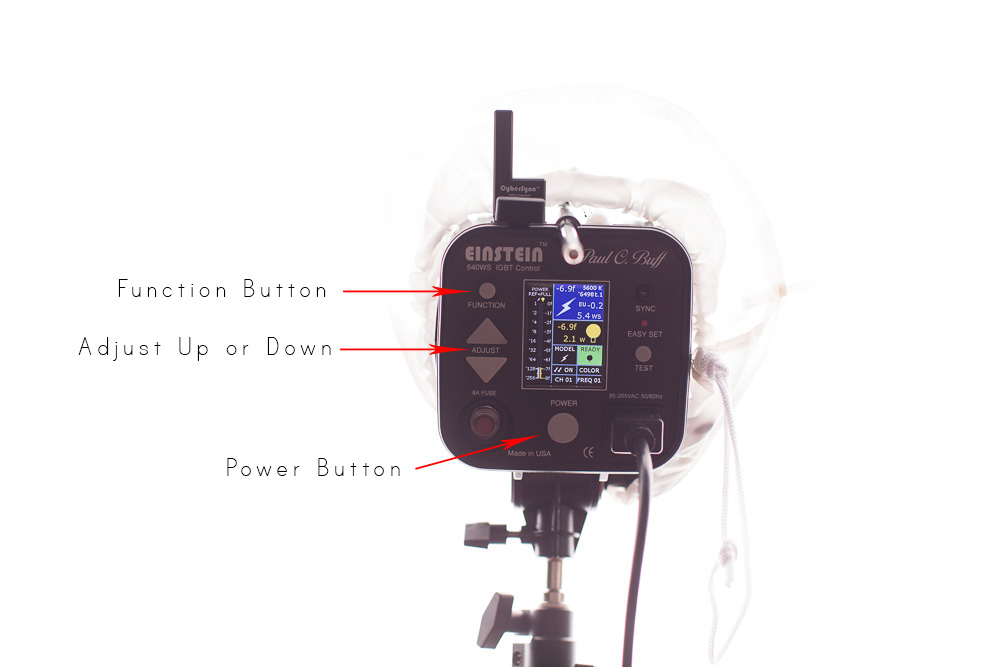
In case you’re interested, this is how the back of my Einstein looks!

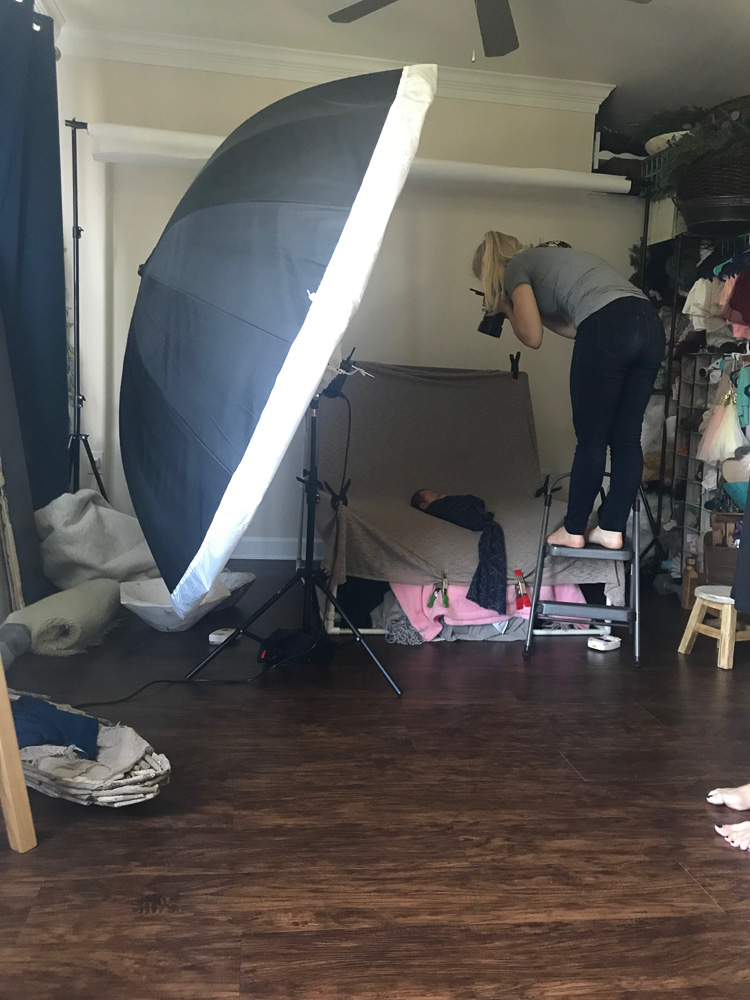
I always get up on a stool to get above the parents as this is a much more flattering angle. I’m super short so it’s even more important for me. Notice where mom is in relation to the edge of the umbrella.
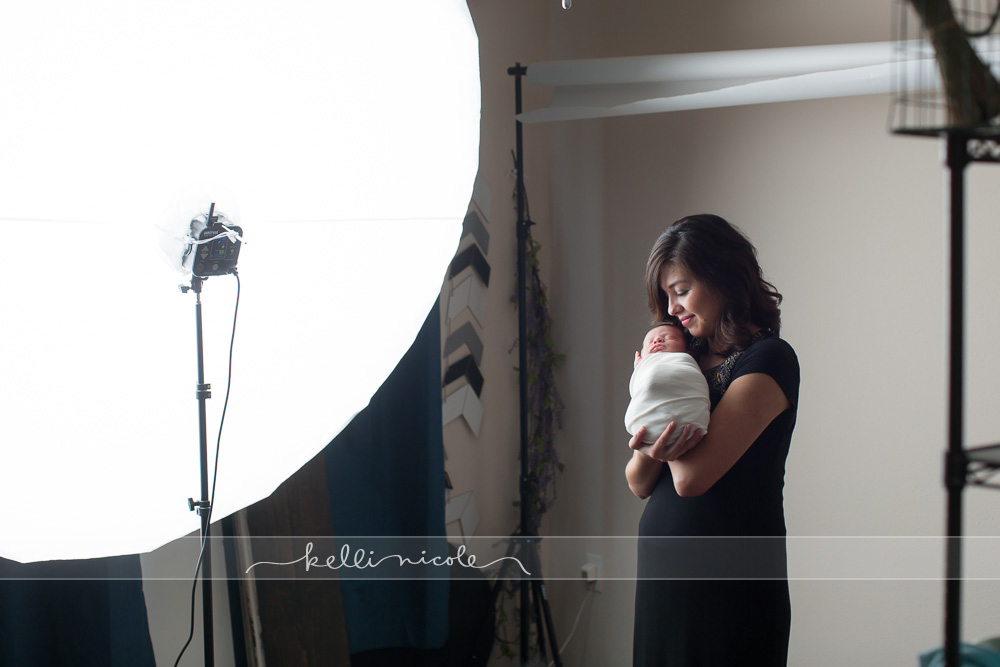
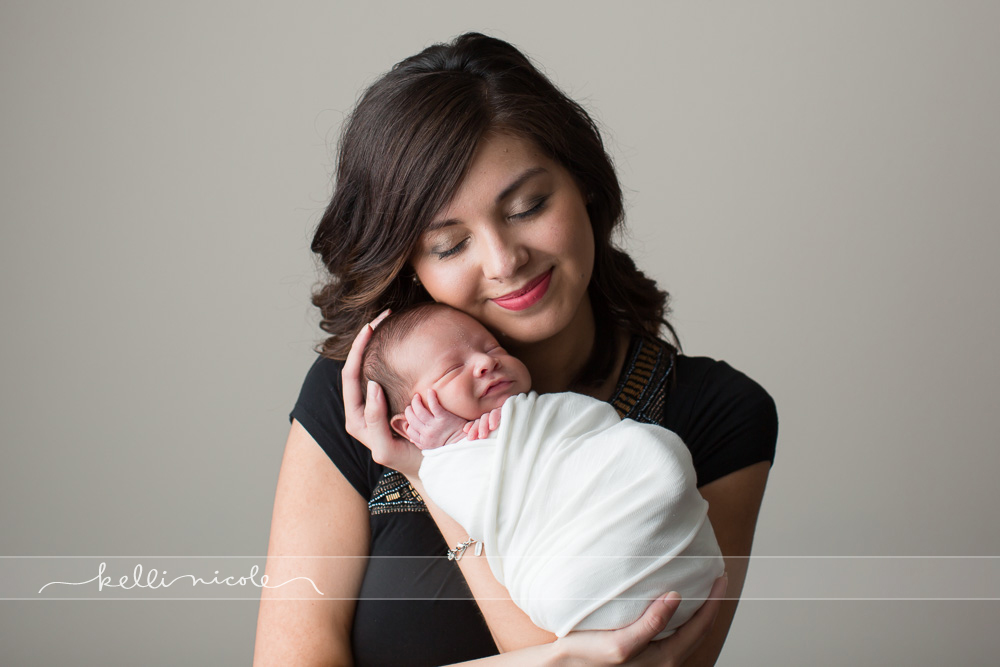
When the baby is naked I put a puppy pad or two (or 4) underneath the baby/parent so if she pees the parent has a safe spot to direct the pee, haha. You can actually see a few pee spots that I haven’t edited out yet on the mom’s shirt ;). The pee pad came in handy this time, but it might not protect mom and dad’s clothes entirely! When you start taking off the baby’s diaper, try blowing on the baby genitals before you take the diaper all the way off. Sometimes that will stimulate the baby to pee right then and not a few minutes later :). You can also see my background stand in the background. I use the white paper (or gray) depending on what the parents want and what they’re wearing.
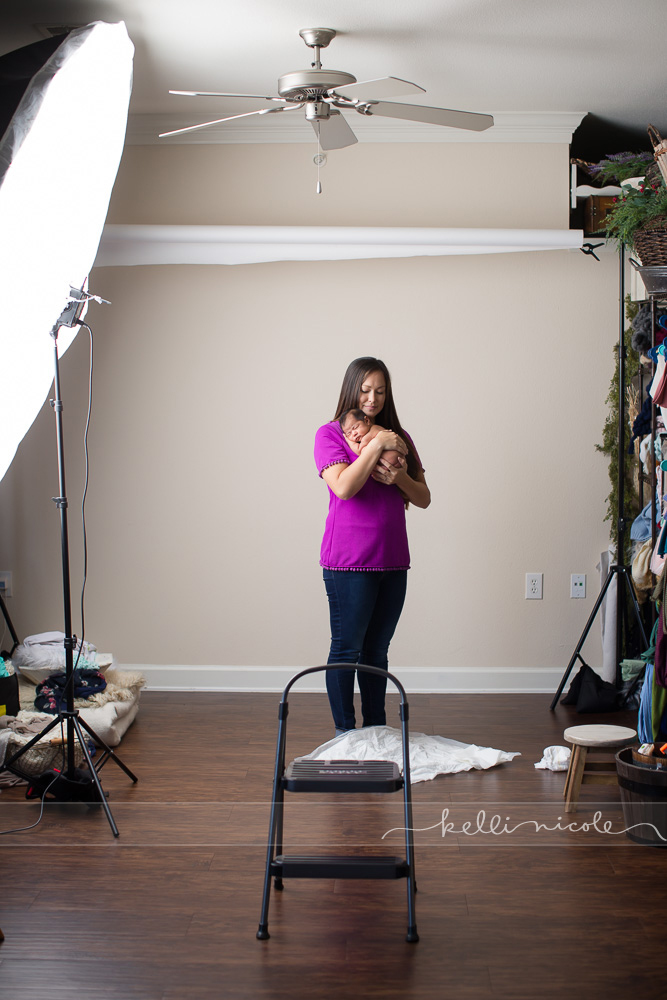
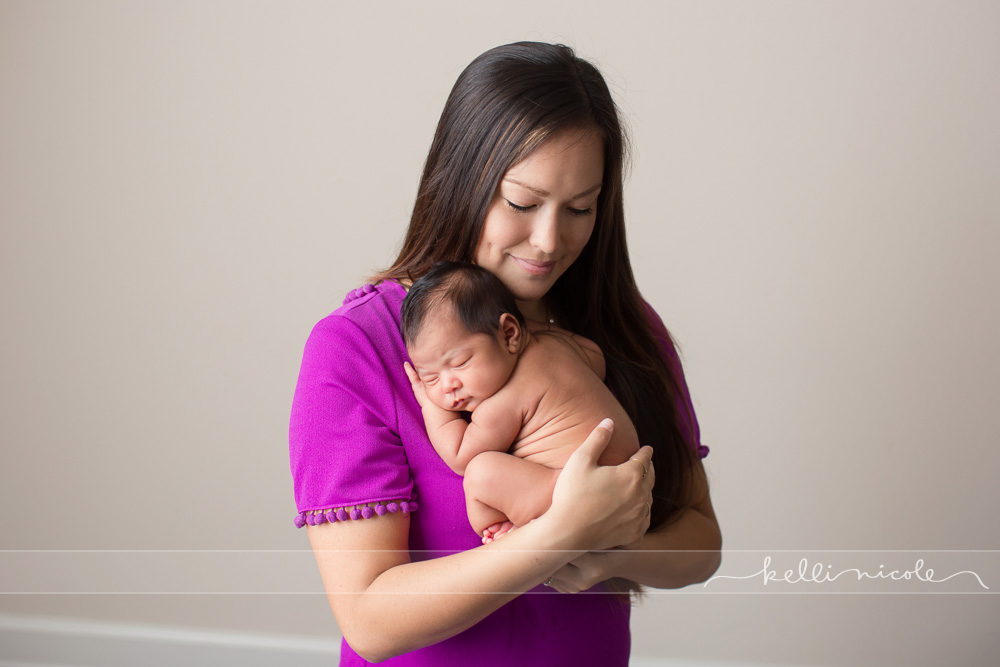
Here’s an example of a family picture on the white background. Depending on how close or far away I place them the background could look more white or more gray. In this image the little boy is standing on a kitchen stool. 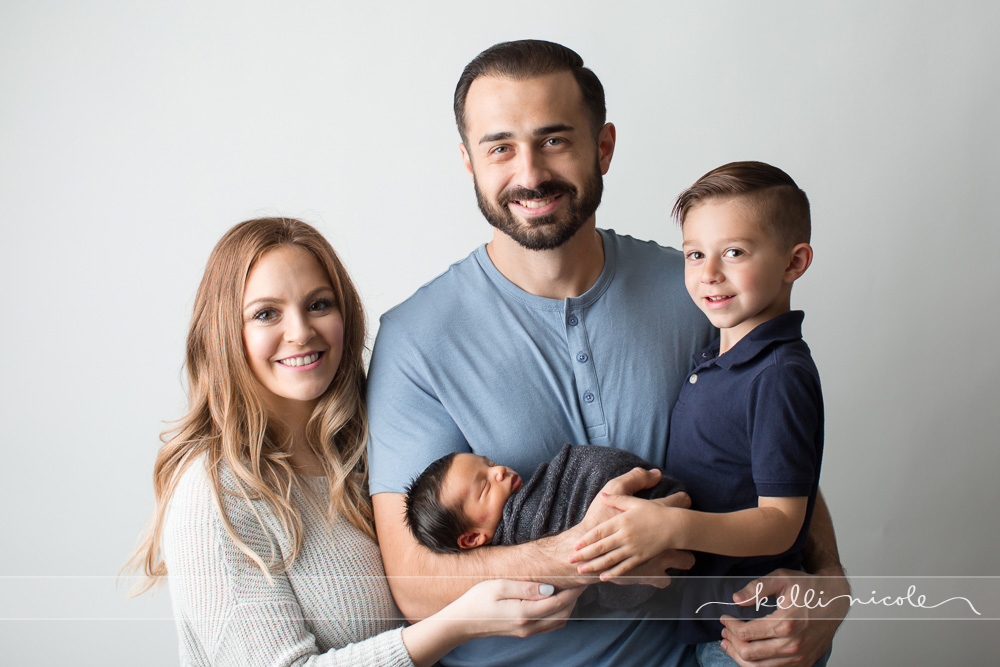
Beanbag Poses
(*Note, I recently switched and do currently use the dog bed, plus these posing tools as well as some others. I also use these clamps now).
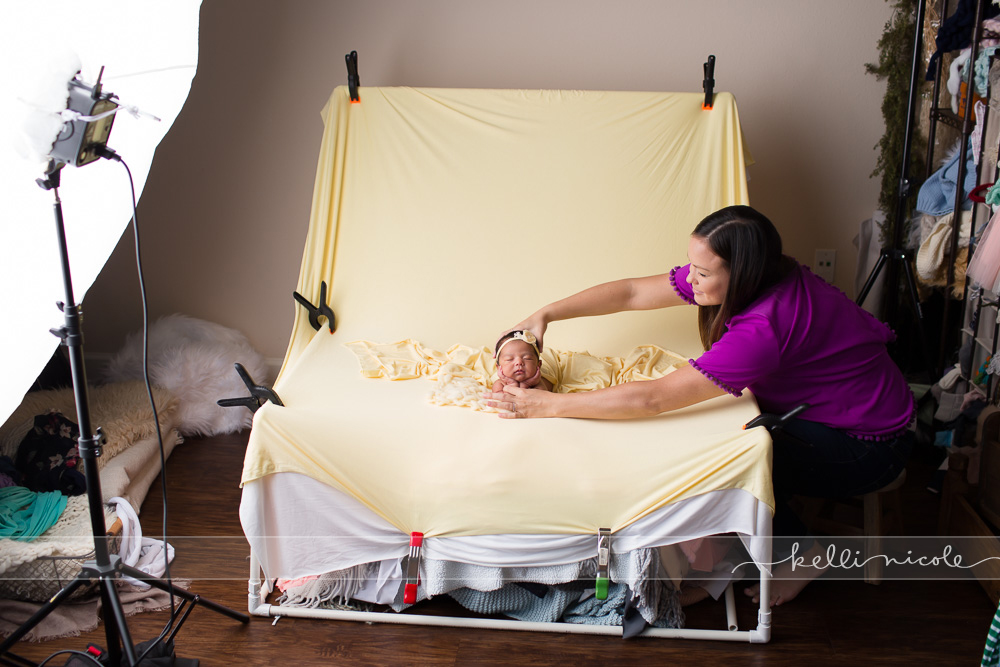
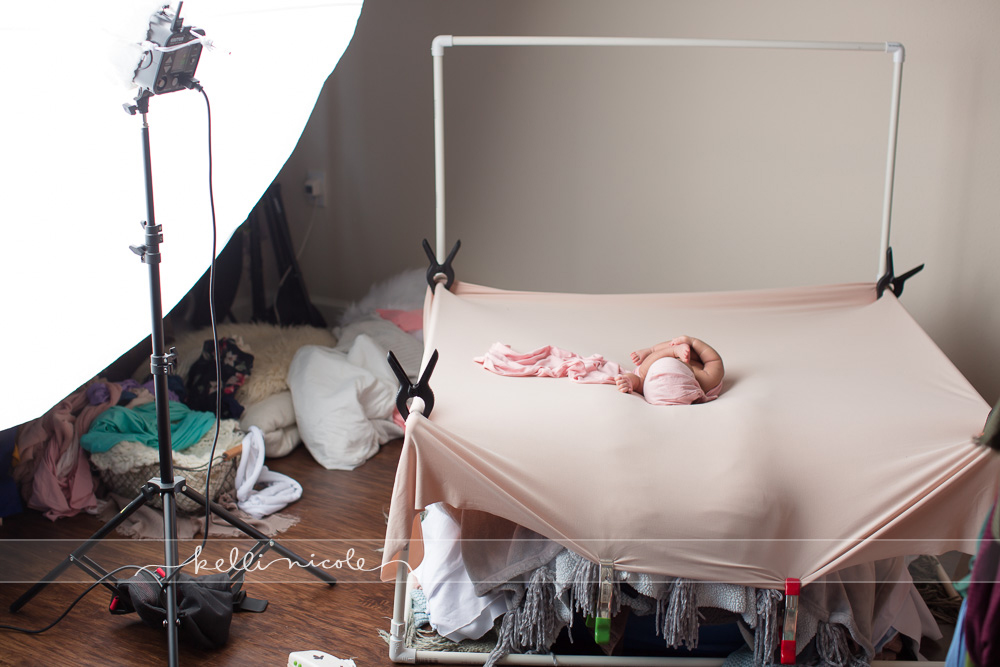
There are many ways to do this. Some people use a dog bed in place of a beanbag, some people use posers specifically designed for newborn photography. There are many companies that sell these. I bought a regular medium sized beanbag online years ago, bought more stuffing to put inside, and it’s what I still use. It works for me, but some day I may upgrade. The pvc pipe background stand is fantastic. I bought mine off another photographer, but you can easily make your own using PVC pipes, elbows and T’s. I got metal clamps at Home Depot/Lowe’s and recently heard that the plastic ones can be a bit of a safety hazard so I’ll be replacing those. You want to get your background nice and tight to make sure there are no wrinkles. Try to do everything as best you can in real life so you don’t have to do as much photoshopping afterwards :).
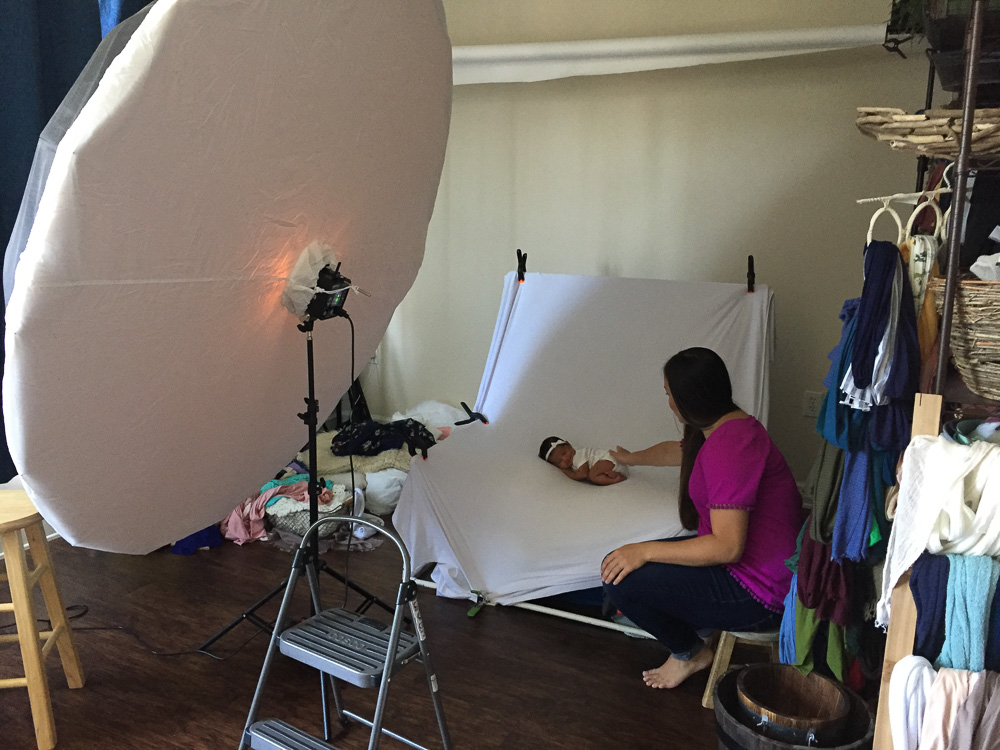
I use these rolled up towels underneath the blankets to get the shape I want. Sometime I give a little more padding under the one where the baby’s head will be (as I said above I use these now with a dog bed and they’re wonderful).

As you can see there are several layers of blankets on the beanbag. This is to make sure it’s nice and smooth. I’ll make sure to use a thick, smooth blanket (like the gray one below) right underneath the top layer, especially if the top layer is thin or has no texture.


If the baby is naked I’ll put a puppy pad under the second layer. If the pad is directly underneath the top layer the wrinkles from the will show through. I will layer all the blankets I want to use on the beanbag before we start so that all I have to do is lift the baby gently, have someone strip the top layers, and then place the baby back down on the blanket I want to use next.

This next picture has very little editing done. In this situation I haven’t done anything to blur or lighten the background. 135mm 2.0 lens, ISO 160, 1/200th second, f2.8
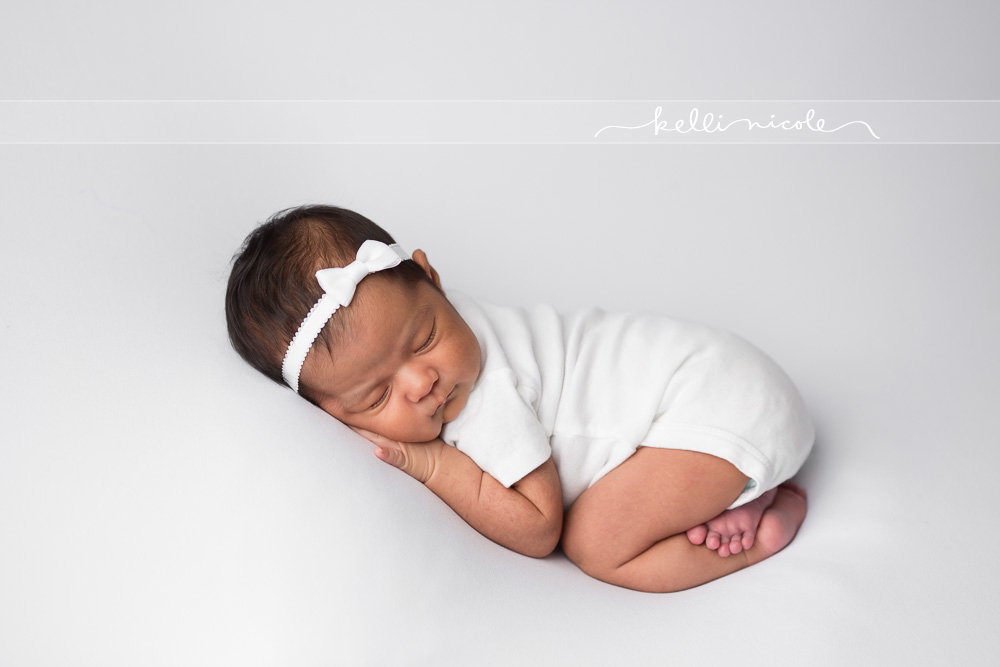
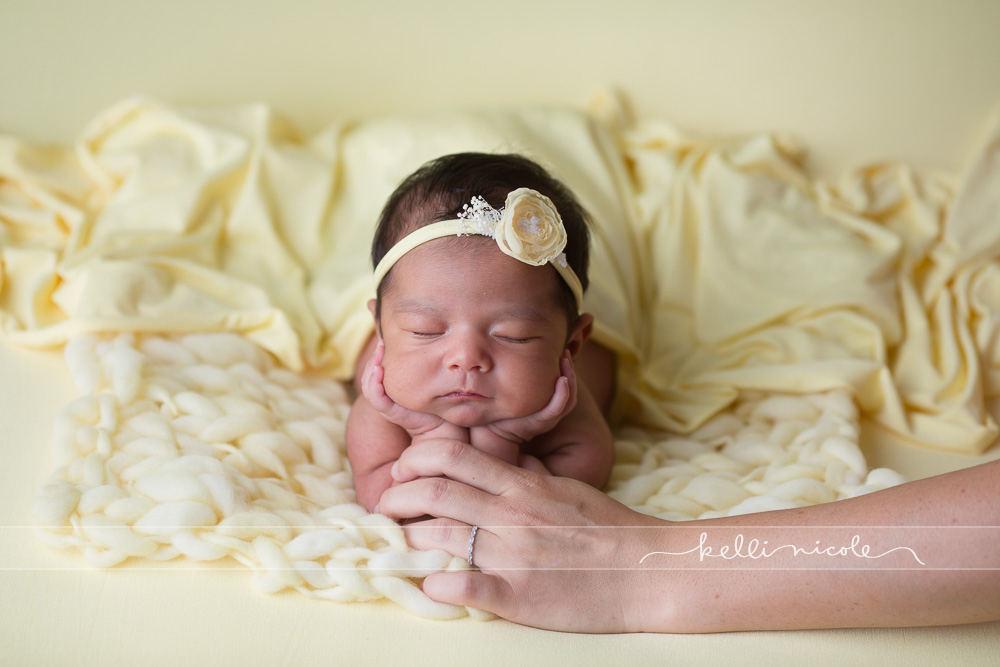
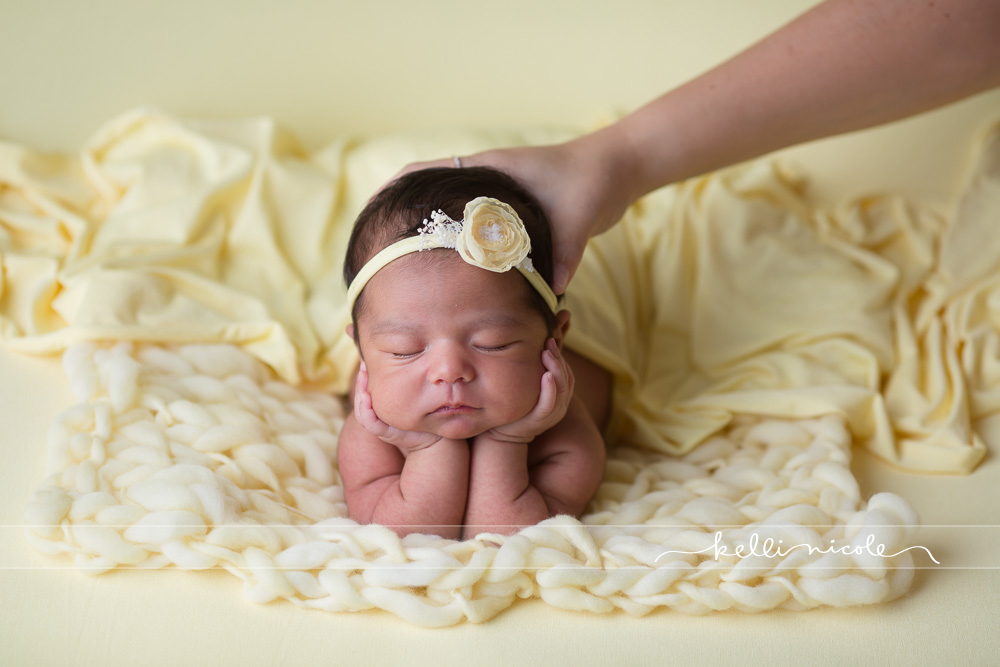
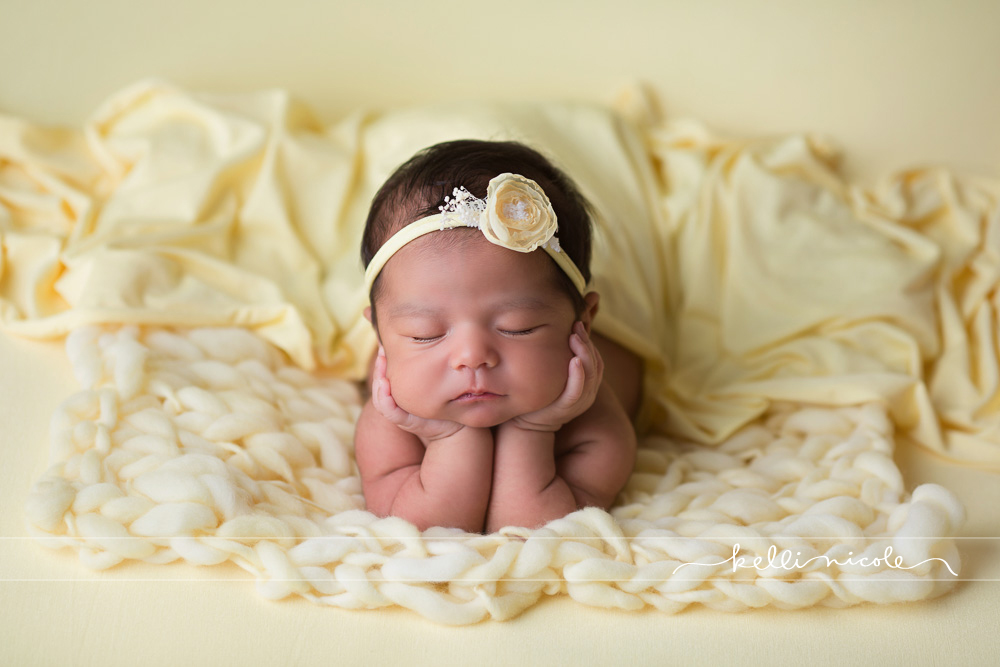
This pose is commonly called the froggy pose or the hands in chin pose. One thing I do differently from many people is that I don’t generally bring the feet up by the arms. That’s just a preference thing. I like using different textures, but I love the monochromatic look like in this image. Safety first with poses like this! I’ll have someone responsible hold the baby’s head in one picture and hands in another picture and then I’ll photoshop the two together. I do know some photographers who do this themselves and shoot with a wide angle lens so they can be close enough to the baby to hold it.
135mm 2.0 lens, ISO 200, 1/200th sec, f2.8
Please forgive that mess in the background! I love doing backlit photos, especially with this pose. I know a lot of people use fancy beans underneath babies, but I just use rolled up towels. You can see the outline of the large towels on either side of the baby here. I have smaller towels rolled up under her head and bum as well to keep her in place where I want her. 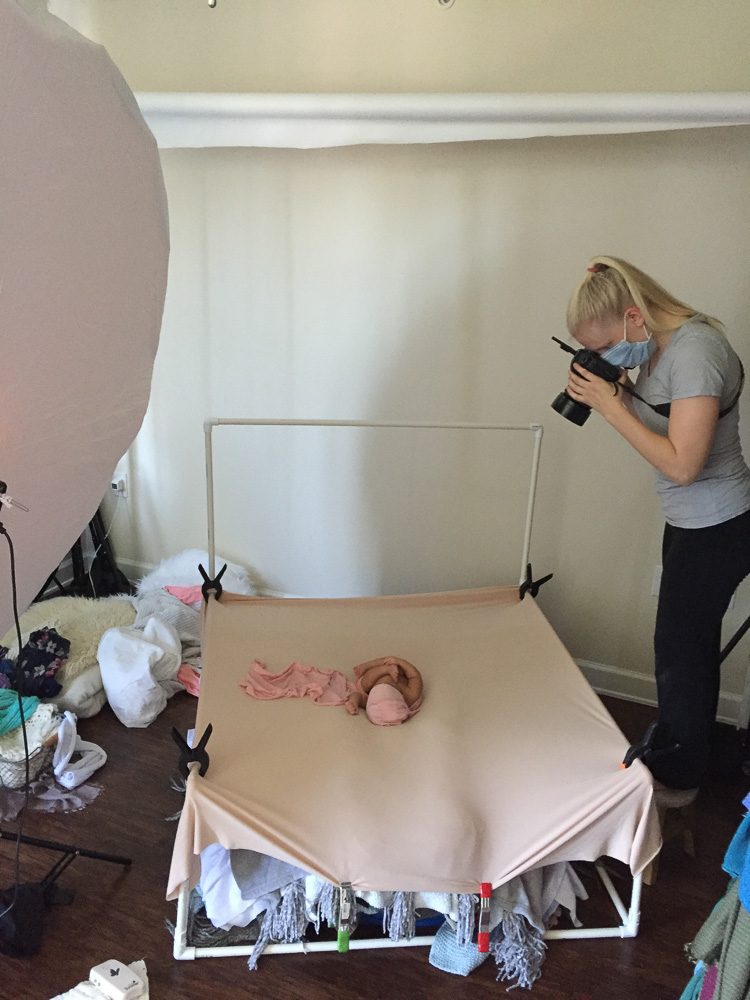
Sometimes during this pose diapers will look too big and bulky, so I will take it off and use disposable nursing pads in its place. When I took off this wrap the nursing pad was soaked, but the wrap and backdrop were dry!
50mm 1.2 lens, ISO 200, 1/200th sec, f2.8
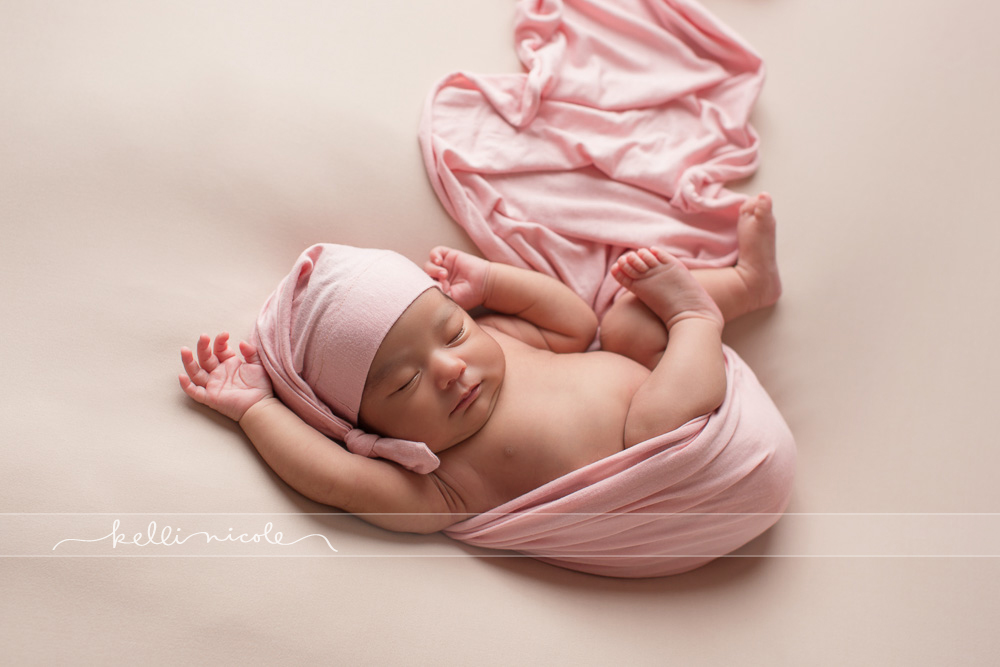
85mm 1.8 lens, ISO 200, 1/200th sec, f2.8
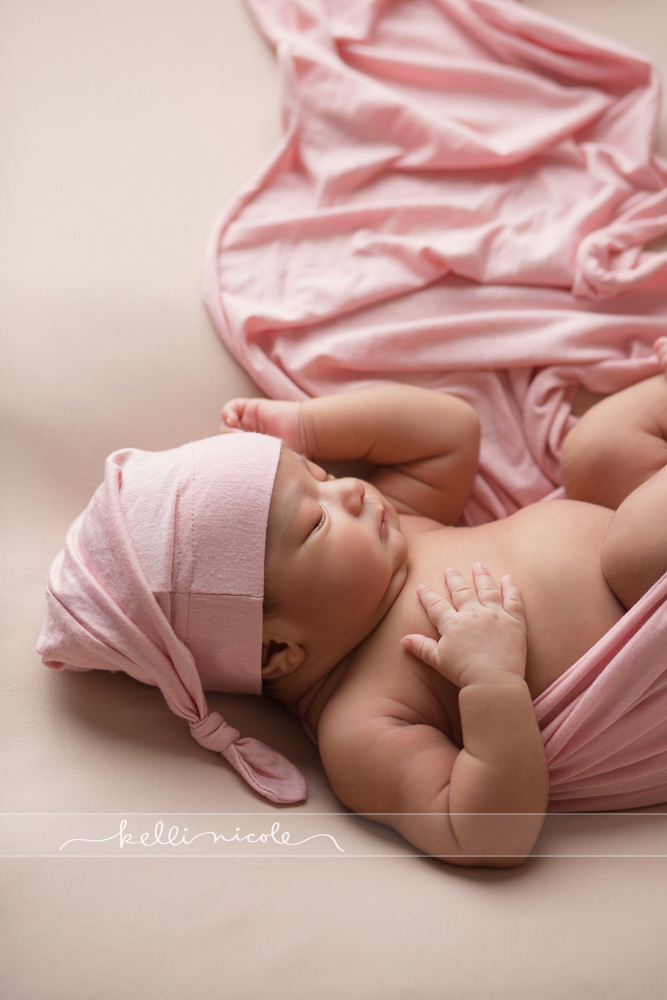
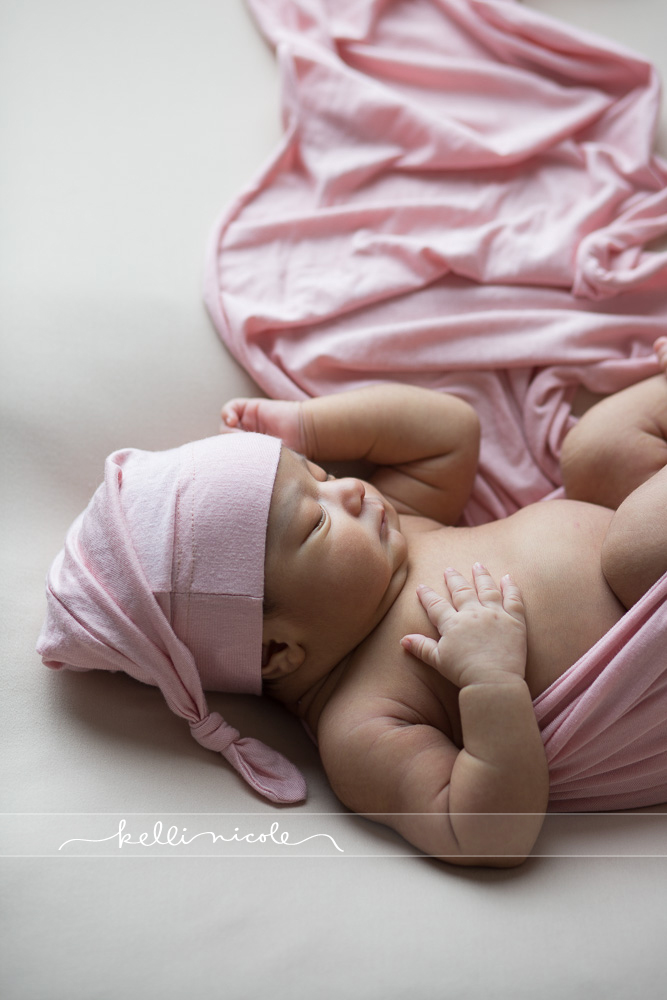
This is the picture above, but completely unedited, otherwise known as SOOC (straight out of camera). This is so that you can see that it’s best to do as much as possible in camera so you’re not spending too much time editing in post processing. We all make mistakes or have to deal with bad baby acne, so some pictures will take more editing than others, but it’s best to get the lighting, exposure, and posing right in camera when possible!
This is the same setup as above, but in blue. Baby was starting to get a little squirmy so I had mom hold her legs to add a little variation! I still love this shot! 50mm 1.2 lens, ISO 250, 1/200th sec, f2.8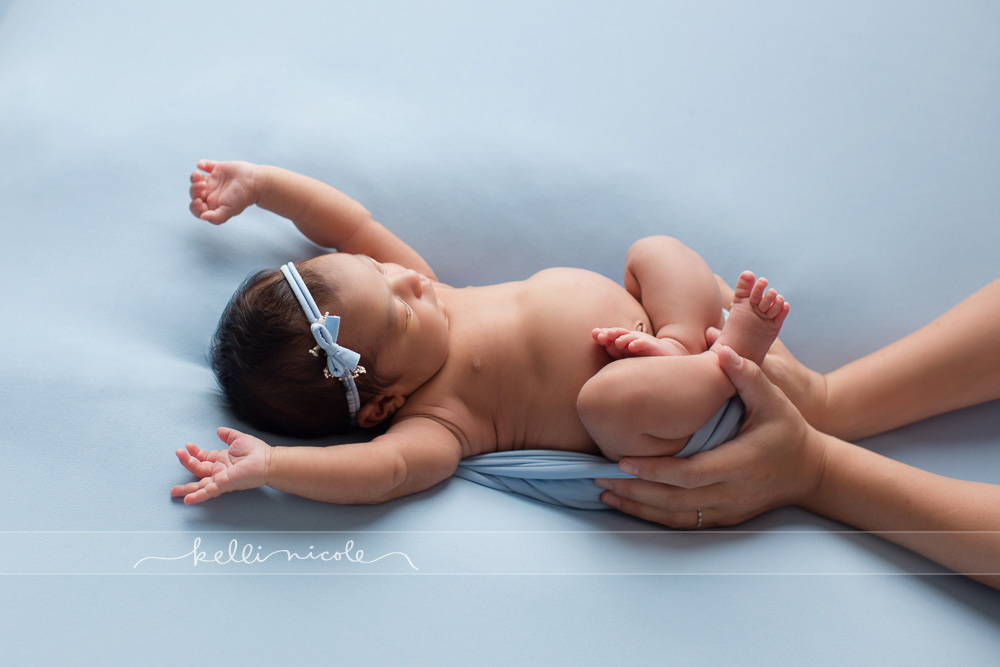
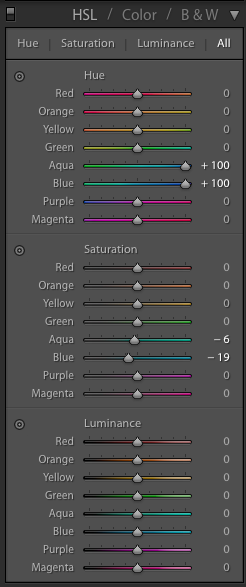
Blues and greens are great colors to use if you want to be able to change the color later because those are colors not found in human skin. As you can see below I was able to alter the colors of the blanket and headband in Lightroom only using the Hue and Saturation sliders. No other editing has been done, but if I was doing this for a client I would probably take it into Photoshop and do a little fine-tuning as well so make sure the color is uniform.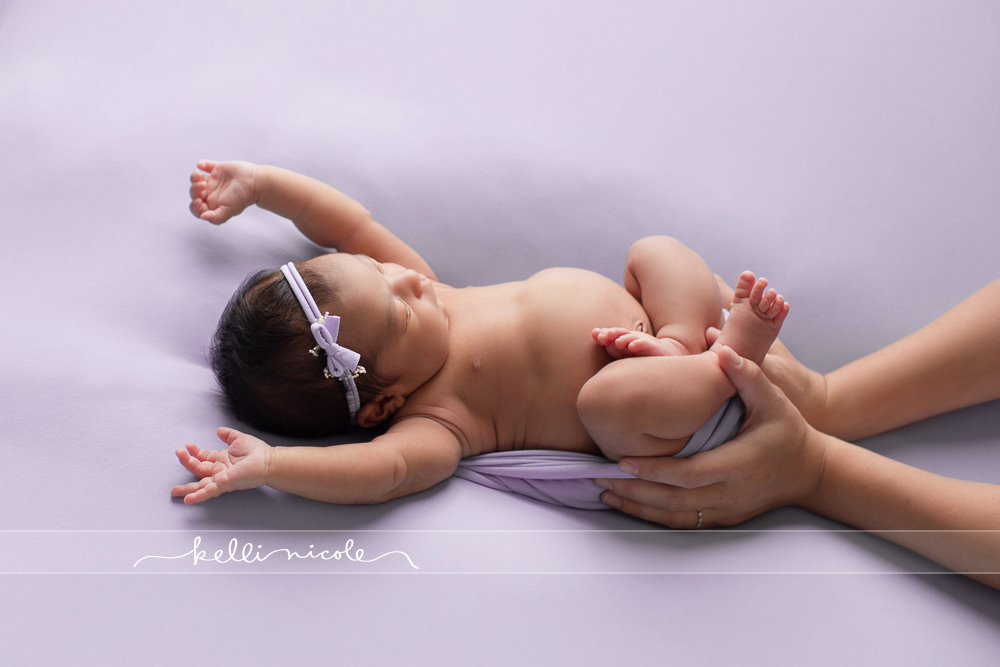
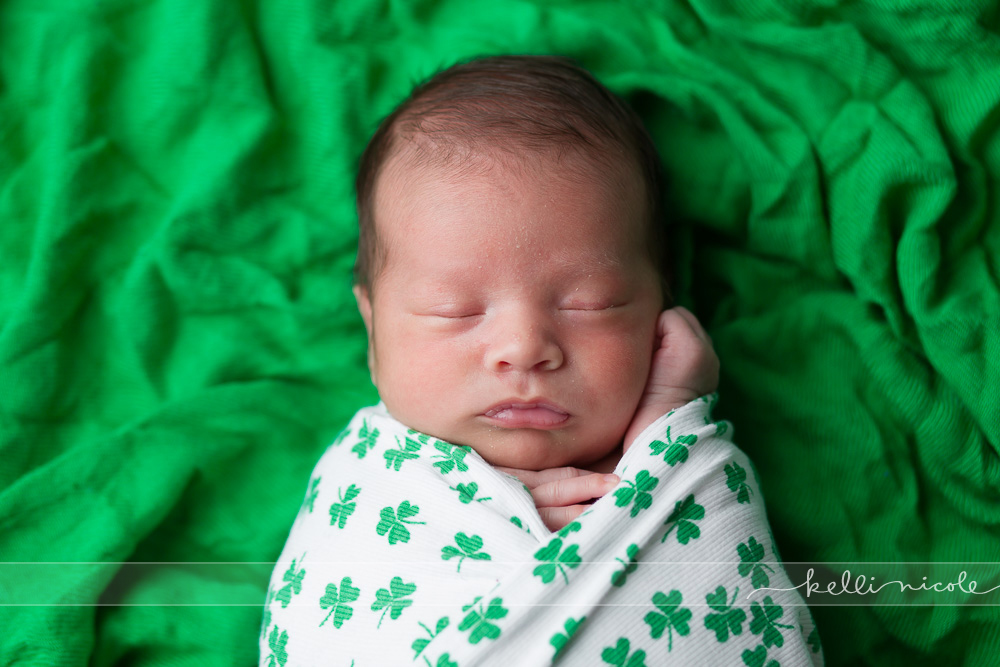
This is one of my favorite poses! I love this little tucked-in look. I always wrap the baby in the same wrap or a coordinating color underneath the top layer to help baby feel secure. You can also see the soother at her bum set to vibrate.
This shot below is when I was standing near her feet. As you can see you’re looking up the nose a little and I didn’t like that angle, so I switched my position.
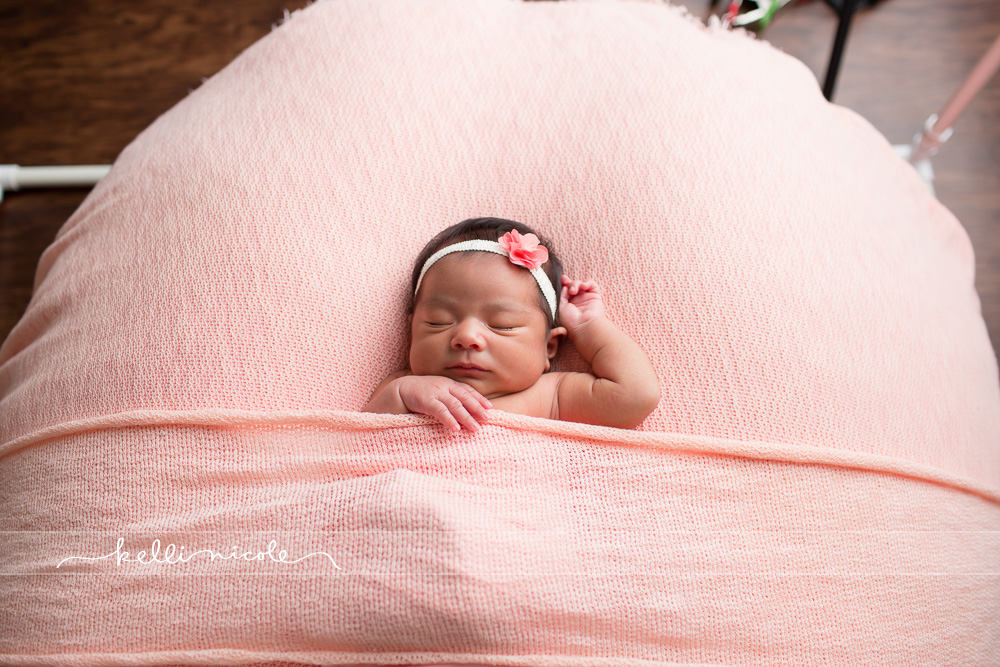
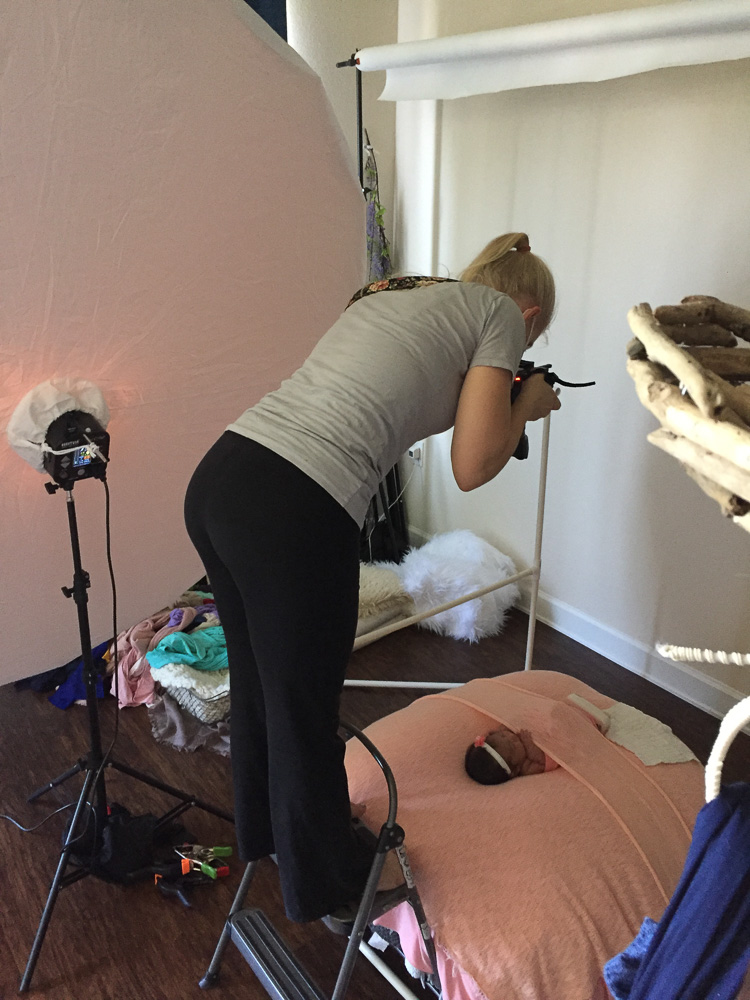
I’m much happier with this angle (below). This is where I was in the behind the scenes picture. You can sort of see how the blanket is clamped on either side to the pvc pipe. This make sure it’s nice and tight. 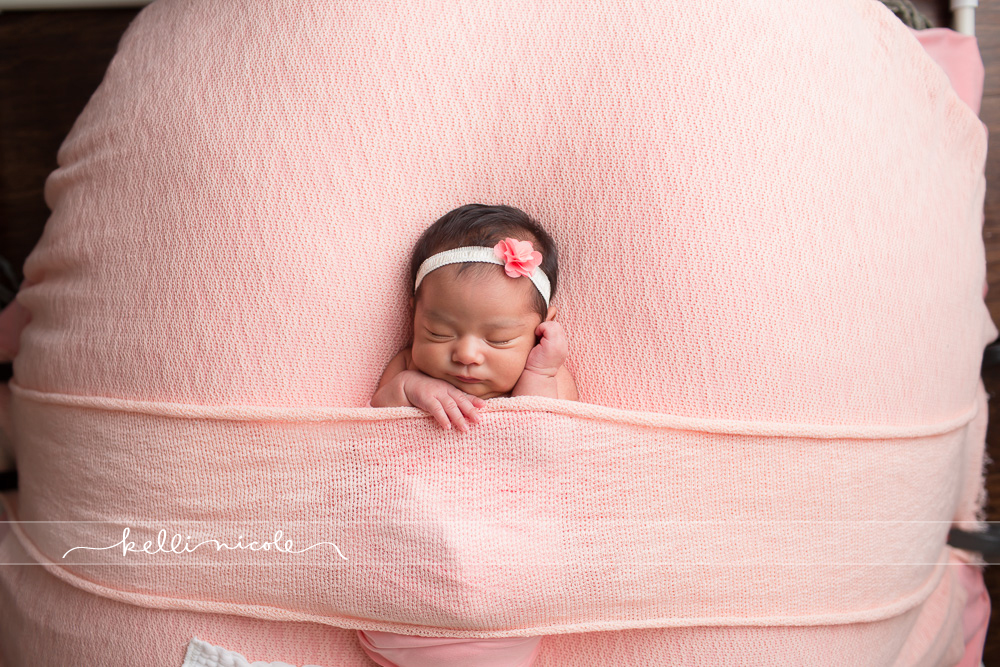
I switched lenses to get closer. 85mm 1.8 lens, ISO 200, 1/200th sec, f2.8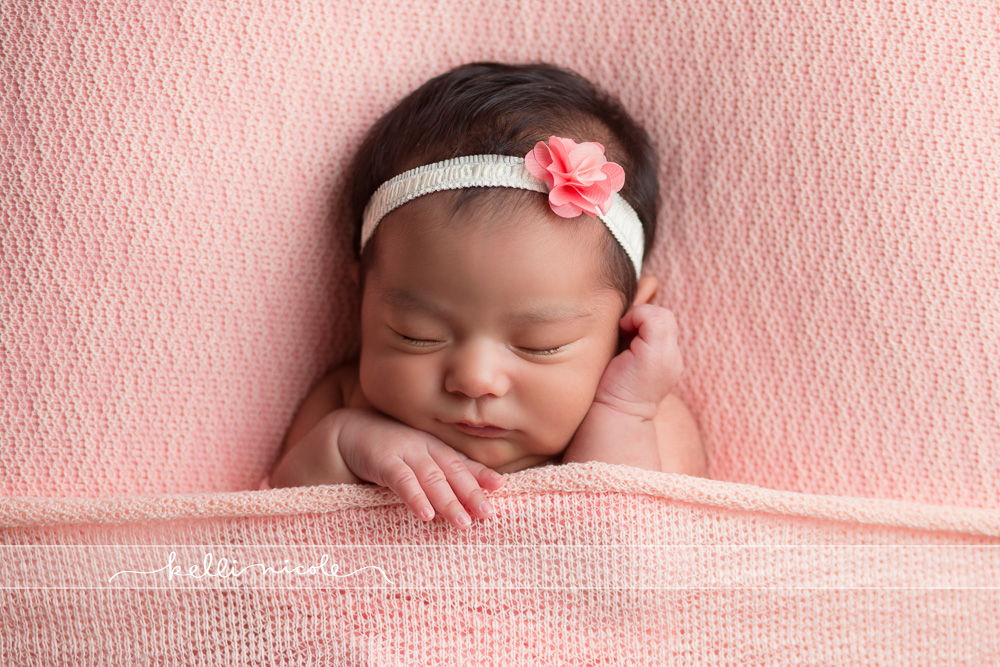
Get more out of a pose by changing angles. I love shooting from this angle as well! Same settings as above.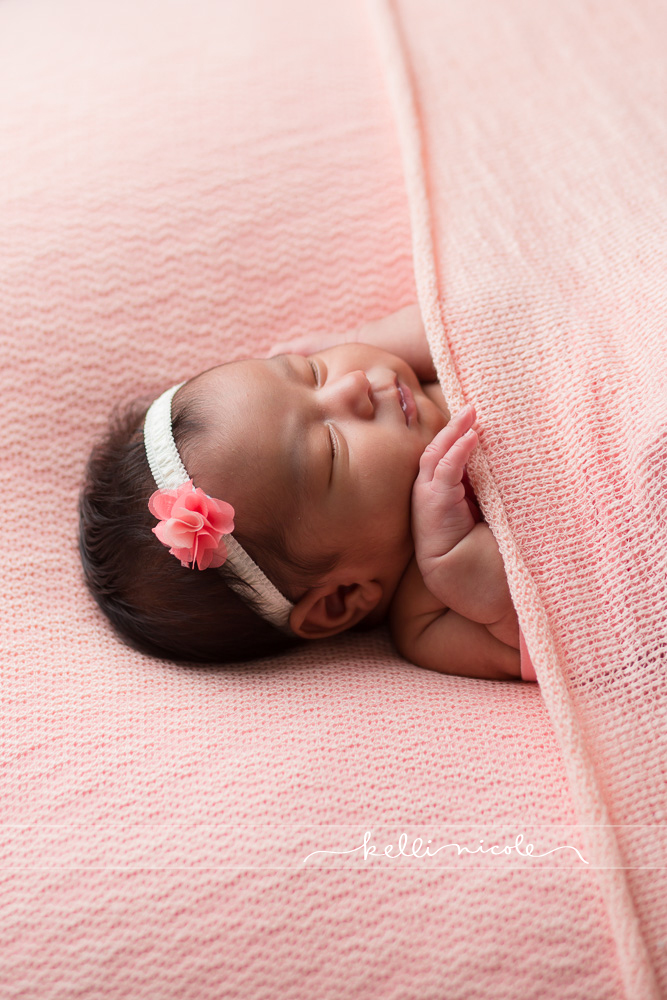
Once again, take note of where the light is in relation to the baby. You want the light to come from the top of the baby’s head and not the feet.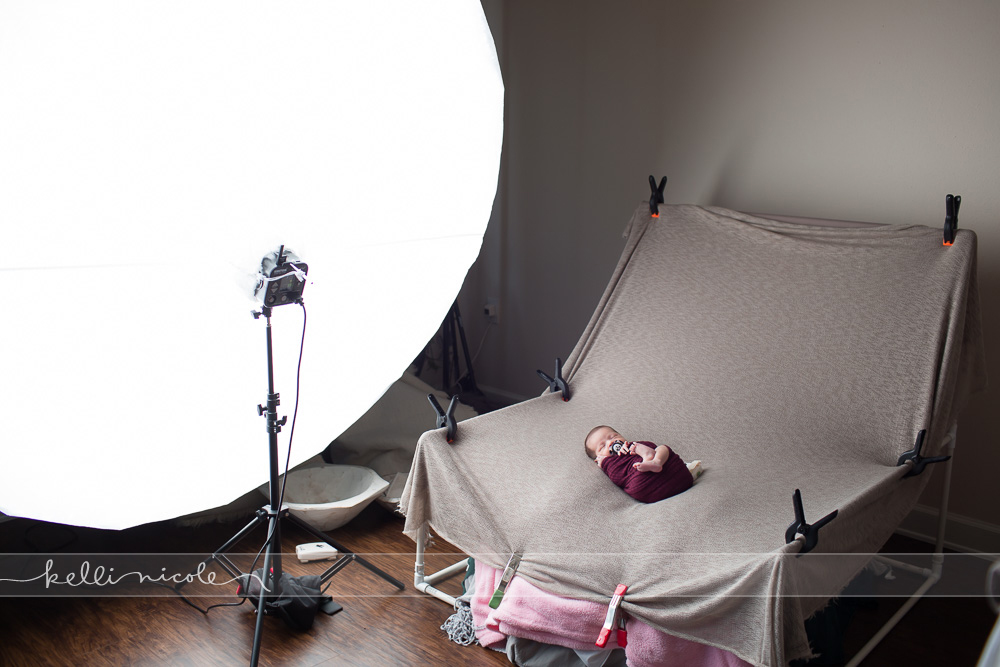
This is the correct way to light the baby. 135mm 2.0 lens, ISO 160, 1/200th sec, f2.8 (same for all the shots in the same setup).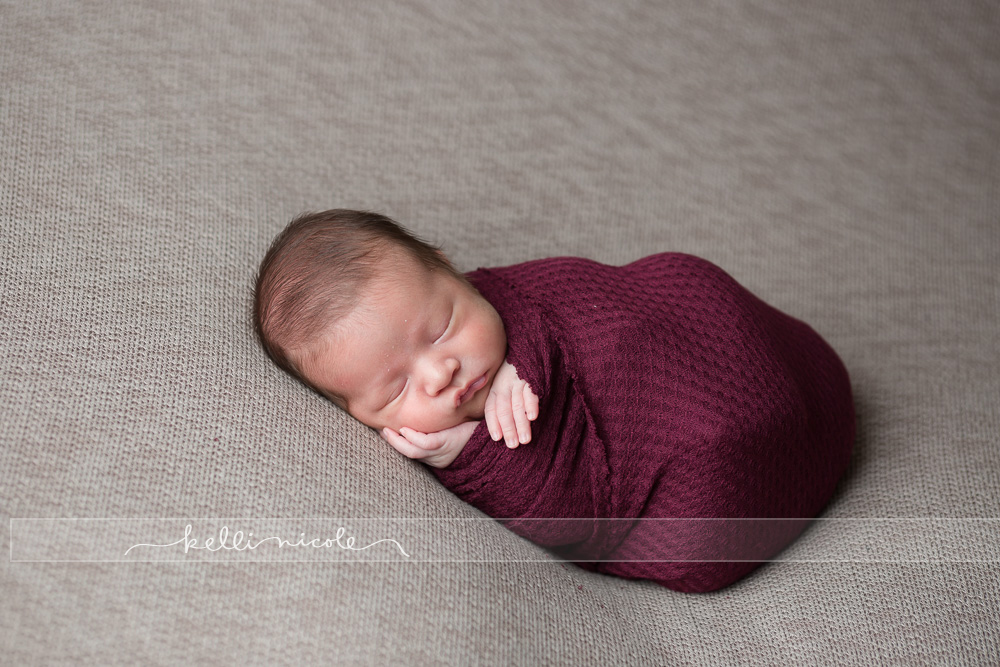
In this picture I turned the baby the opposite direction so the light is coming from his feet. Notice the weird shadows above his nose an don his cheeks. You don’t want that.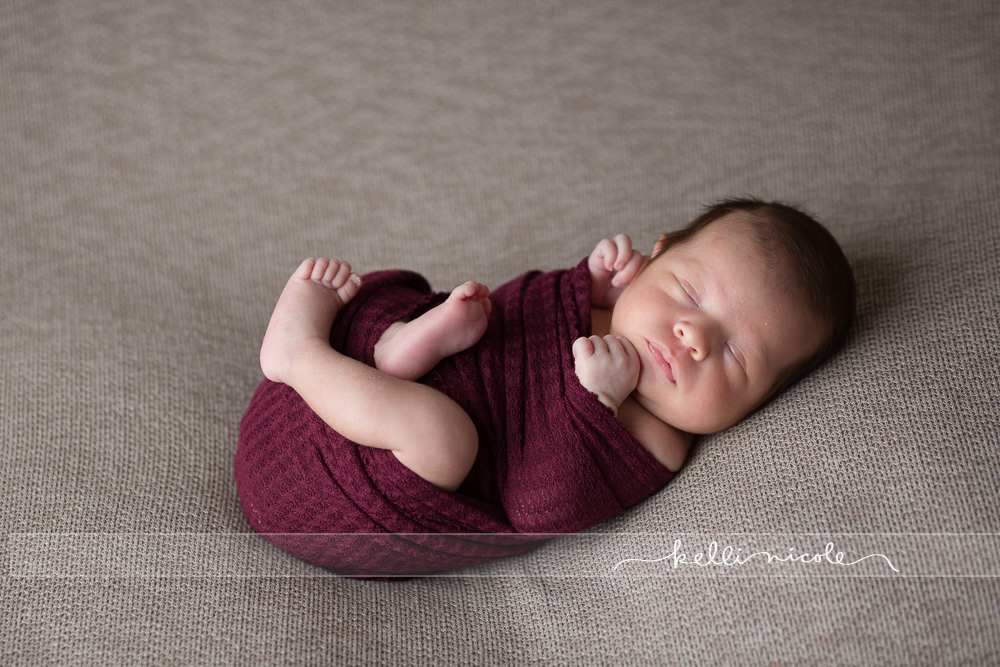
Another thing to pay attention to is angles. You generally don’t want to look up baby’s nose. This picture is still cute and isn’t the best example, but you can see the difference for yourself between the two images.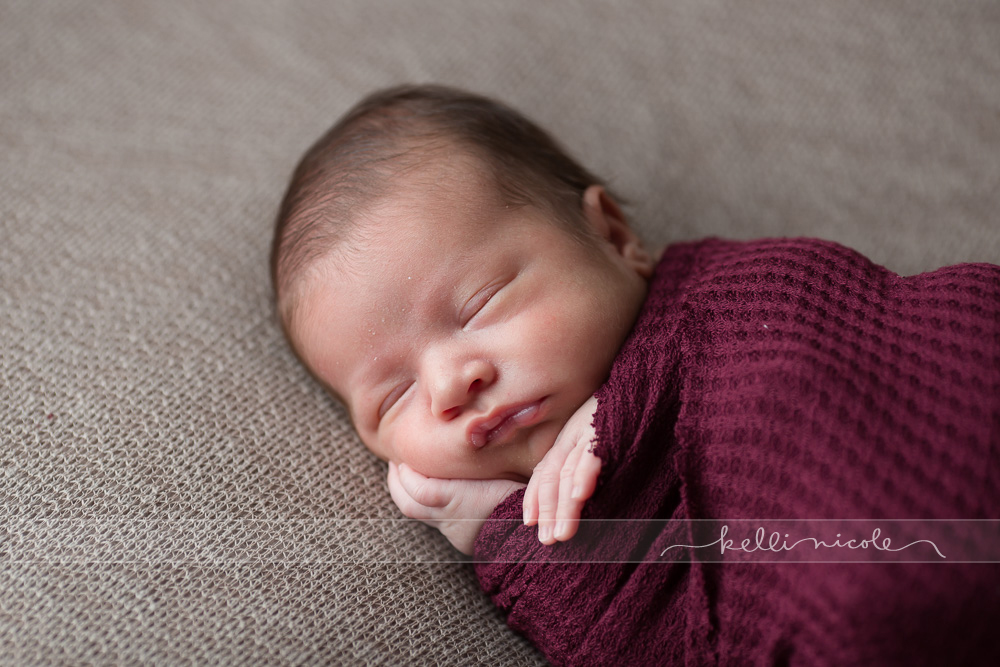
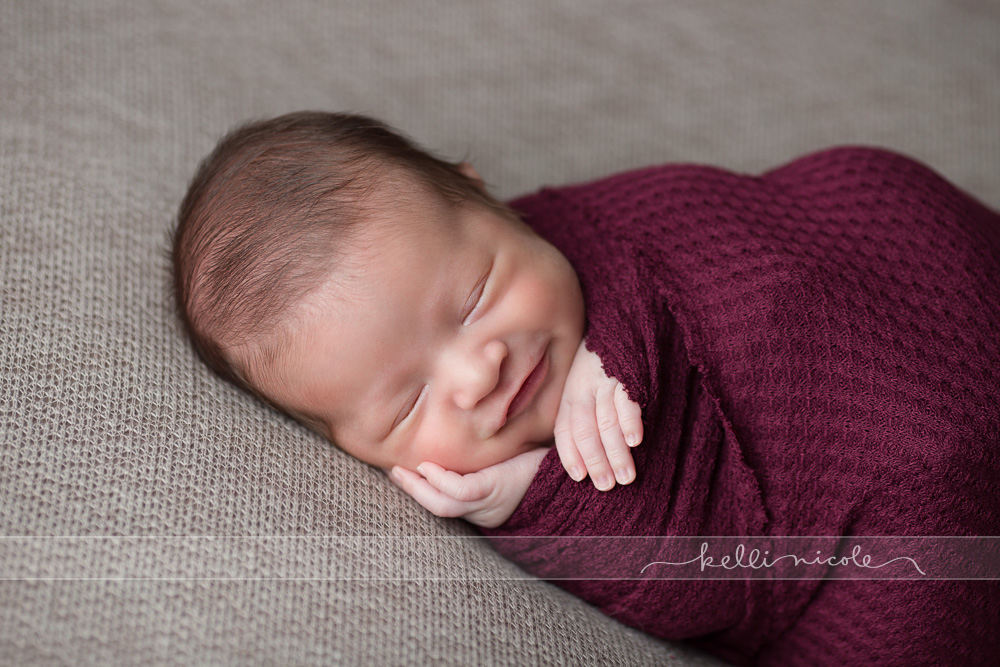 Here’s one last beanbag shot.
85mm lens, ISO 160, 1/200th sec, f 2.8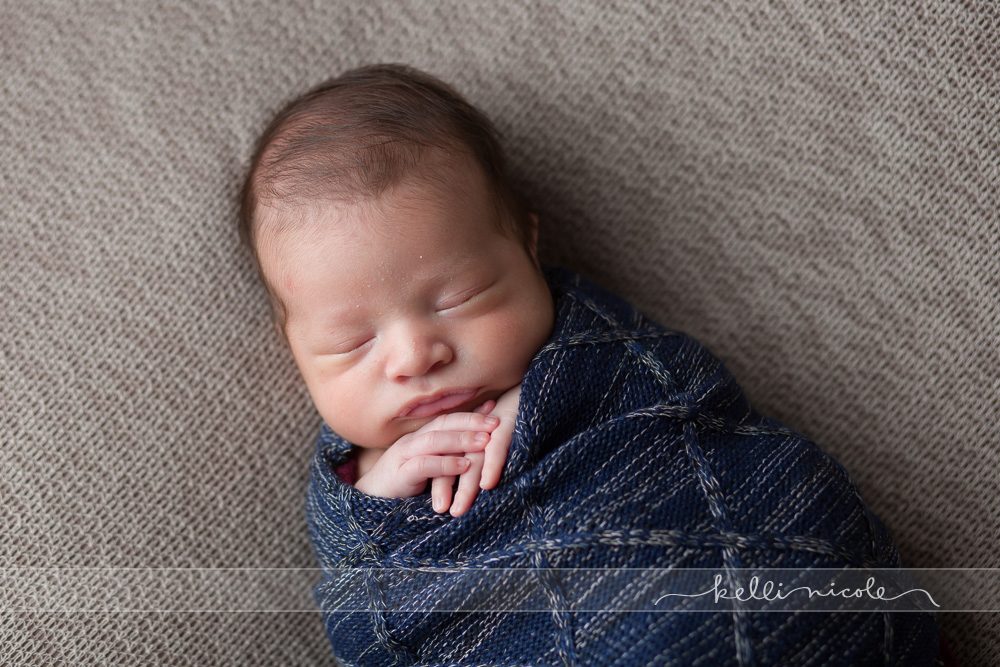
Floor Props
I love prop shots! I have way too many props, haha, but it’s a great way to add a lot of variety to a session. I usually do about 3-4 prop shots per session, depending on what the parents want and how the baby does. 
85mm 1.8 lens, ISO 200, 1/200th sec, f2.8

You can see here that the boards I use are reversible! When I want to switch I just flip them over. I just got four 8-foot boards at Home Depot and had them cut in half. I painted one side white and stained one side dark walnut. Make sure you use a stain primer if you do this yourself! I’d like to get more boards to use against the wall as well.
I usually sit behind baby to get this pose down. There’s usually a lot of patting, shushing, and pacifier use and then I’ll go to the front and fix any other little problems with baby’s hands. 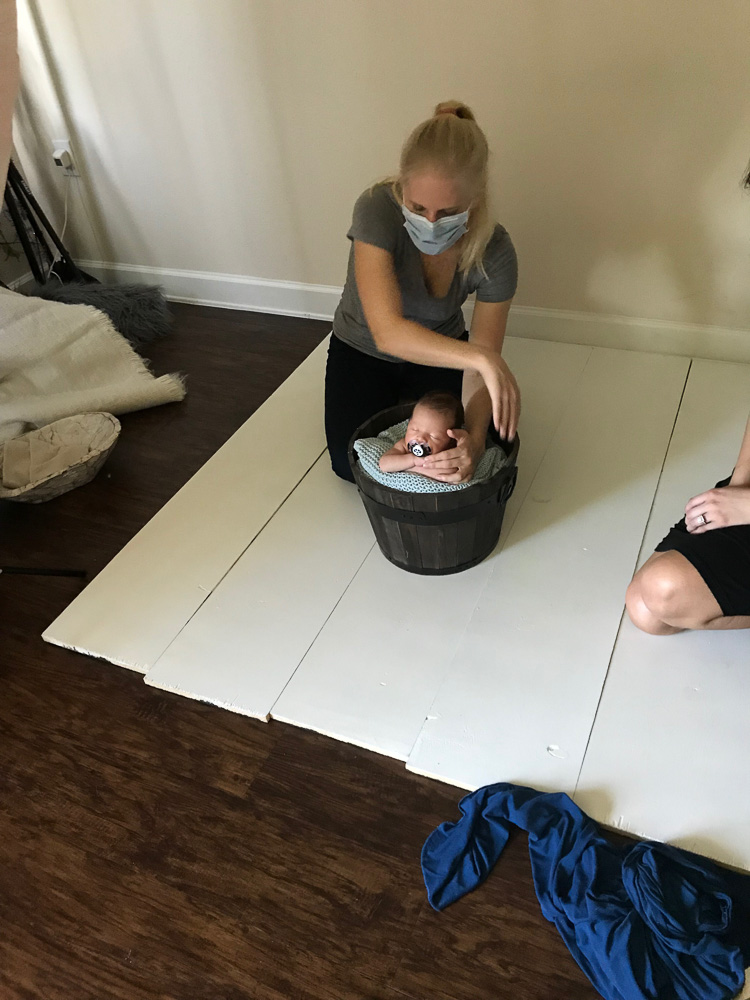
This is how the baby turned out the first time so I took a safe shot (just in case baby freaked out and we couldn’t get anymore pictures) and then tried again.

Perfect! I like the chin right on top of the wrist/hands.
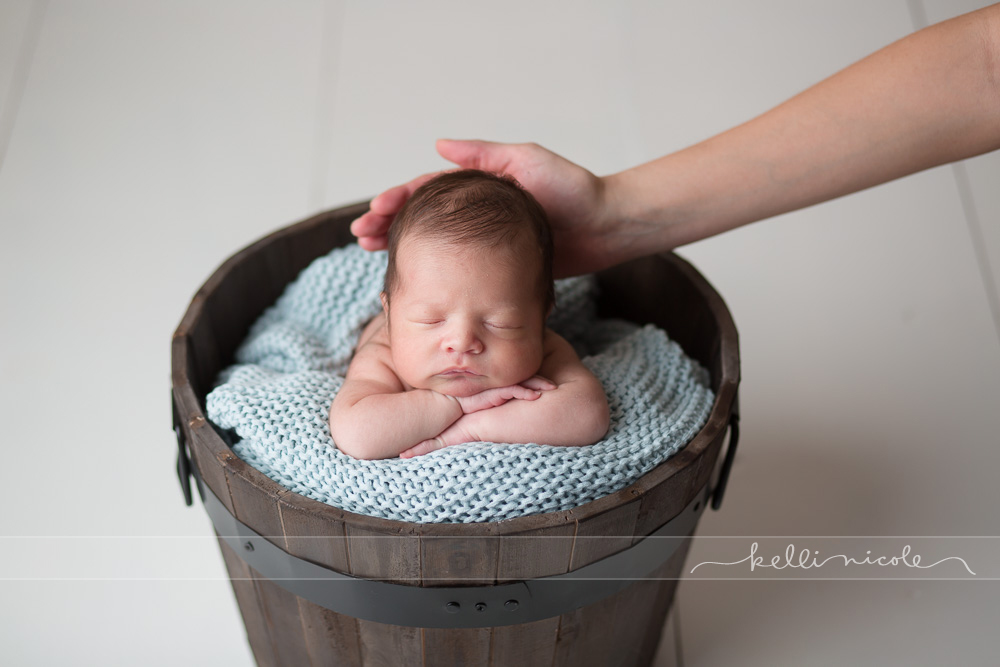
Mom pulled her hand away, but hovered right outside the frame just in case baby decided to move :).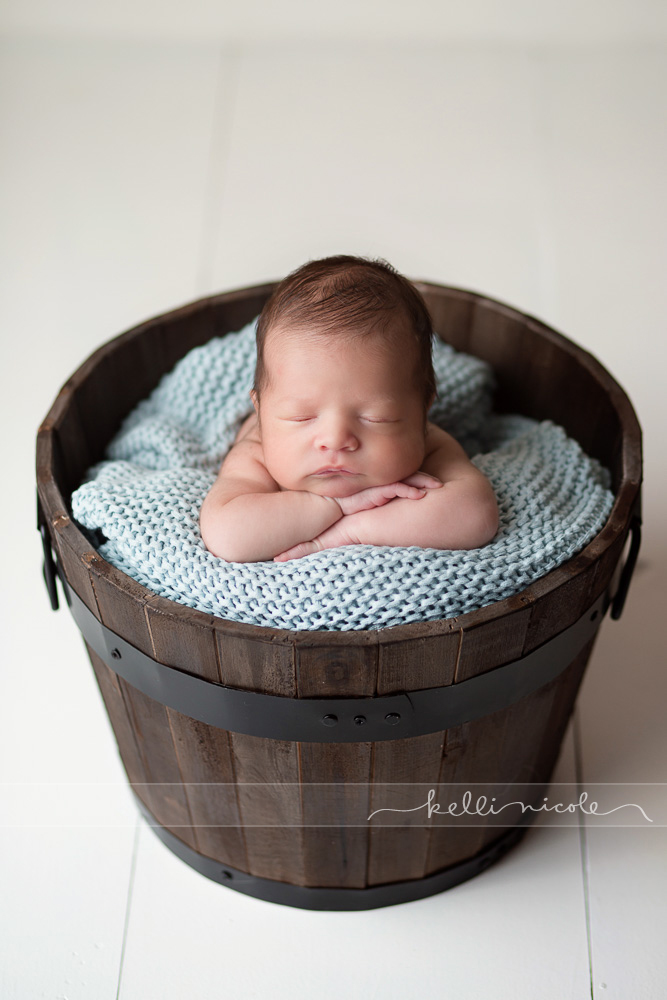
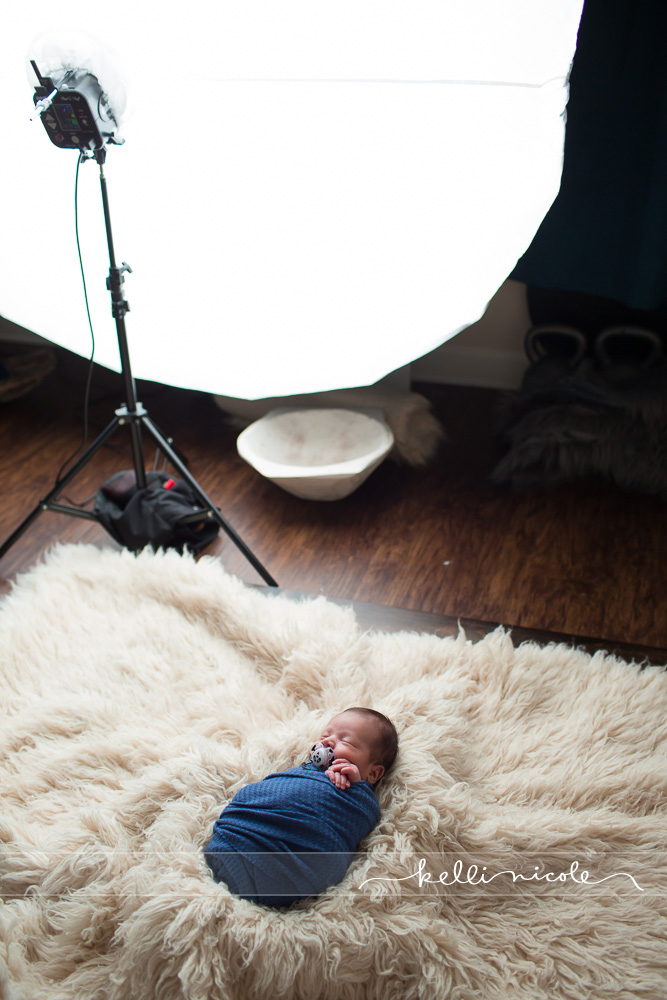
For this next shot I used a flokati as a background and I like to use a bowl like this underneath to keep the baby in place. You can also put padding around the outside of the bowl, like towels or blankets to keep the flokati on the same level.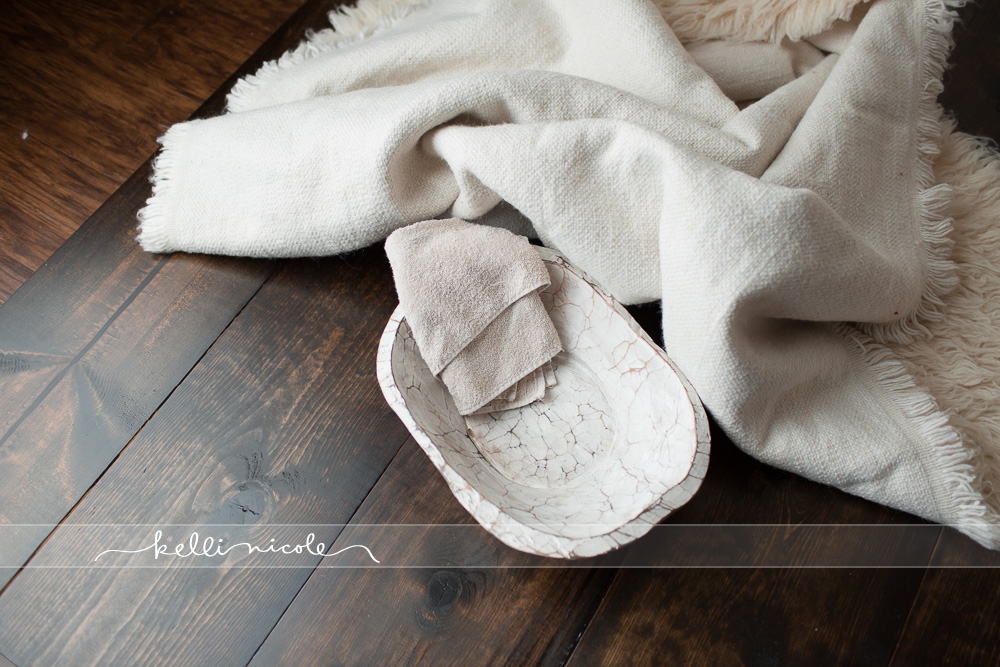
Baby took a little bit of soothing!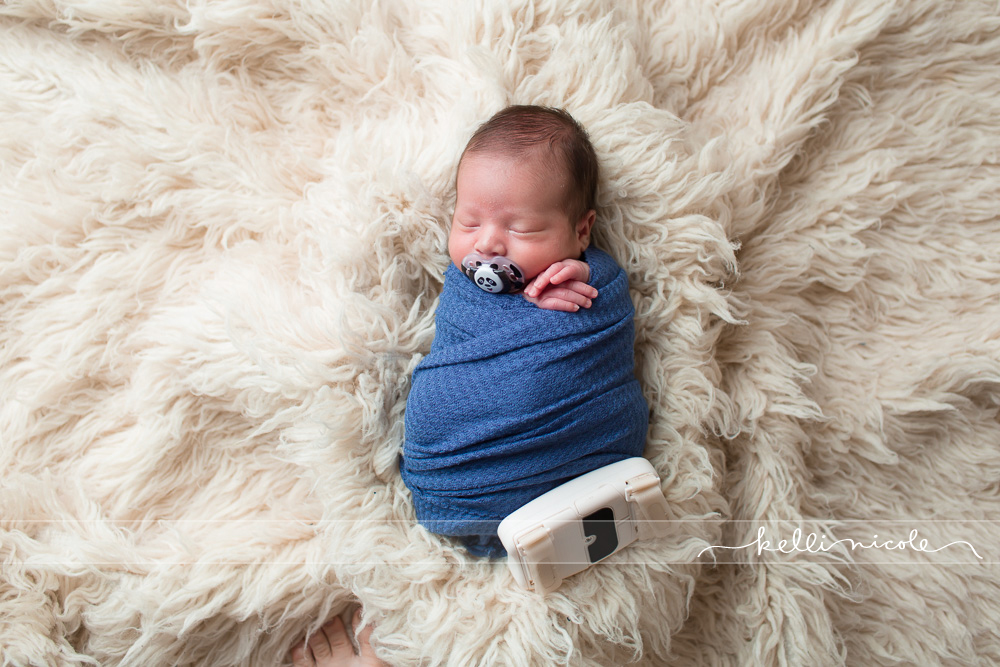
Here you can see the placement of the baby in relation to the light.
And the final image! 35mm 1.4, ISO 160, 1/200th sec, f2.8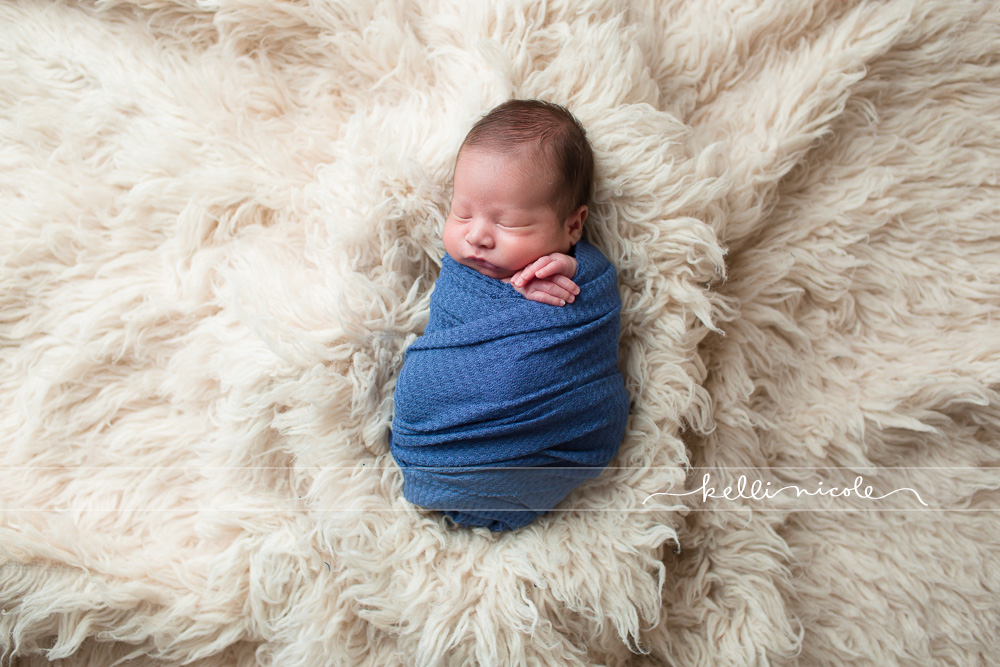
These two shots are also on the floor and baby is laying in a bowl, but it’s the white bowl in the images below.

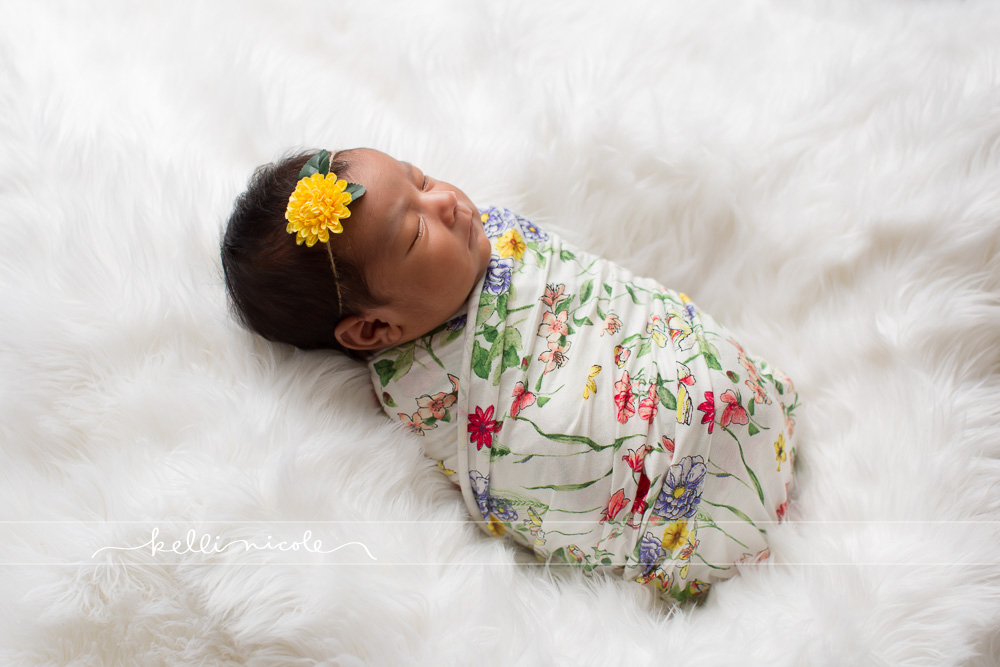
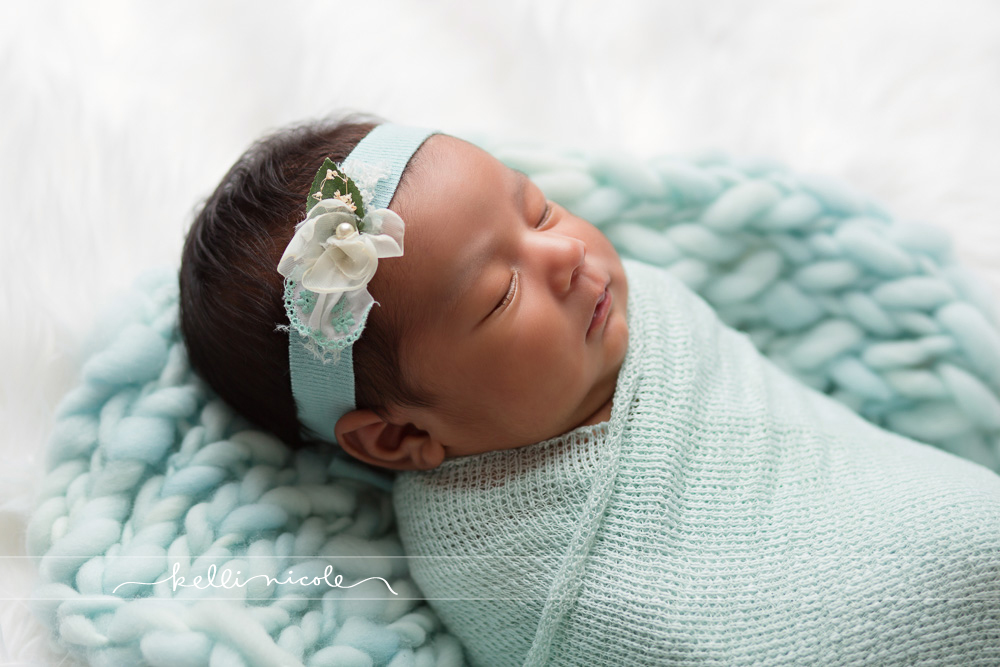
Take not of the position of the light in this image. You want the light to come from the top/side of the baby’s head like this.
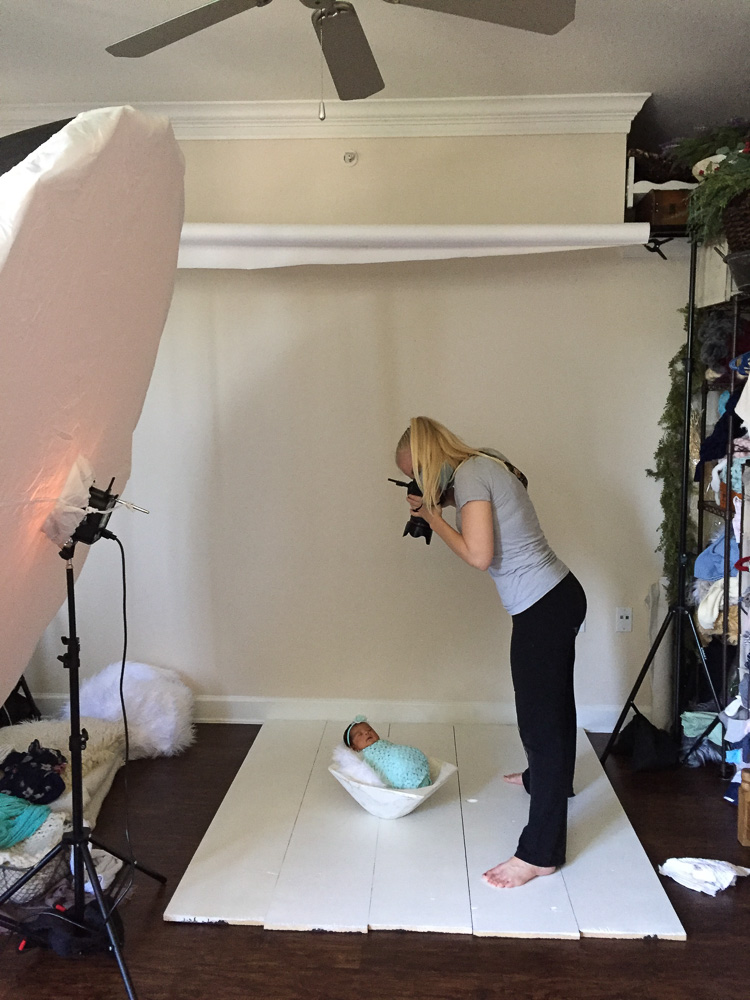
And it will create beautiful images like this!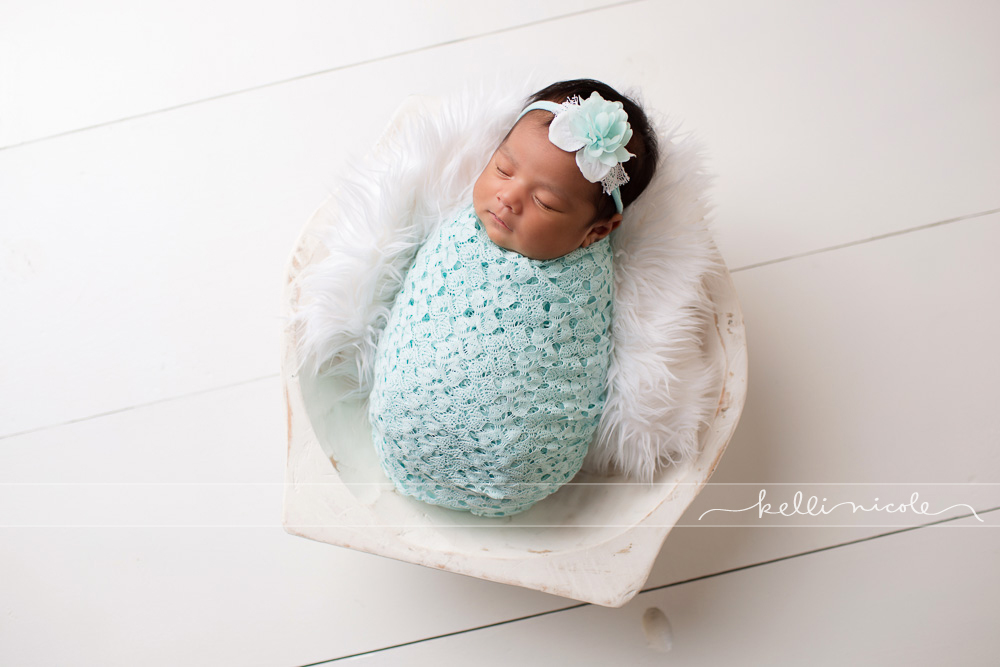
This is the wrong way to light a baby. 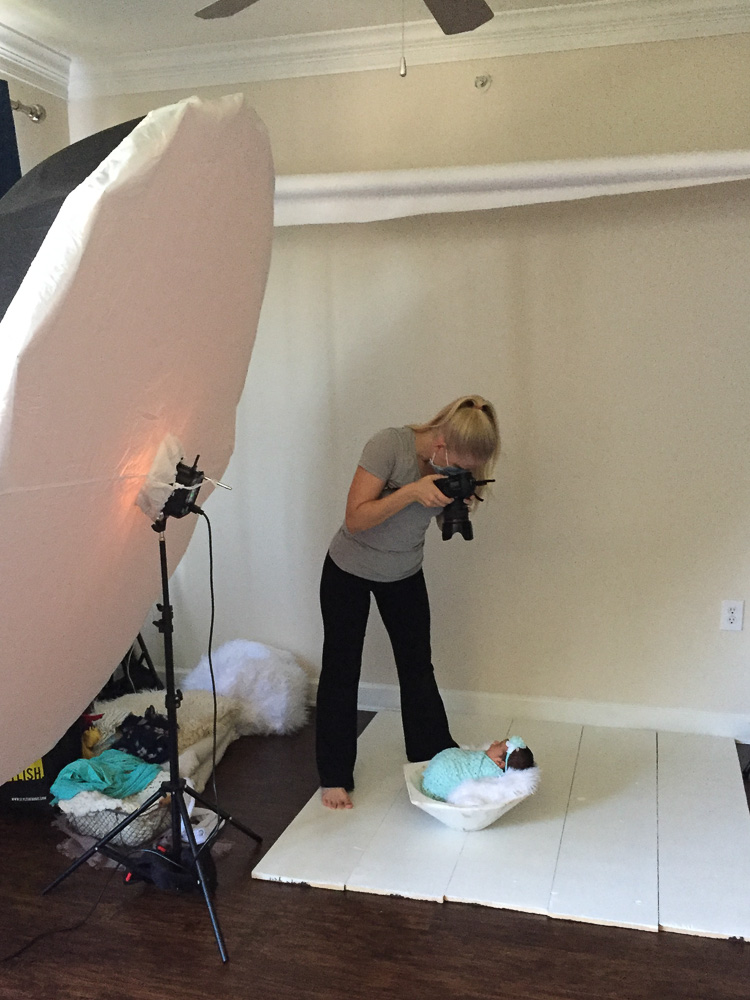
You can see the shadows above the nose. The lighting is not as pretty in my opinion.
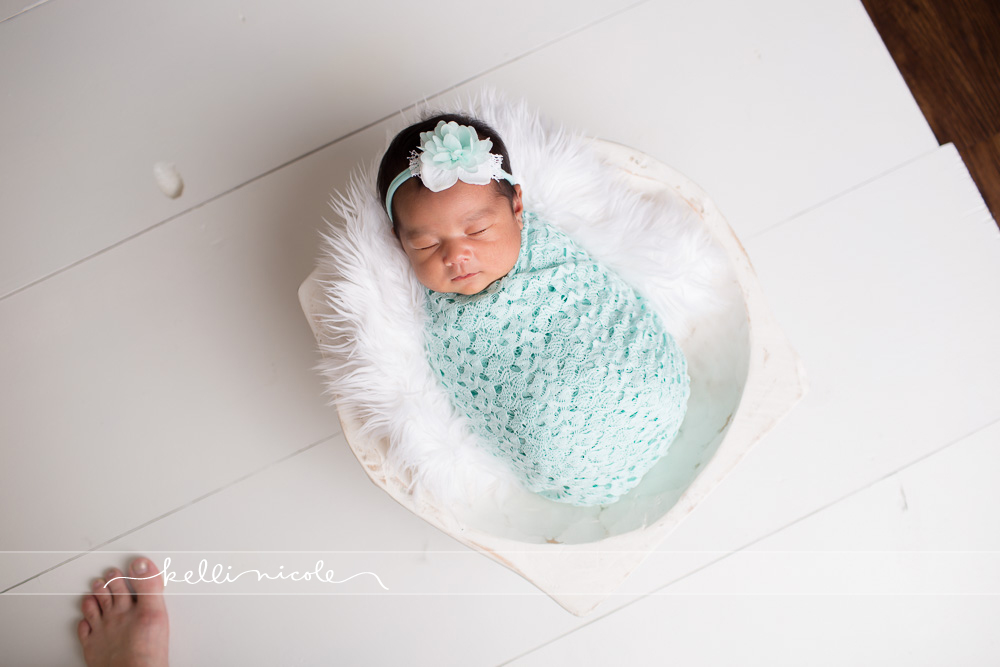
One last example of bad lighting…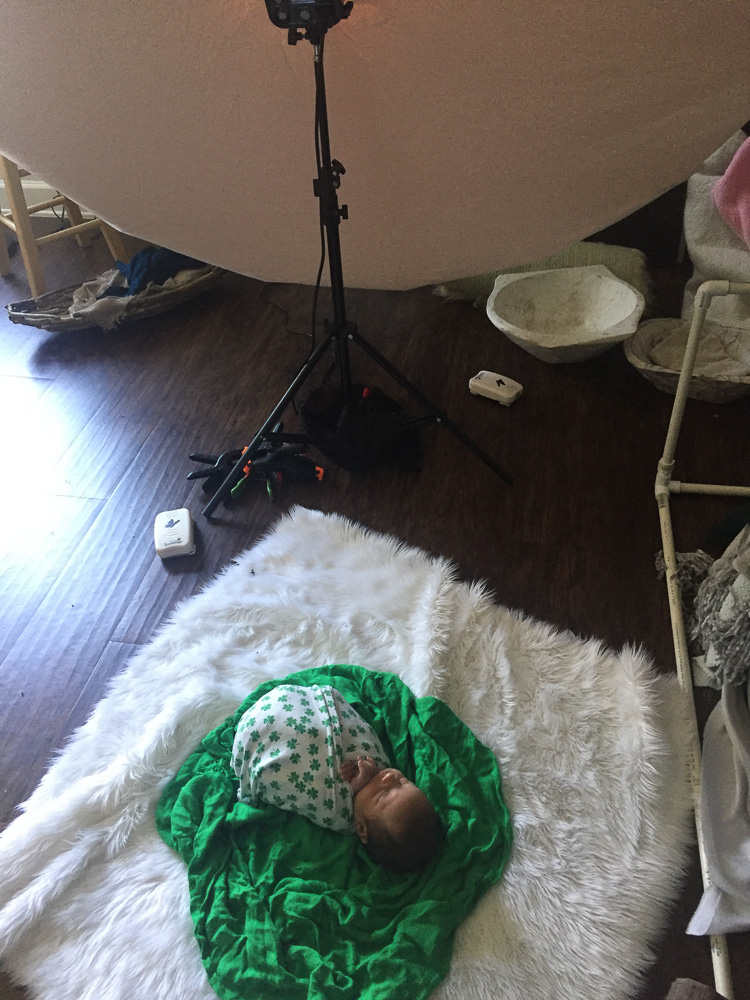
As well as bad hand positioning. The baby’s left hand looks awkward and is covering his face too much. You want to try and get the hands under the chin and/or beside the face. 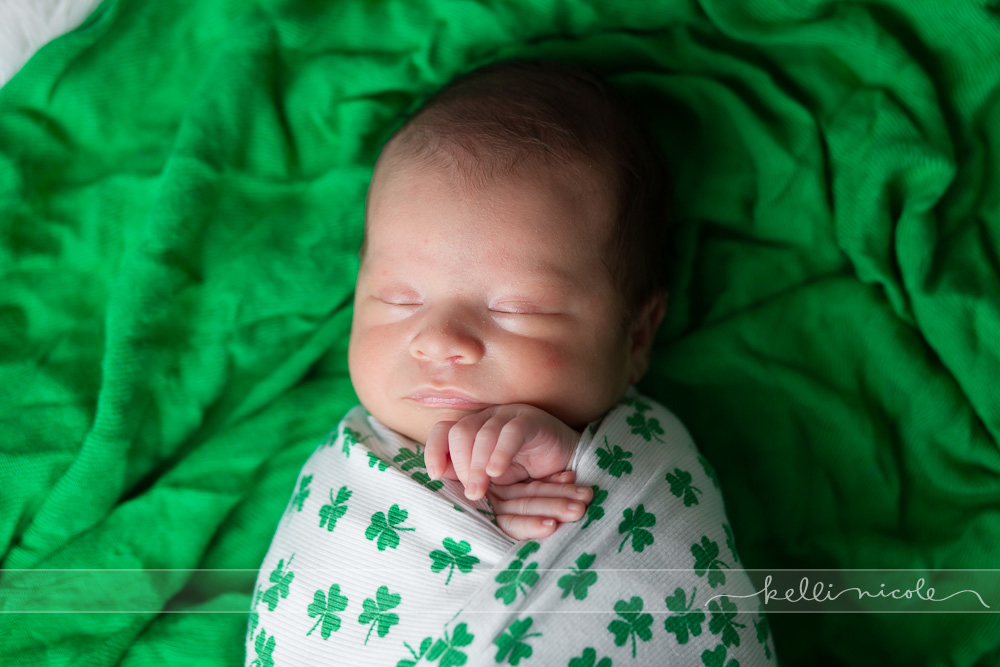
This is a better way to position the baby.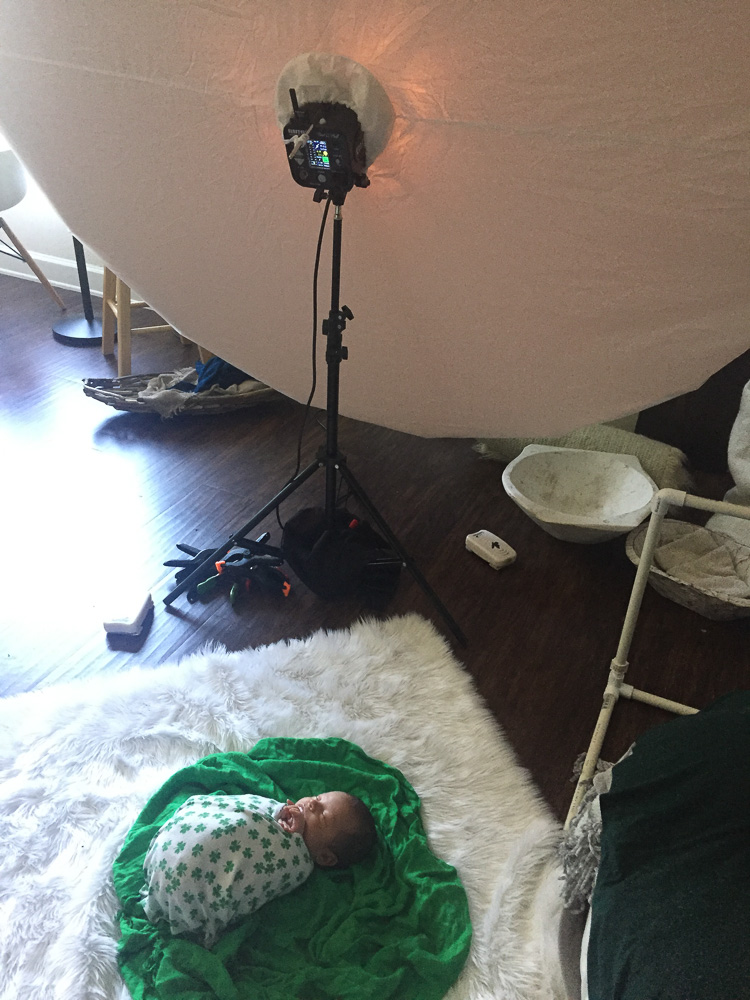
This is better lighting, but now we’re looking up the baby’s nose, so it’s not a great angle. 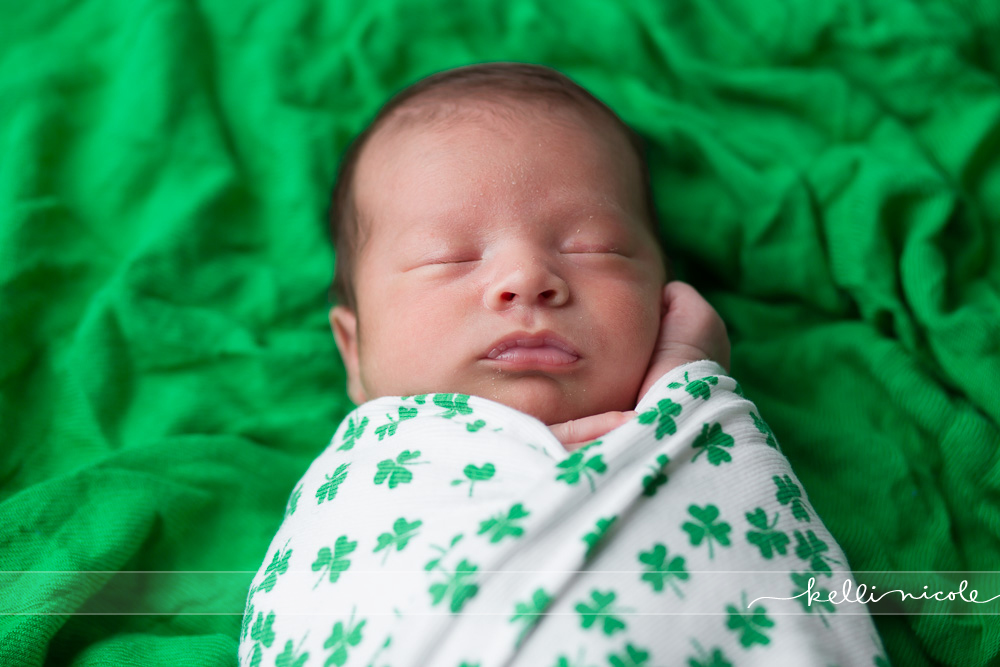
This is a much better angle!
Let me know if you have any questions and I’ll do my best to answer them! Happy posing!
