Newborn Photography Tutorial – Studio Light

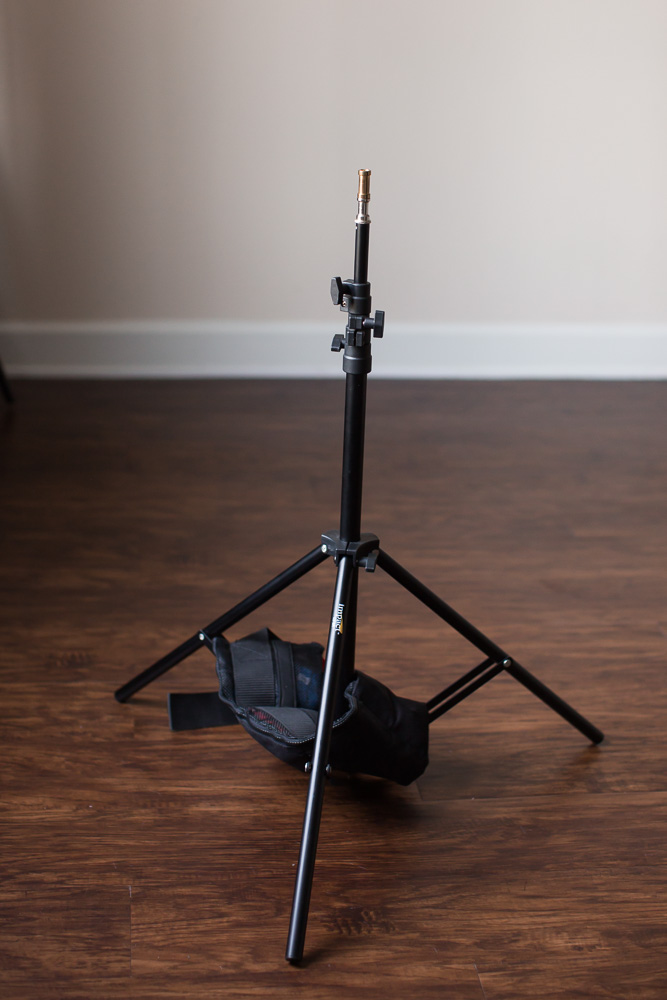
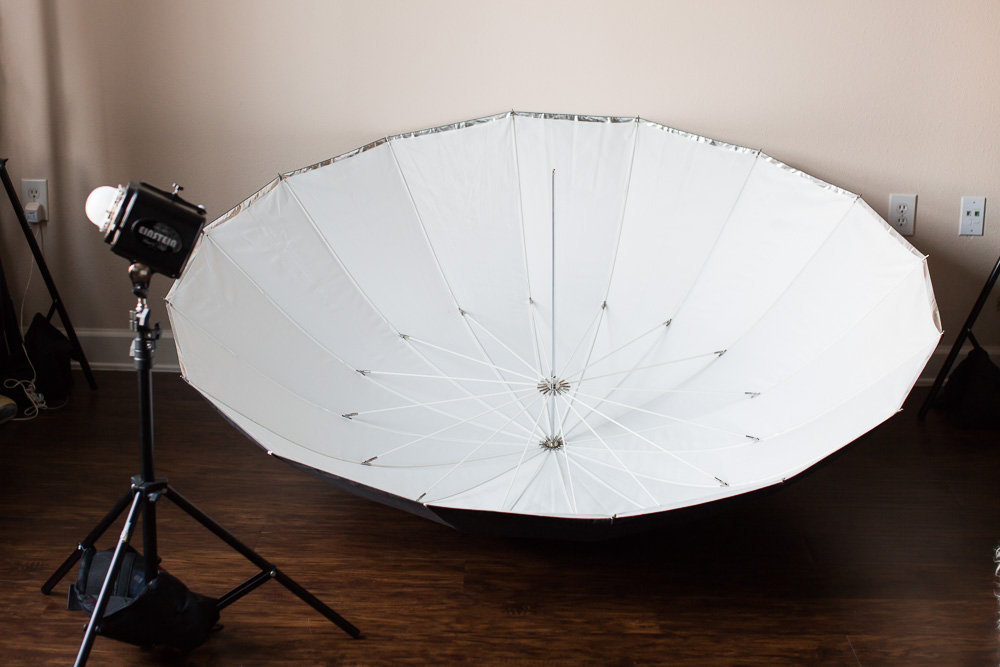
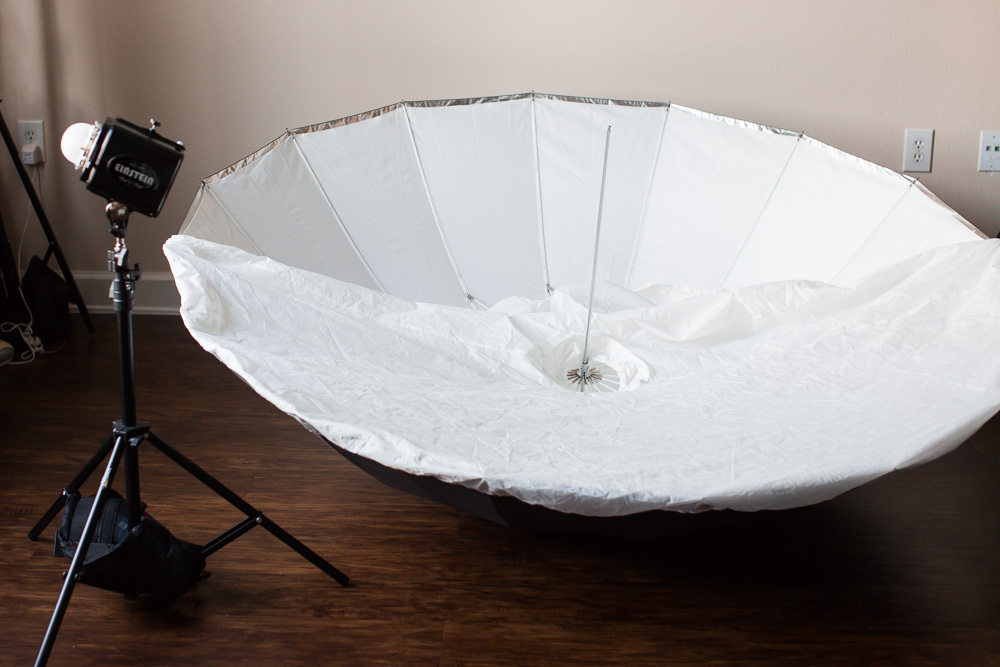
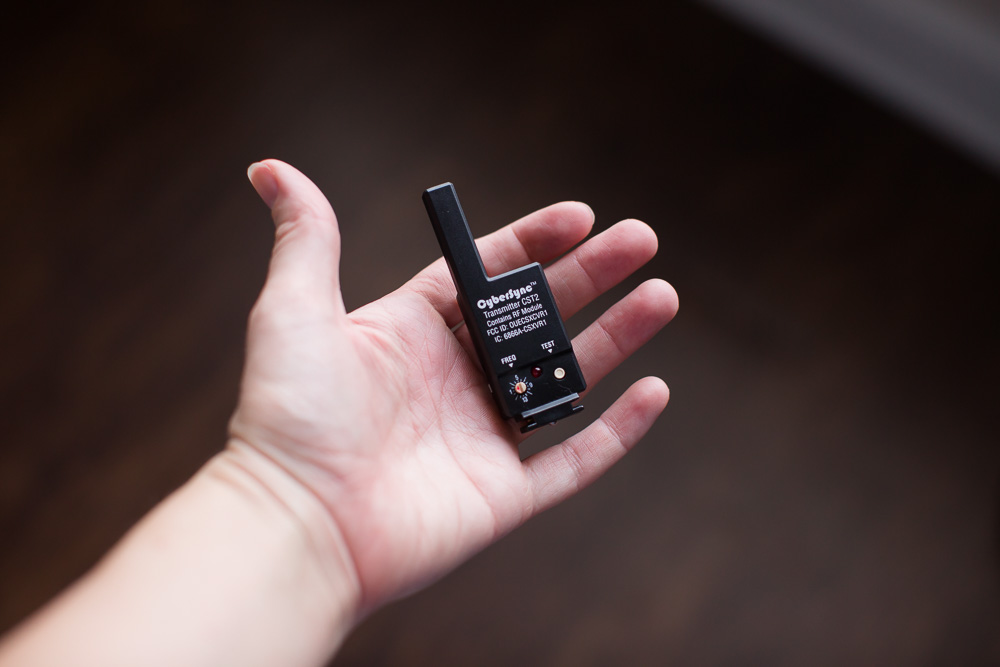
Years ago I did a tutorial for natural light newborn photography, but I use studio light now so I thought I’d make a tutorial for that as well! If you’d like to see my first tutorial you can see that here. Also, so that this post wouldn’t be too overwhelming, I have a separate post on the studio lighting I use and how to set it up. You can see that post here!

If you’re interested in knowing where I got certain props or blankets just ask! Some came from destash groups or antique sales. 

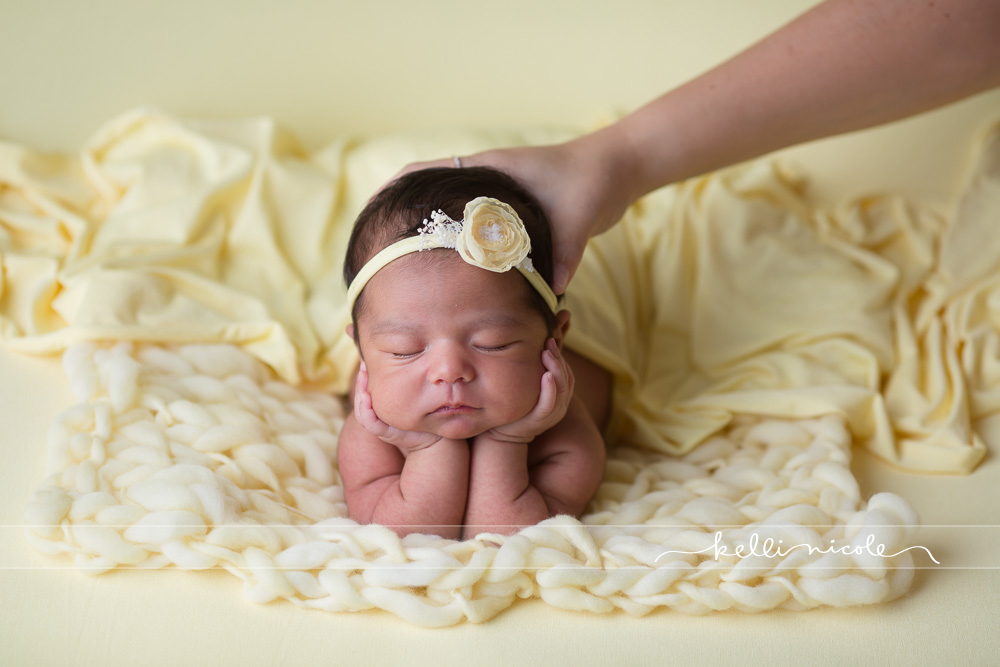
*Disclaimer: I am not the best newborn photographer out there and I am well aware of that, haha. If you have a different lighting setup and you’re happy with it, that’s great! I used to be a natural light only newborn photographer and I still use natural light at times in the homes of clients, but I am happy with my current setup. I’m sure I will adjust and adapt at the years go on, but I know that this can help someone who is starting out or unsure of just how to use studio lighting. I hope this will help anyone who looks at it! Oh, and I’ve linked many of the items I use or mention below. I don’t get any kickbacks from any of the companies, I’m just doing it so you know what I’m talking about. 

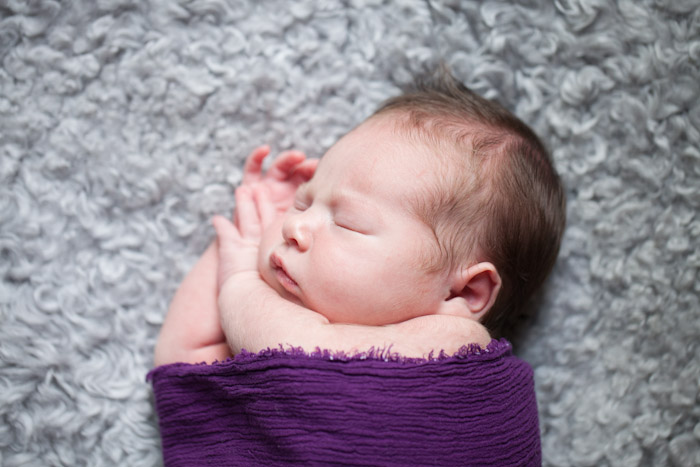
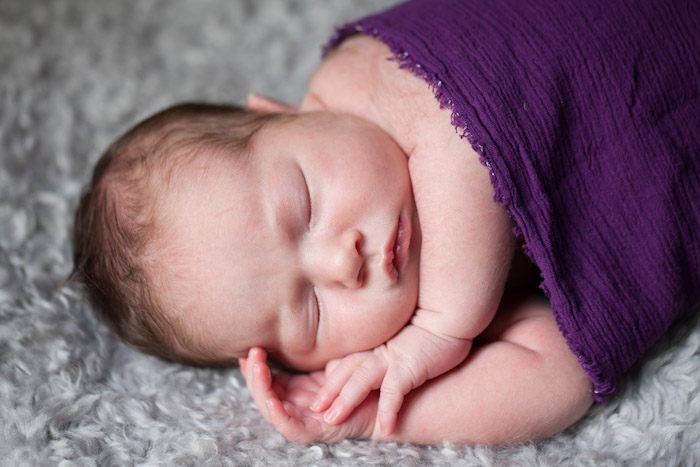
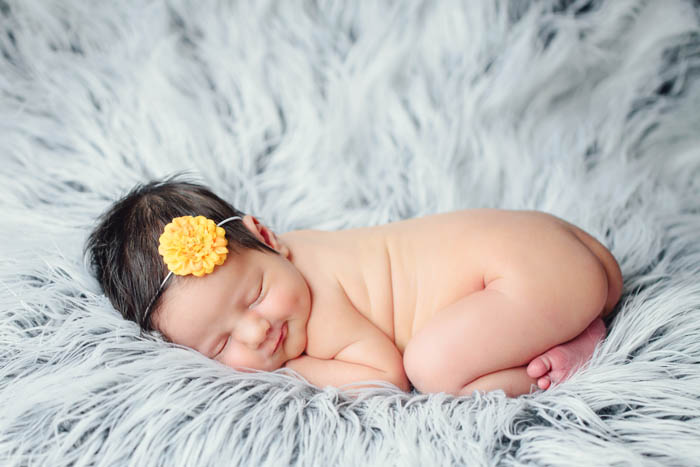
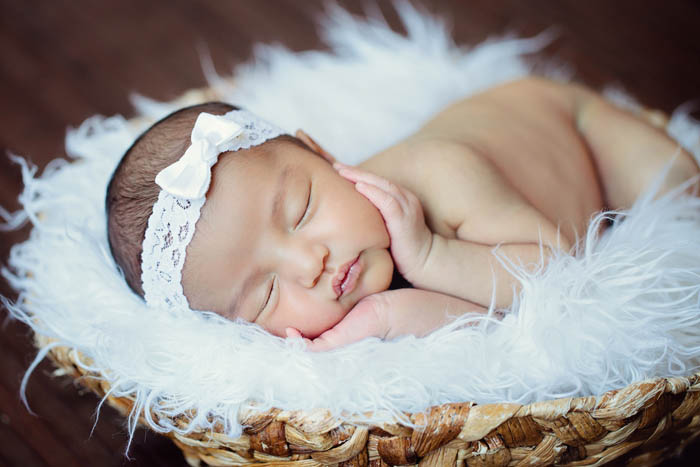
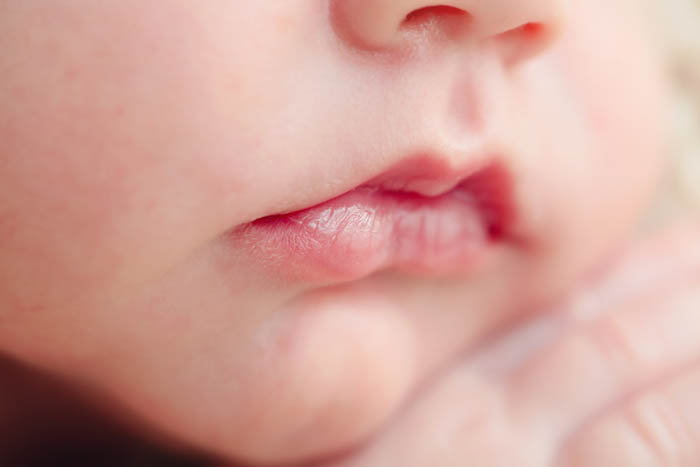
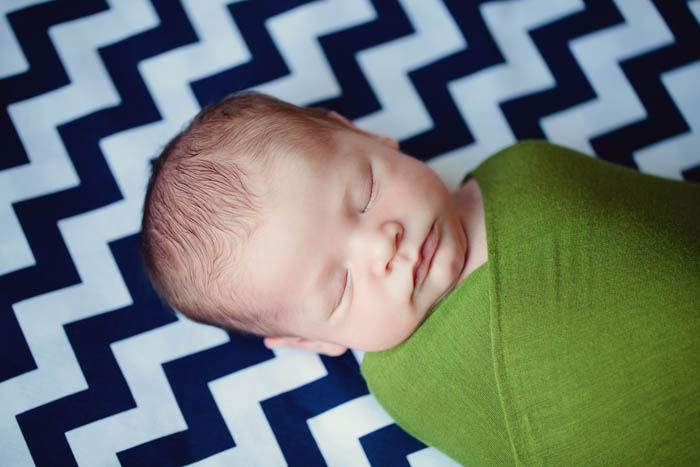
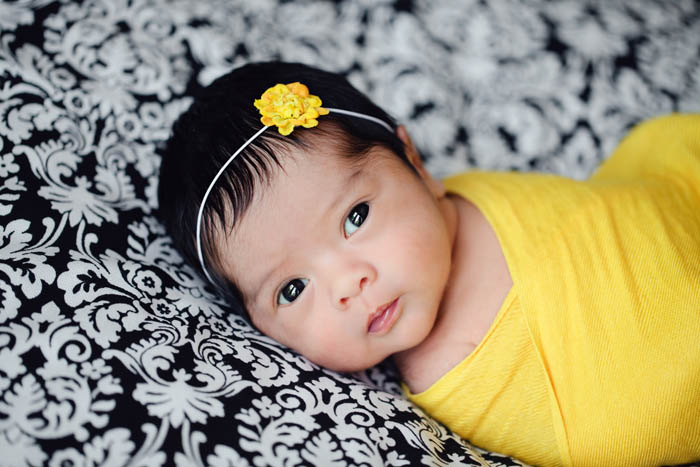
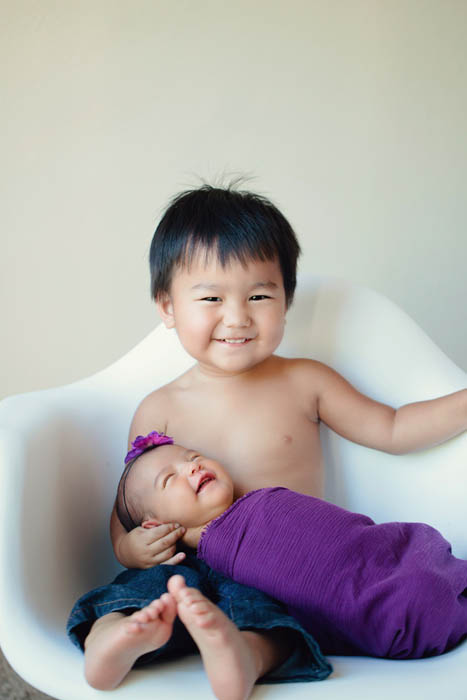
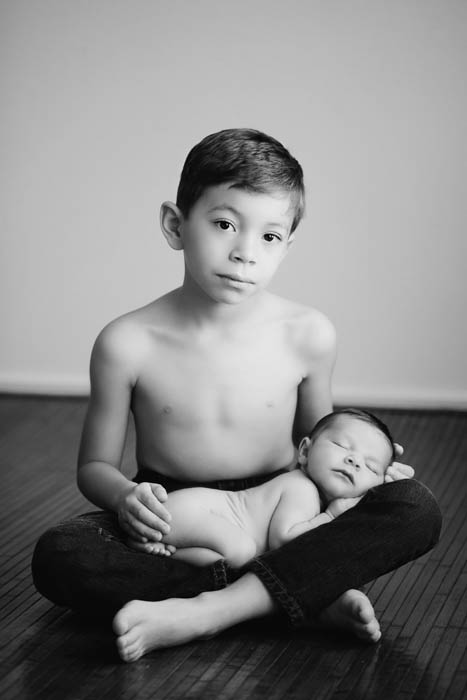
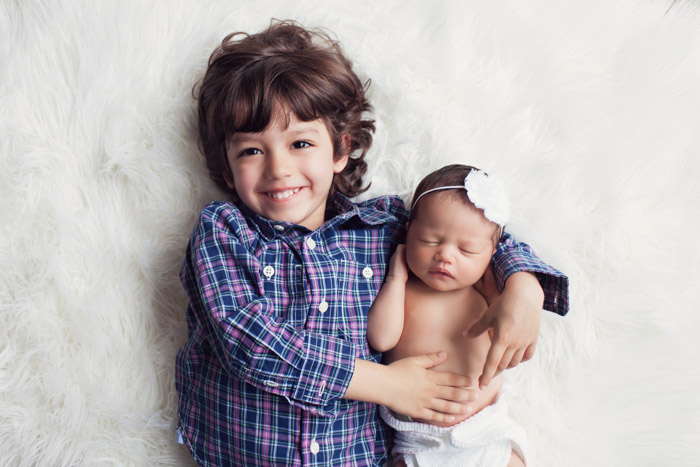
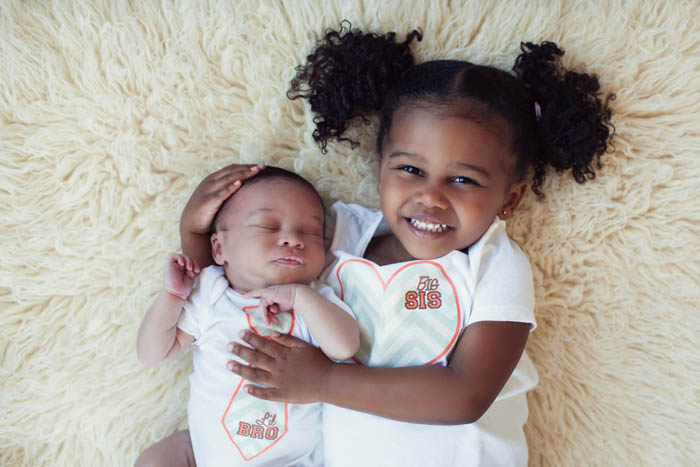
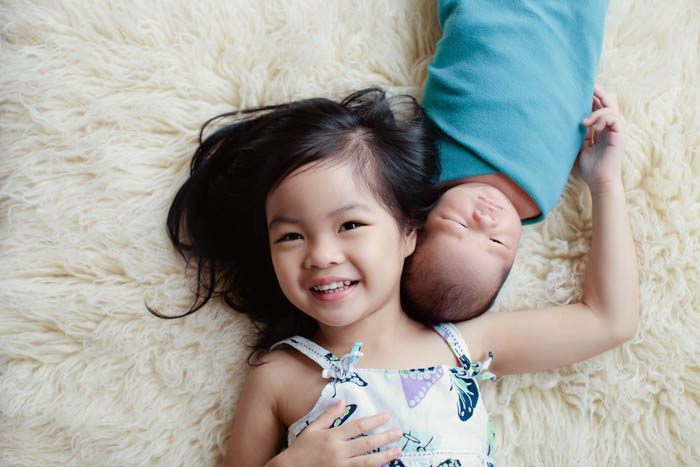
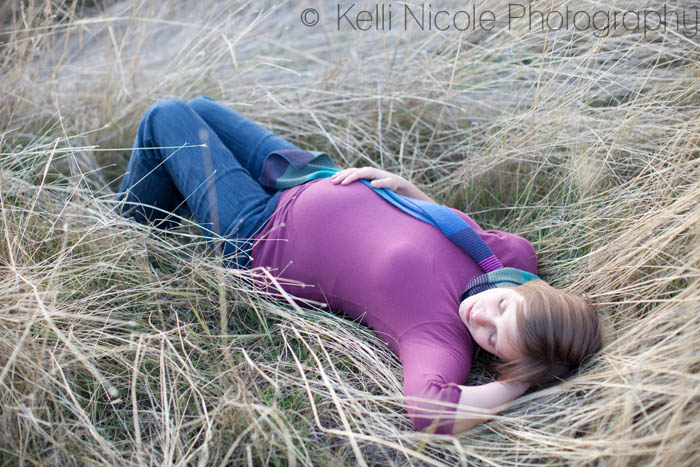
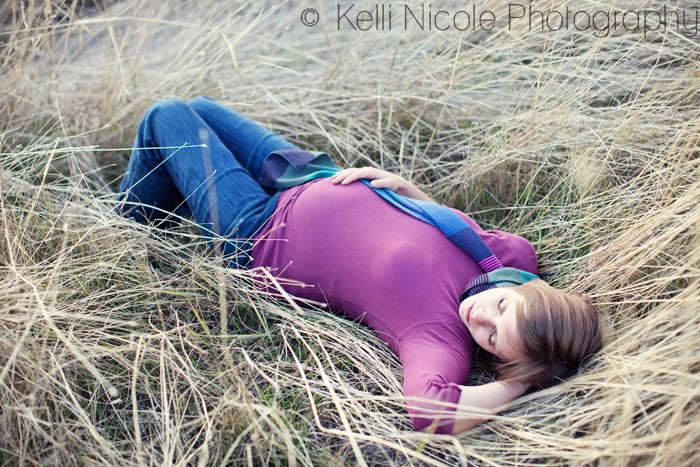
Every newborn will be different, but the usual sweet spot in newborn photography is 7-14 days.  I don’t recommend photographing a baby that is exclusively nursing (not taking a bottle at all) before about 7-9 days or before the mother’s milk fully comes in and they have a well established nursing relationship. Breastfeeding is often a stressful part of new motherhood and the mother and baby will be better off if you wait a few days to make sure things are going well and the baby can go at least 2 hours between feedings. In the first days many newborns will cluster feed while they try to get the milk to come in and that can make a newborn session difficult. Tongue ties have become more common and sometimes need to be taken care of before a newborn session if the baby is nursing. Right around the 2-3 week mark is when many newborns will start getting baby acne and flaky skin, which is another reason to try and get the baby in a few days sooner. That said, the little girl in this post was 2 weeks 6 days for her newborn session and one of the best newborns I’ve ever had! She had beautiful skin, though I did have several babies recently between 2-3 weeks that had very bad baby acne or peeling. The little boy in this post was one month old, but was also born a bit early. For preemies I do recommend waiting to do the session until the baby is home from the hospital (obviously) and about 6 lbs. They seem to do a little better with a little more chub on their bodies. 

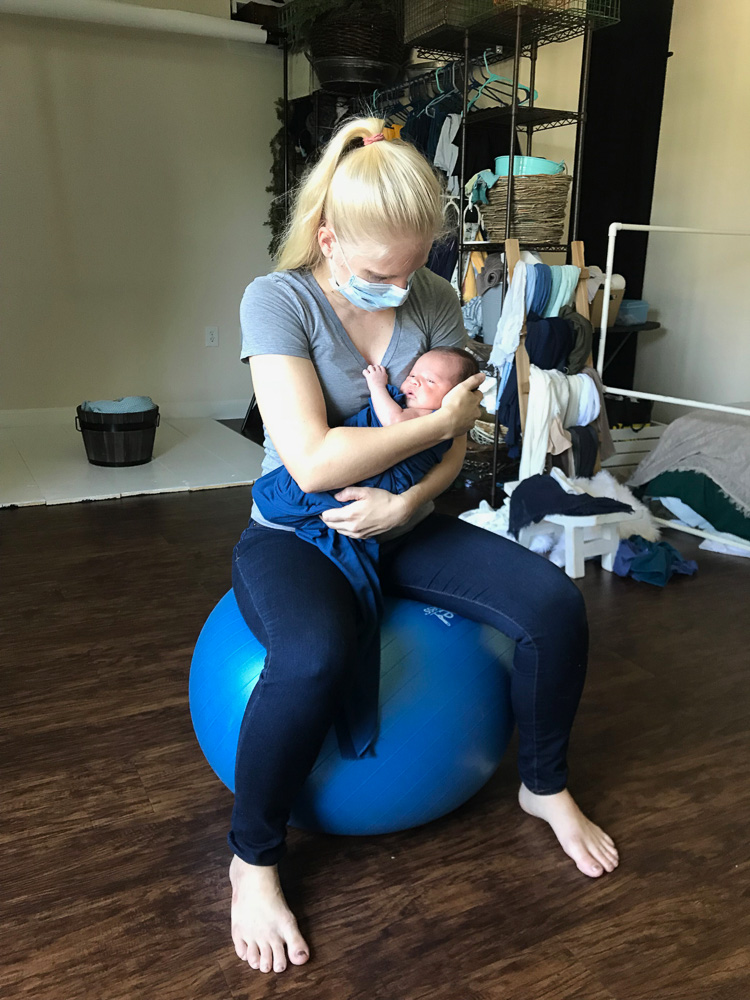
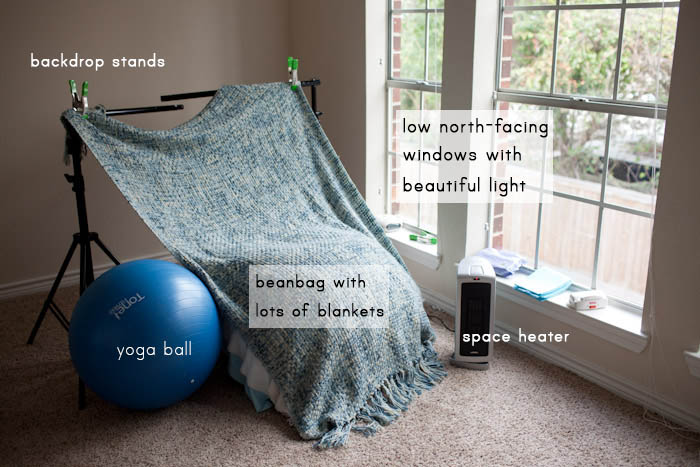
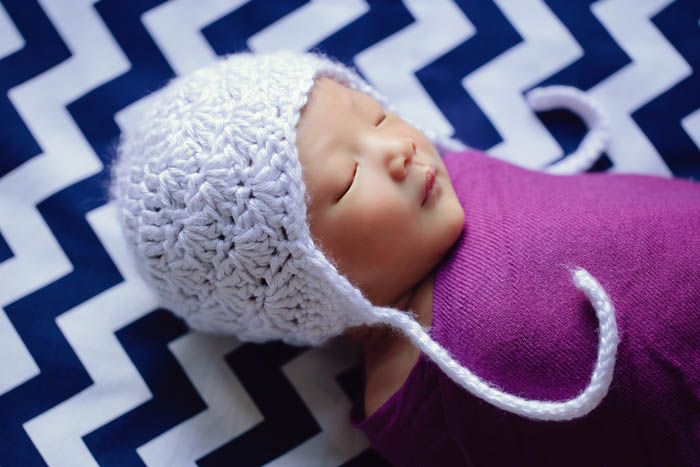
One thing I often use to calm a baby or help them to get sleep is a yoga ball! I sit on the yoga ball, hold the (typically) swaddled baby close to my chest with their head by my heart, and bounce. It mimics the motion in the womb when the mom walks around and the baby bounces in the amniotic fluid. Babies love this. I think I’ve only ever met one or two babies that didn’t seem to like it or didn’t calm down immediately. Another trick I use is to pull a soft hat over their eyes. Occasionally, this will make a baby angry (in which case I remove the hat if they don’t settle immediately once I start bouncing), but typically it helps the baby fall asleep. I remove the hat after they’re posed in the prop. 

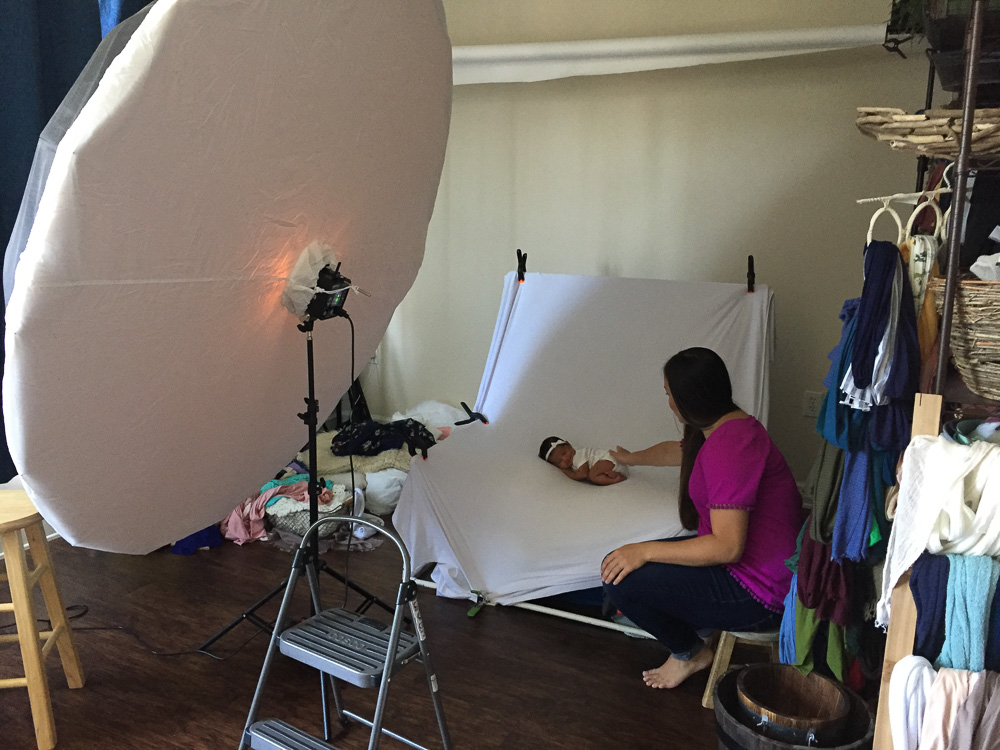
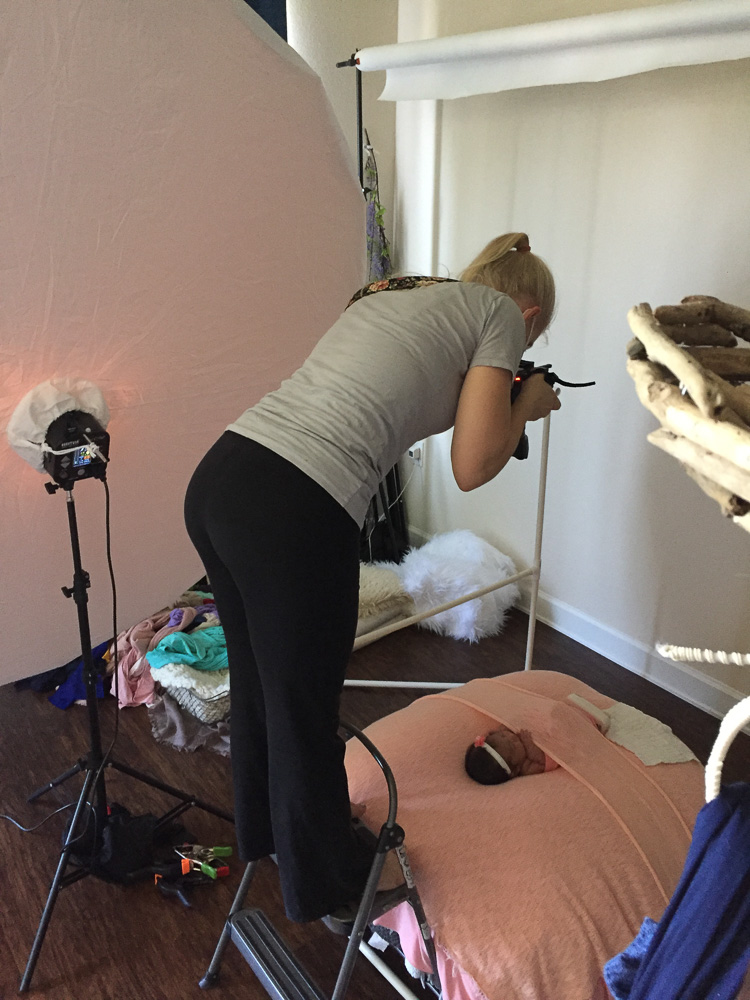
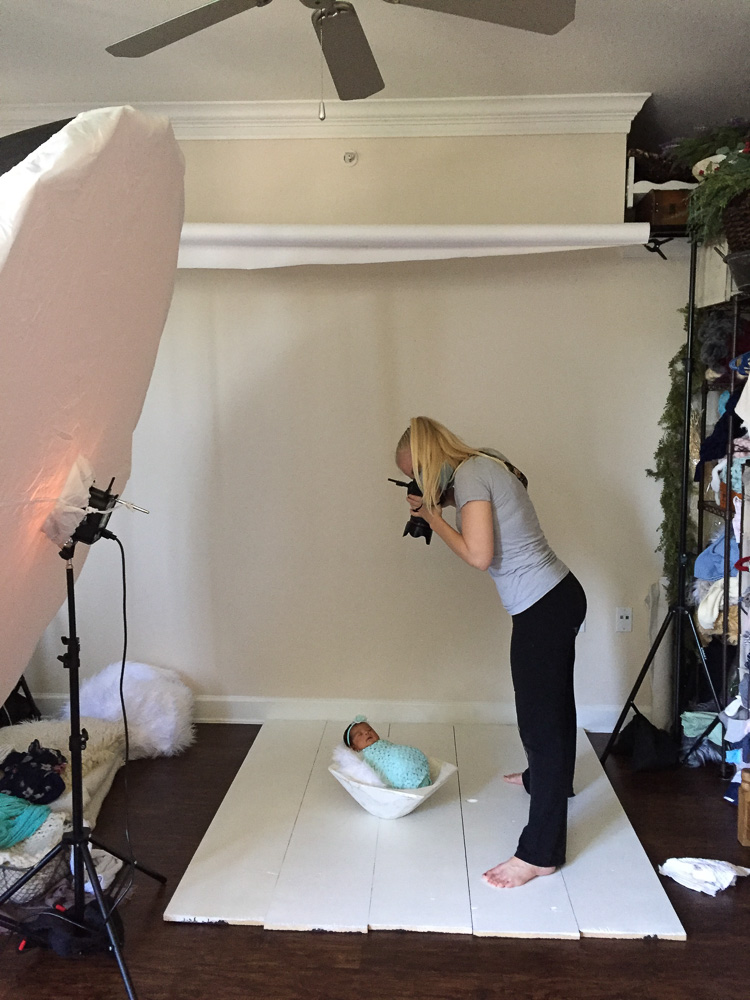
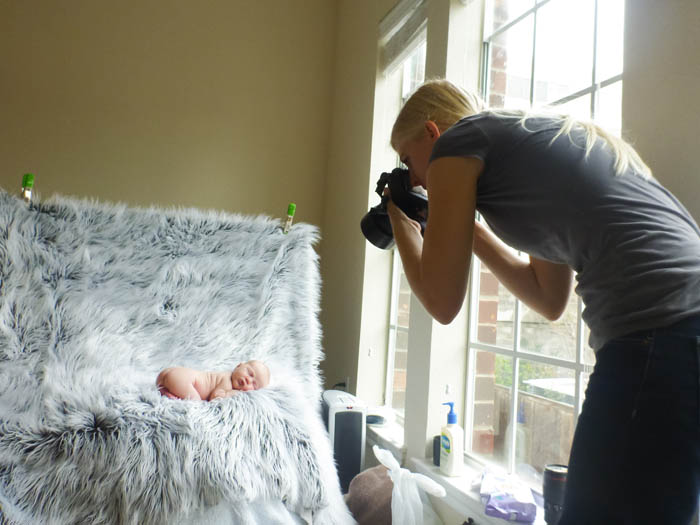
Oh, and one thing you’ll notice in the behind the scenes pictures is that I’m wearing an anti-viral face mask. I started wearing them for all my newborn sessions in 2018 as a precaution due to how bad flu and RSV have been and have continued to do it as a policy, especially with preemies or during flu season. One of my clients had to reschedule their session because their baby contracted RSV and was hospitalized. I’m grateful I wasn’t exposed, but it was scary to think that I could have been and not known immediately. I wear the mask because when I handle the babies they’re often very close to my face and I’m paranoid about breathing germs on them that I may not know I have as I know you can spread germs without even showing symptoms of illness. It also prevents me from touching my face during the session. I obviously take other precautions as well, such as hand washing, sanitizer, and sanitizing/disinfection items with safe products. This is a personal preference and I did newborn photography for years without using a mask and to my knowledge I never got any clients sick, so I don’t judge anyone who doesn’t do this. I’m just becoming a little bit of a germaphobe in my old age ;).

posed, newborn, photography, session, photo shoot, houston, texas, kelli nicole photography, baby girl, color, newborn photography, houston newborn photographer, studio, newborn boy, newborn posing, newborn photography tutorial, studio newborn lighting, paul c buff einstein lighting, newborn boy, yoga ball, bounce, wrapped newborn

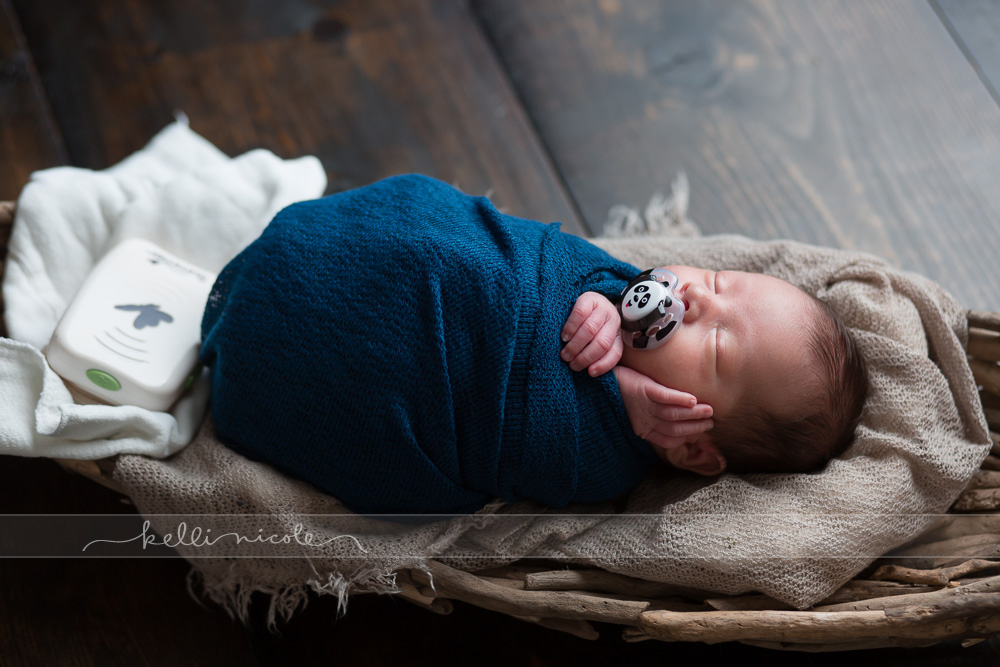
Another thing that is also great for calming fussy babies during a newborn session is a pacifier. I highly recommend allowing the use of a pacifier during the session, even if you don’t usually allow one, though I completely defer to the parents as many aren’t comfortable allowing their baby to use one. Letting the baby suck on one for a minute or two at a time during the session is unlikely to cause any harm to the baby or breastfeeding relationship and you can easily just never use it again if that’s your preference. Newborns find sucking to be a very soothing thing to do and often prefer to do so even if they’re not hungry. I recommend the soothie kind of paci as they’re made of hospital-grade silicone, sized and shaped for baby’s mouth, and will not leave hard plastic lines on the baby’s face. They should give one of these to you in the hospital if you ask so you don’t need to purchase one if you don’t plan to use it further. I do not recommend hard plastic pacis during a newborn session because of the lines it may leave on the cheeks. A pacifier is often the key to calming a baby during difficult poses. You’ll see a hard plastic pacifier in many of the pictures; just be aware that’s not what I typically recommend. This baby was a little older and that’s what he was used to and what the parents had on hand.

I keep the room around 77-80 degrees and have a white noise machine blasting at full volume. This is the one I’ve been using for the last 8-10 years and it’s still going strong. Babies are used to a lot of noise in the womb and sleep more deeply with white noise going. Often, when I want to get some awake pictures at the end of the session and the baby is still sleeping I’ll just turn the white noise machine off and the baby often wakes up! Newborns don’t have active sweat glands in the all places you would think just yet, so if you’re worried about baby being too hot check the forehead for sweat, which will indicate that the baby is trying to cool down its body. They’re used to very warm temperatures inside mom, though, so they’ll probably be pretty comfortable in the heat! It’s usually mom and dad’s sweat that wipes off on baby during family pictures :). Another thing I use is this soother. It vibrates and plays white noise and a heart beat sound (among other noises), though the white noise is not loud enough and will turn off after a time so I don’t rely on that alone. I’ll usually wrap it up in a burp cloth and put it inside a basket or next to the baby’s bottom to help them relax. You can see it in some of the images below, like this one. Most babies enjoy this. Update, this is the one I currently use and I love it (Munchkin Lulla-Vibe)!! 

posed, newborn, photography, session, photo shoot, houston, texas, kelli nicole photography, baby girl, color, newborn photography, houston newborn photographer, studio, newborn boy, newborn posing, newborn photography tutorial, studio newborn lighting, paul c buff einstein lighting, newborn boy, dark turquoise, wrapped newborn

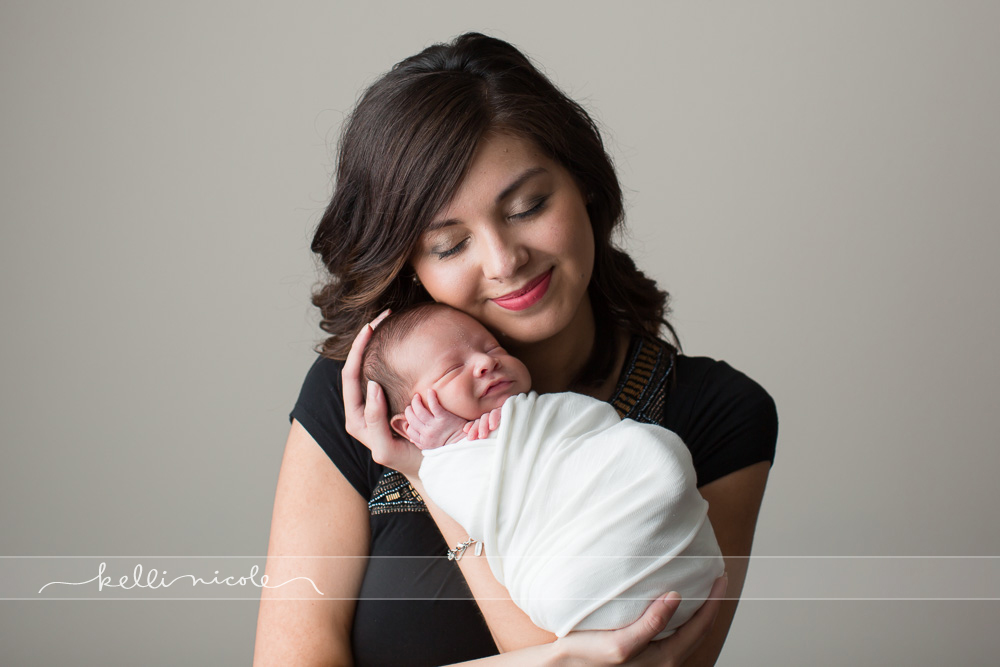
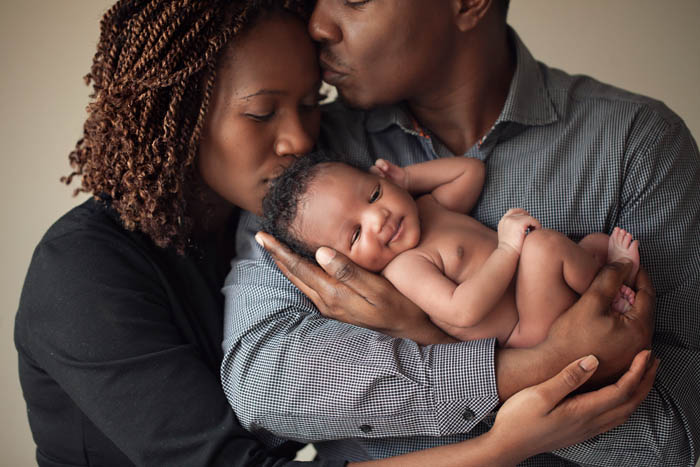
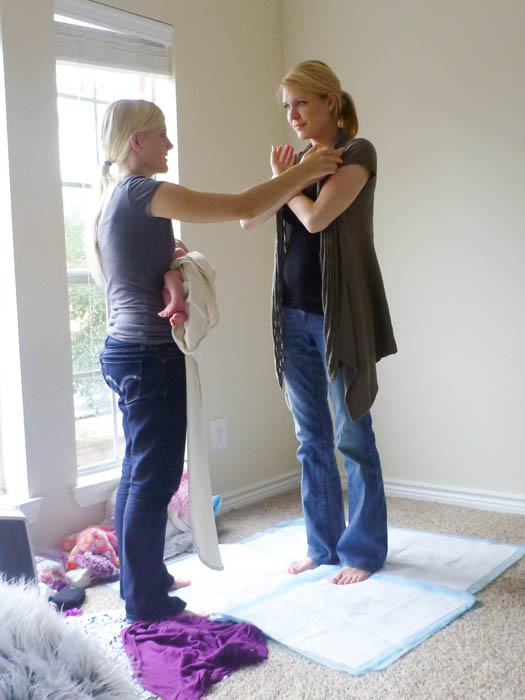
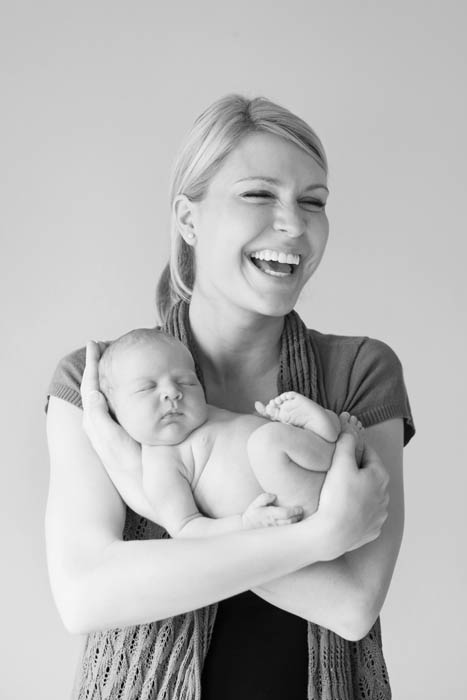
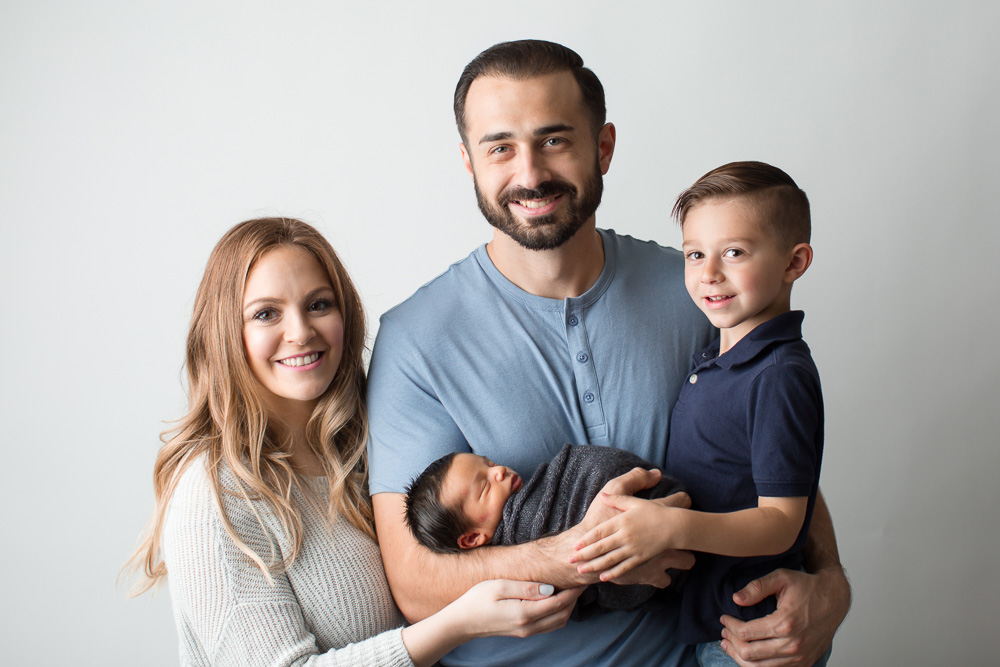
When I begin the session I usually start with family pictures. Since it’s so warm I like to do these first so mom and dad can relax and change into something cooler and more comfortable. Dad or grandma can also then take any older children out (home, to the park, out to lunch, etc). Most siblings won’t be thrilled about spending the next 2 hours hanging out at the studio. I usually do swaddled pictures, but will do naked poses if the parents request it. Before each session I have a phone consult and discuss the types of images, poses, colors, etc that the parents want. 

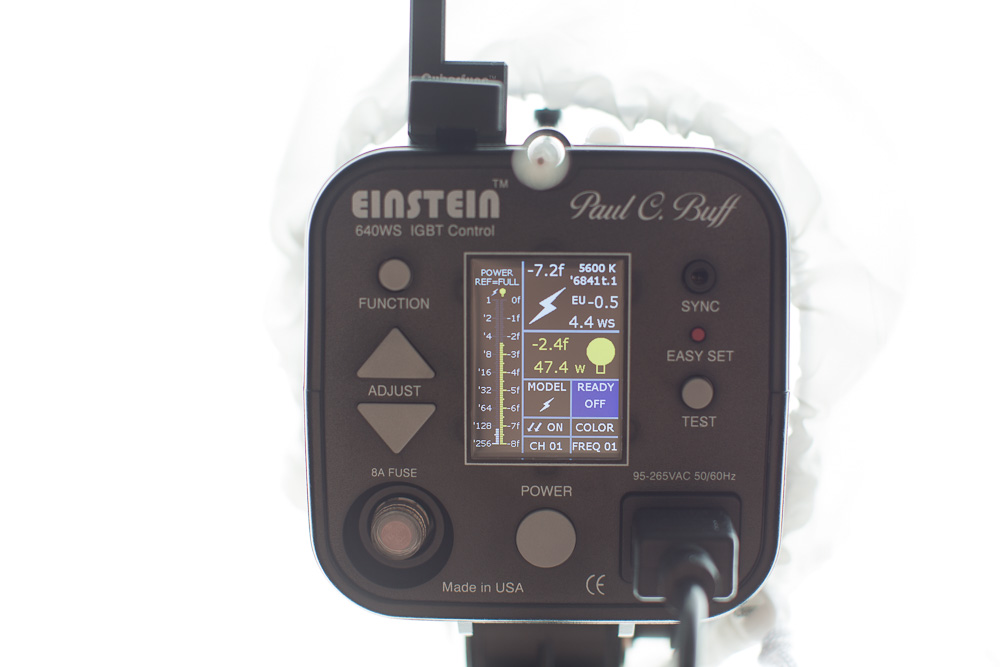
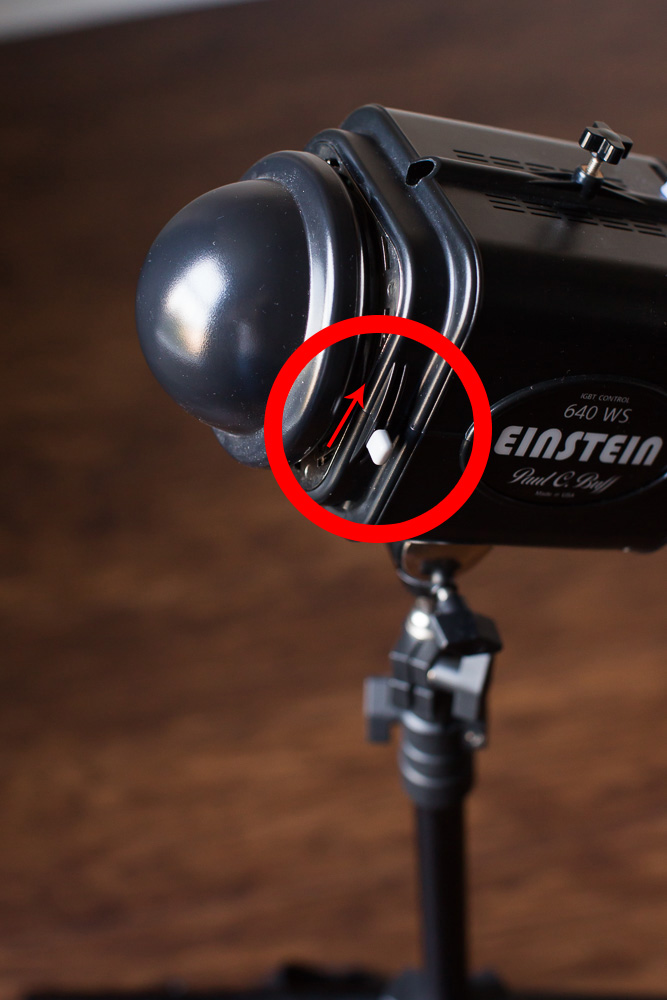
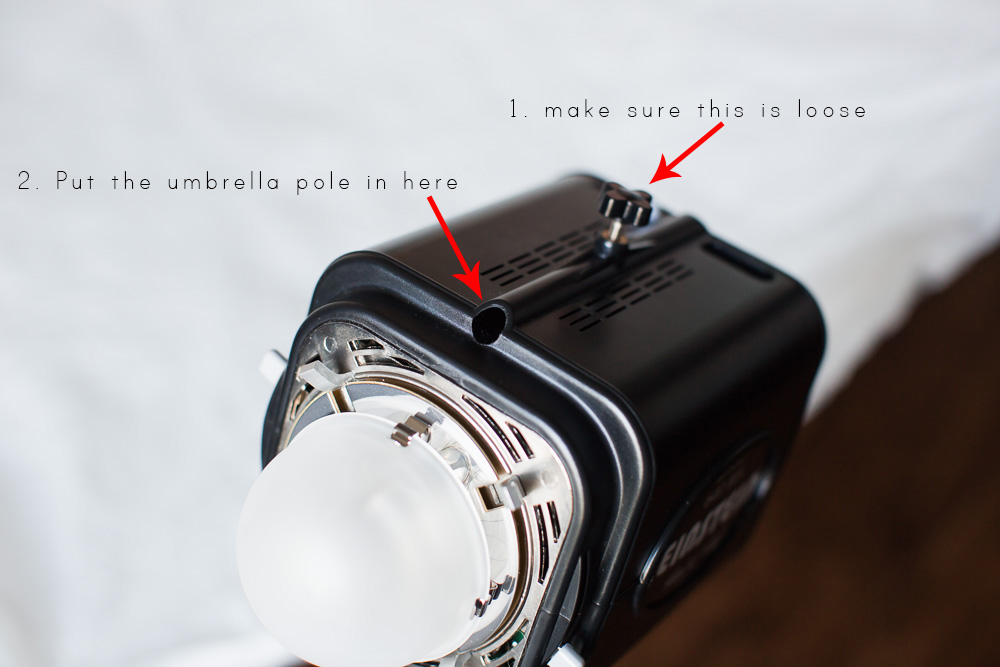
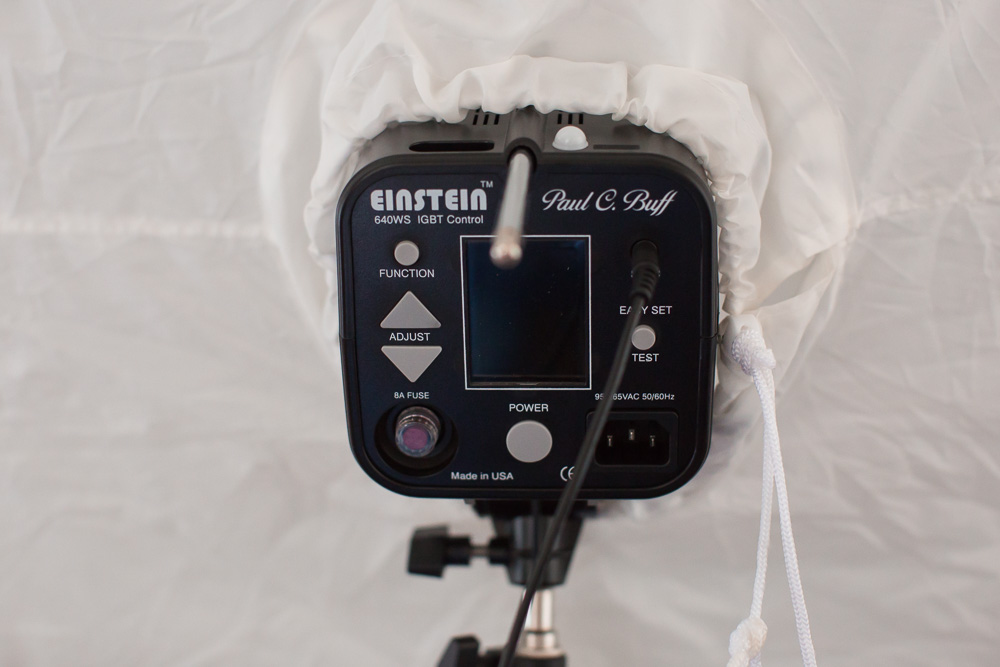
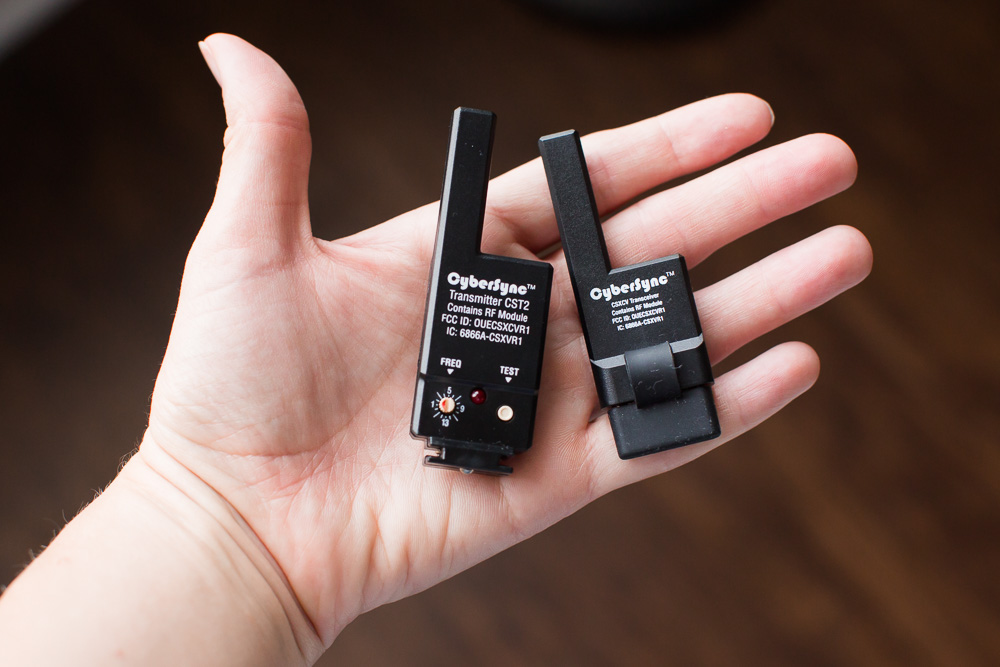
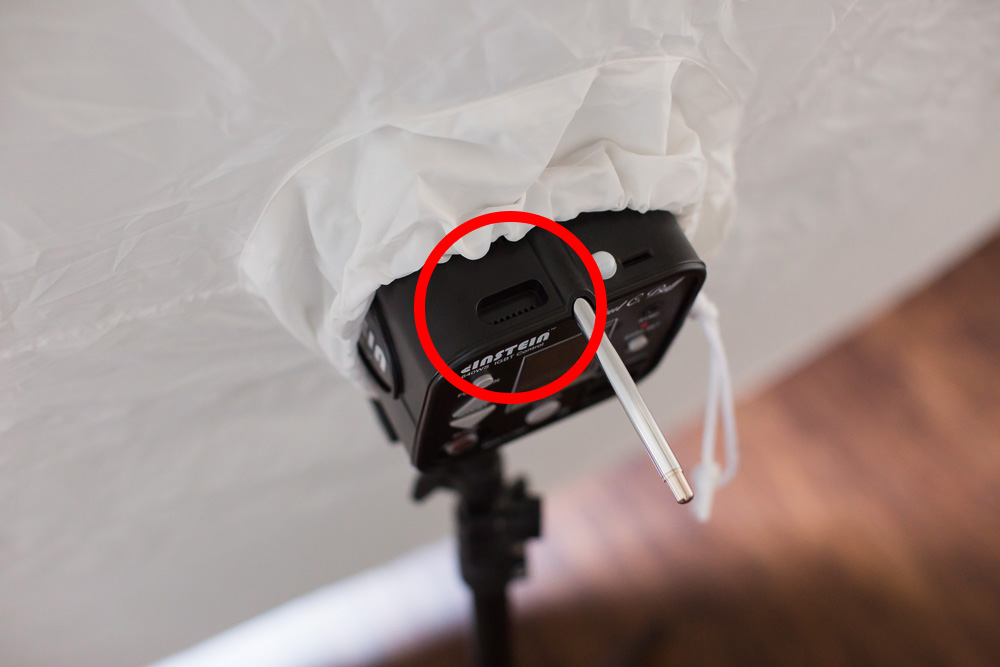
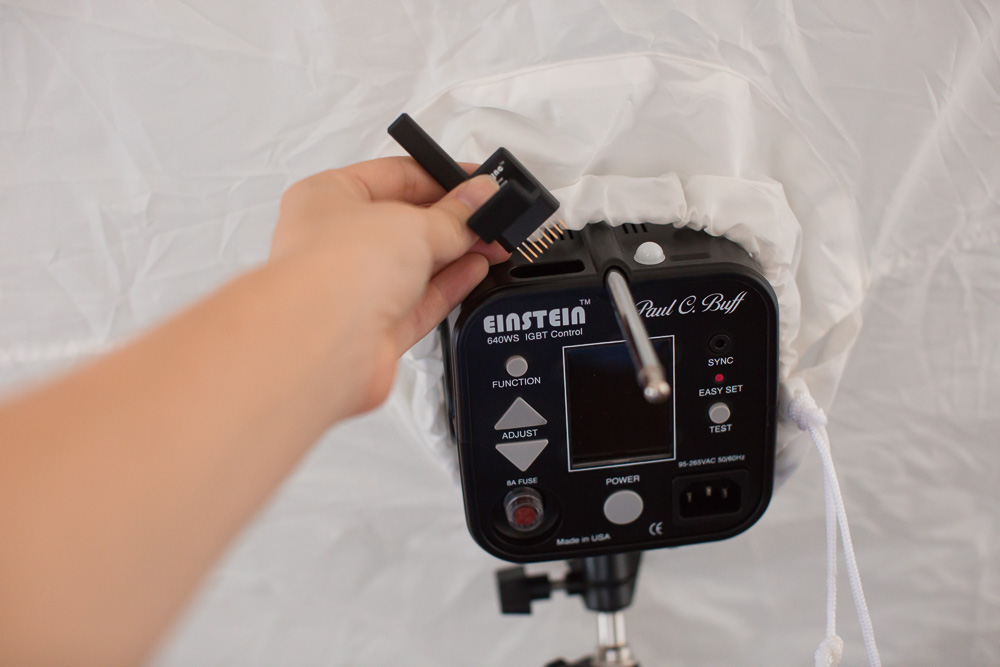
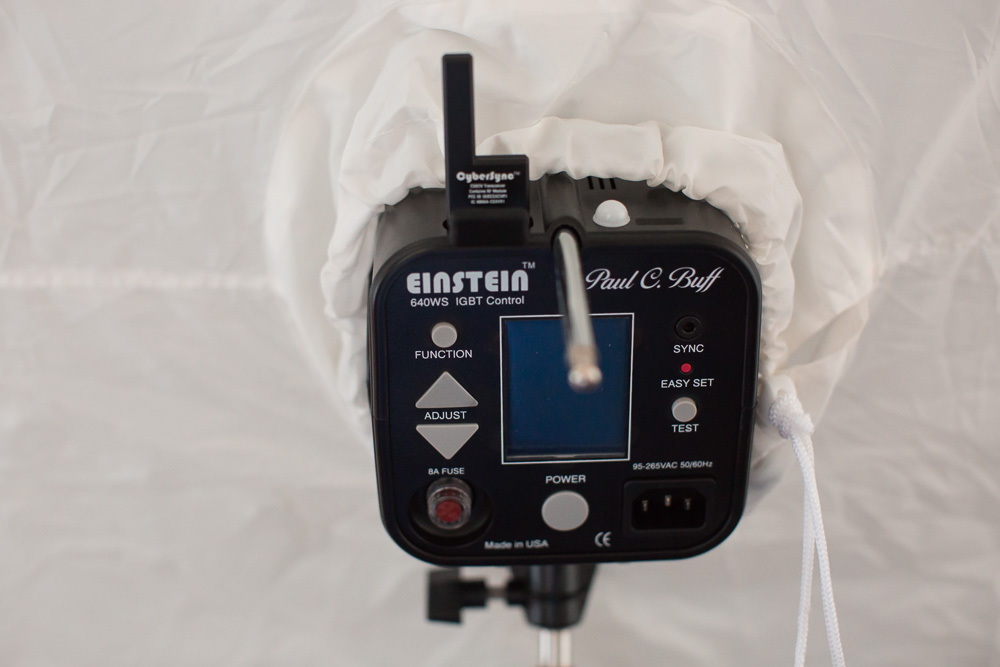
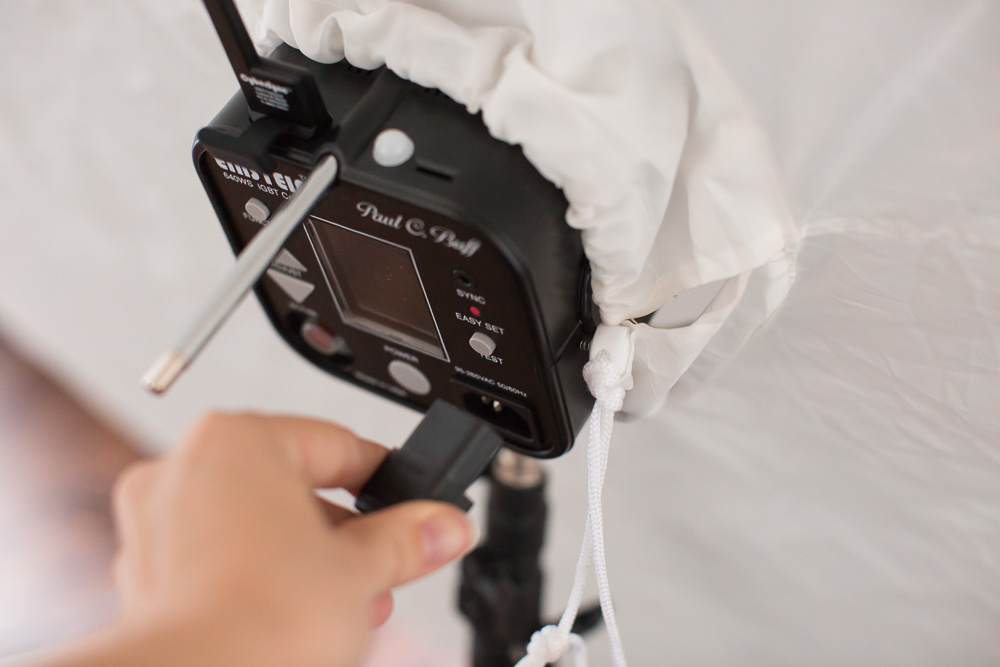
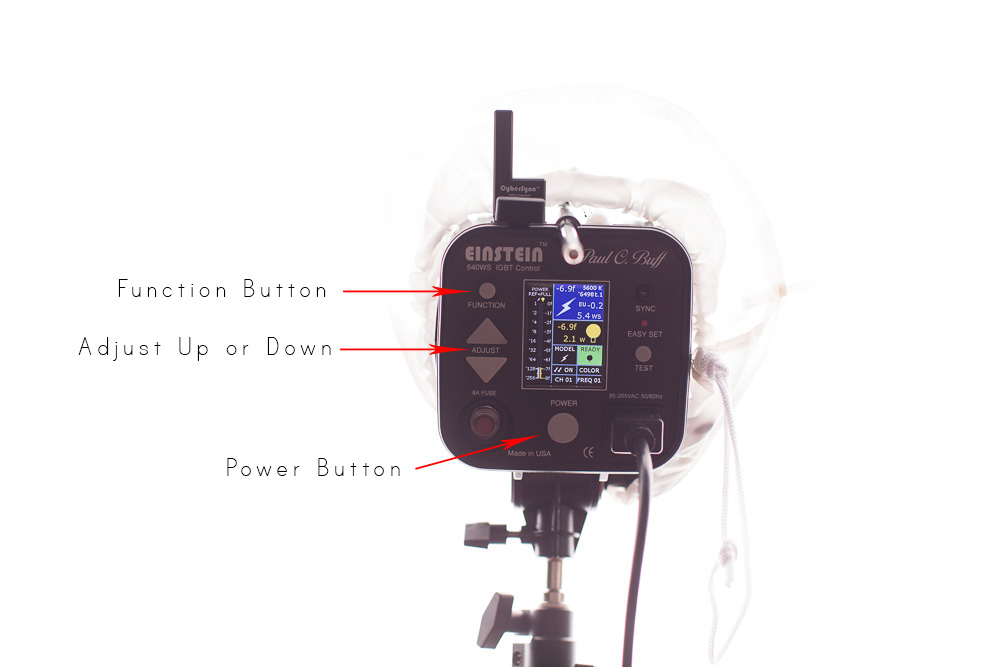
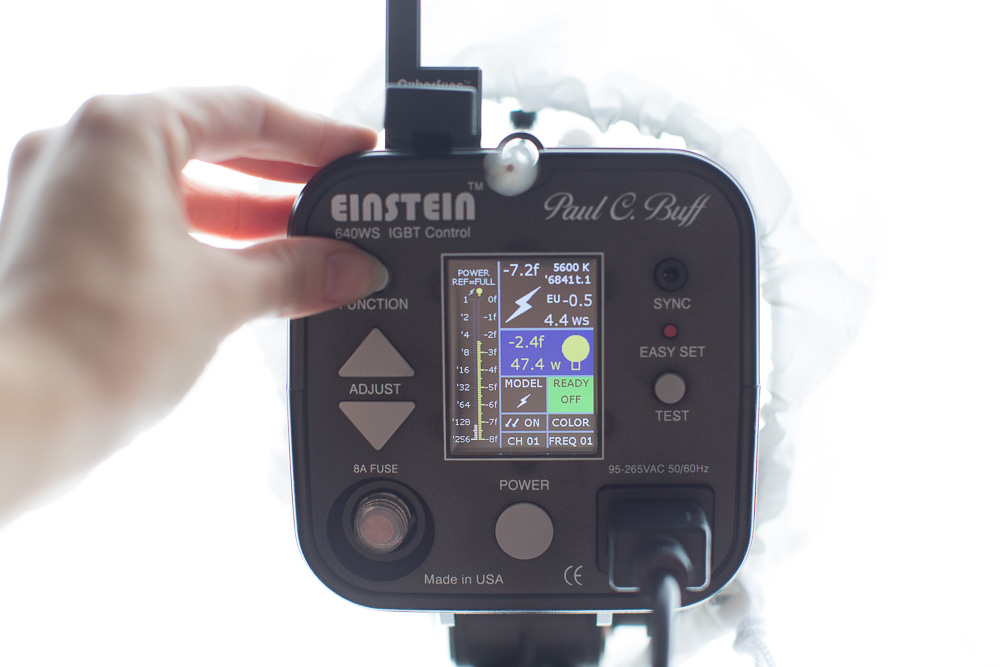
In case you’re interested, this is how the back of my Einstein looks! 

einstein, paul c buff, plm, 86 inch plm, houston photographer, houston newborn photographer, kelli nicole photography, umbrella, studio lighting, studio newborn photography, einstein setup, setting up an Einstein and plm, setting up paul c buff lighting and umbrella

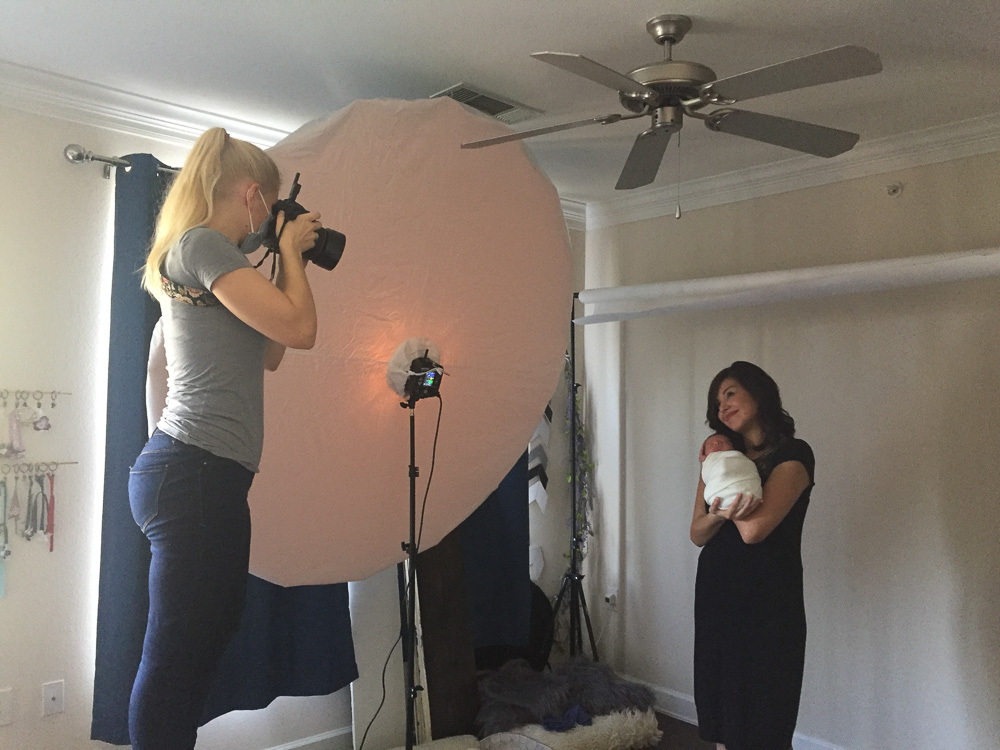
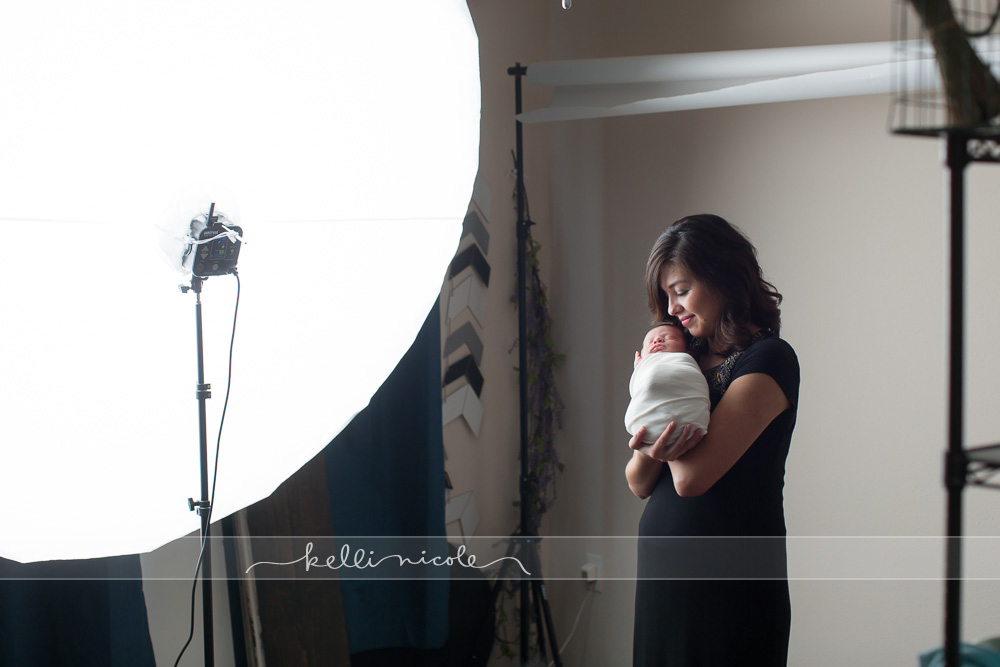
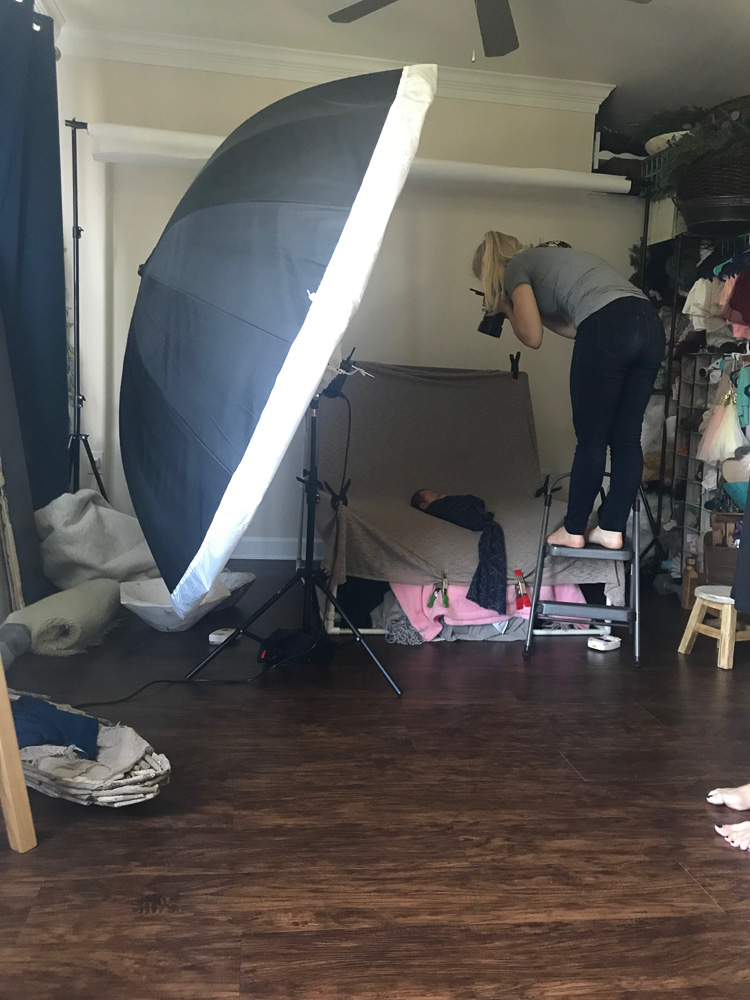
I always get up on a stool to get above the parents as this is a much more flattering angle. I’m super short so it’s even more important for me. Notice where mom is in relation to the edge of the umbrella.

posed, newborn, photography, session, photo shoot, houston, texas, kelli nicole photography, baby girl, color, newborn photography, houston newborn photographer, studio, newborn boy, newborn posing, newborn photography tutorial, studio newborn lighting, paul c buff einstein lighting posed, newborn, photography, session, photo shoot, houston, texas, kelli nicole photography, baby girl, color, newborn photography, houston newborn photographer, studio, newborn boy, newborn posing, newborn photography tutorial, studio newborn lighting, paul c buff einstein lighting, mom and babyposed, newborn, photography, session, photo shoot, houston, texas, kelli nicole photography, baby girl, color, newborn photography, houston newborn photographer, studio, newborn boy, newborn posing, newborn photography tutorial, studio newborn lighting, paul c buff einstein lighting, mom and baby
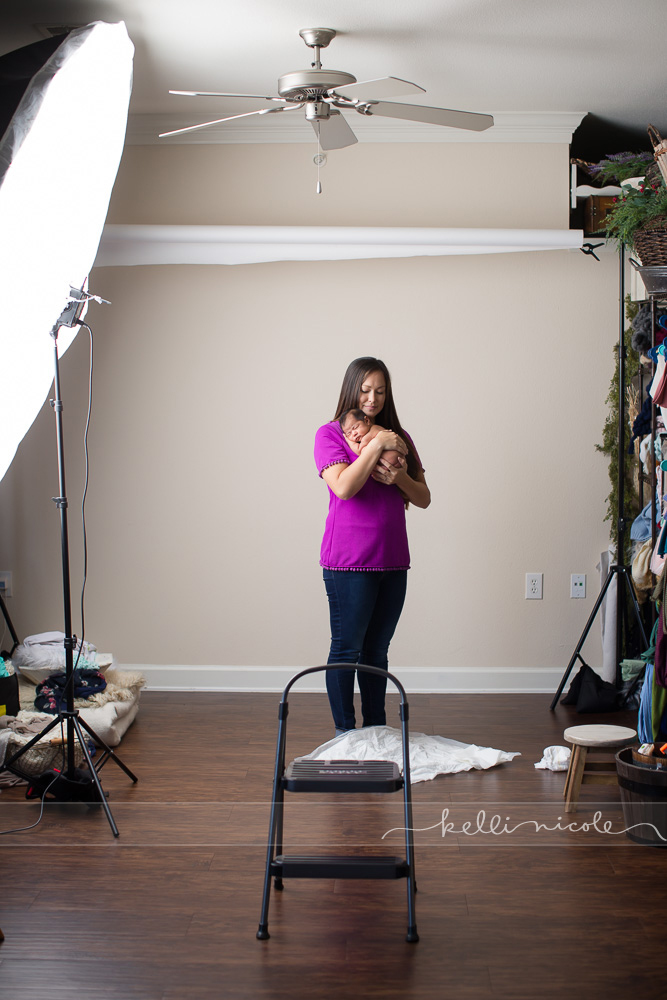
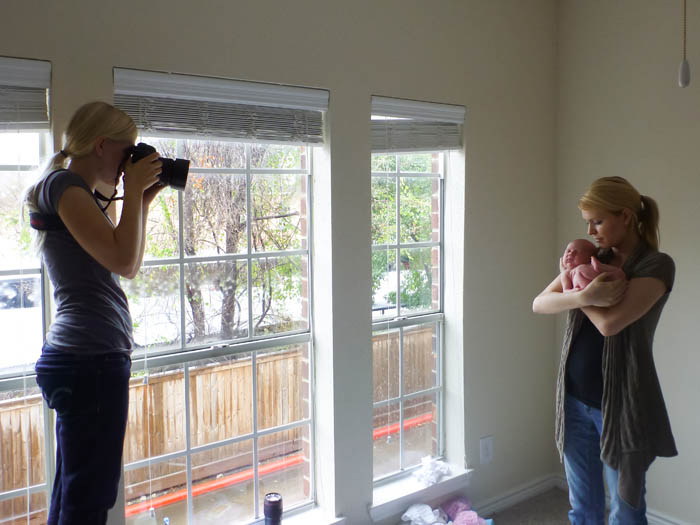
When the baby is naked I put a puppy pad or two (or 4) underneath the baby/parent so if she pees the parent has a safe spot to direct the pee, haha. You can actually see a few pee spots that I haven’t edited out yet on the mom’s shirt ;). The pee pad came in handy this time, but it might not protect mom and dad’s clothes entirely! When you start taking off the baby’s diaper, try blowing on the baby genitals before you take the diaper all the way off. Sometimes that will stimulate the baby to pee right then and not a few minutes later :). You can also see my background stand in the background. I use the white paper (or gray) depending on what the parents want and what they’re wearing.
posed, newborn, photography, session, photo shoot, houston, texas, kelli nicole photography, baby girl, color, newborn photography, houston newborn photographer, studio, newborn boy, newborn posing, newborn photography tutorial, studio newborn lighting, paul c buff einstein lighting, mom and babyposed, newborn, photography, session, photo shoot, houston, texas, kelli nicole photography, baby girl, color, newborn photography, houston newborn photographer, studio, newborn boy, newborn posing, newborn photography tutorial, studio newborn lighting, paul c buff einstein lighting, mom and baby
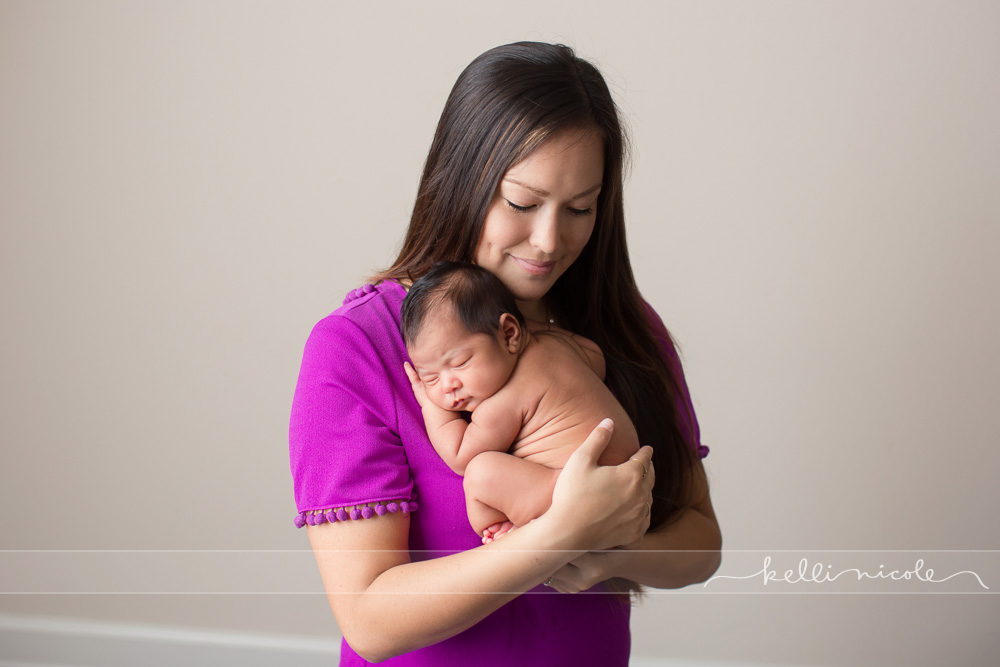
Here’s an example of a family picture on the white background. Depending on how close or far away I place them the background could look more white or more gray. In this image the little boy is standing on a kitchen stool.
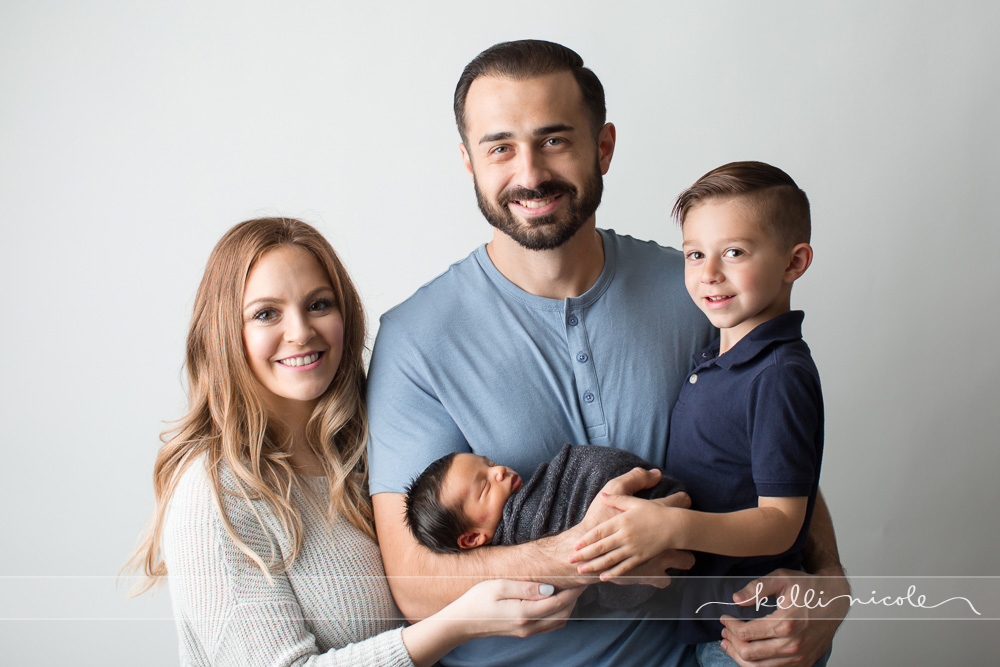
 posed, newborn, photography, session, photo shoot, houston, texas, kelli nicole photography, baby girl, color, newborn photography, houston newborn photographer, studio, newborn boy, newborn posing, newborn photography tutorial, studio newborn lighting, paul c buff einstein lighting, mom and baby, family

Beanbag Poses

(*Note, I recently switched and do currently use the dog bed, plus these posing tools as well as some others. I also use these clamps now).

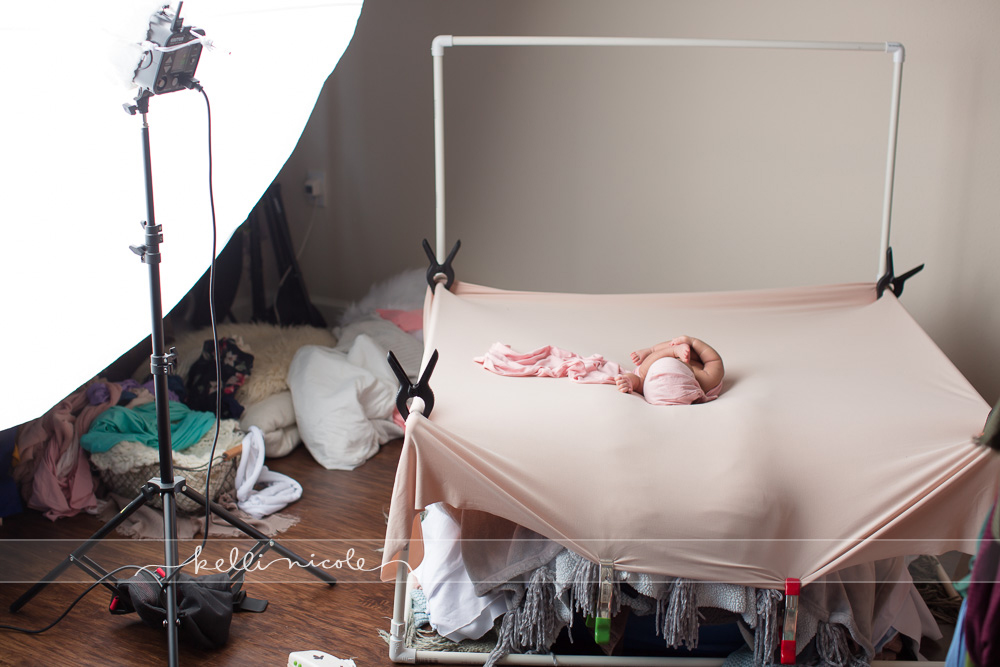
There are many ways to do this. Some people use a dog bed in place of a beanbag, some people use posers specifically designed for newborn photography. There are many companies that sell these. I bought a regular medium sized beanbag online years ago, bought more stuffing to put inside, and it’s what I still use. It works for me, but some day I may upgrade. The pvc pipe background stand is fantastic. I bought mine off another photographer, but you can easily make your own using PVC pipes, elbows and T’s. I got metal clamps at Home Depot/Lowe’s and recently heard that the plastic ones can be a bit of a safety hazard so I’ll be replacing those. You want to get your background nice and tight to make sure there are no wrinkles. Try to do everything as best you can in real life so you don’t have to do as much photoshopping afterwards :). 

posed, newborn, photography, session, photo shoot, houston, texas, kelli nicole photography, baby girl, color, newborn photography, houston newborn photographer, studio, newborn boy, newborn posing, newborn photography tutorial, studio newborn lighting, paul c buff einstein lighting, mom and baby, white background

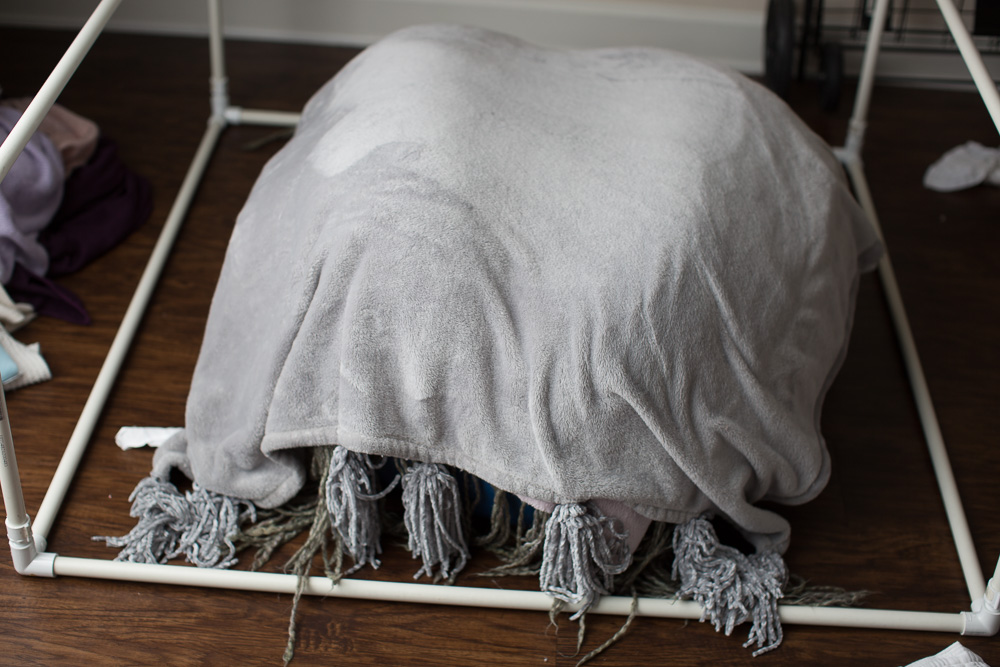
I use these rolled up towels underneath the blankets to get the shape I want. Sometime I give a little more padding under the one where the baby’s head will be (as I said above I use these now with a dog bed and they’re wonderful).

posed, newborn, photography, session, photo shoot, houston, texas, kelli nicole photography, baby girl, color, newborn photography, houston newborn photographer, studio, newborn boy, newborn posing, newborn photography tutorial, studio newborn lighting, paul c buff einstein lighting, beanbag

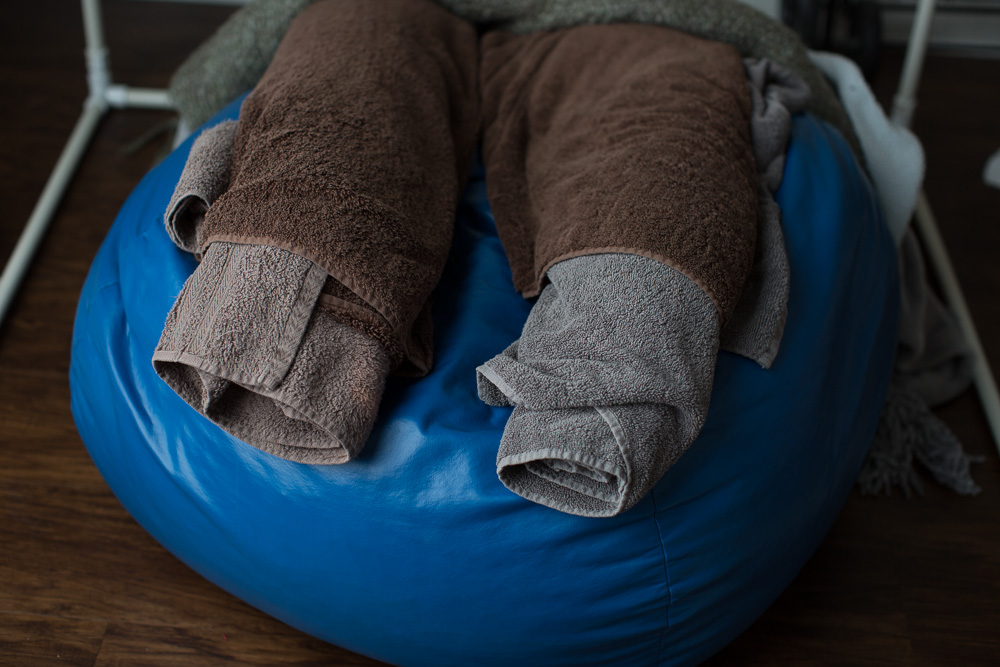
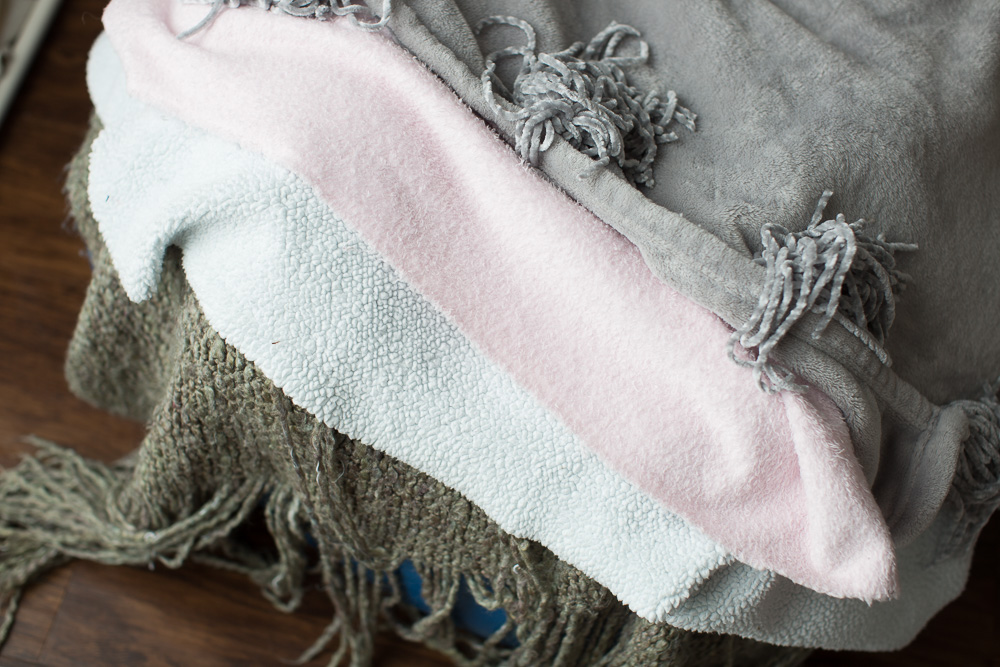
As you can see there are several layers of blankets on the beanbag. This is to make sure it’s nice and smooth. I’ll make sure to use a thick, smooth blanket (like the gray one below) right underneath the top layer, especially if the top layer is thin or has no texture.

posed, newborn, photography, session, photo shoot, houston, texas, kelli nicole photography, baby girl, color, newborn photography, houston newborn photographer, studio, newborn boy, newborn posing, newborn photography tutorial, studio newborn lighting, paul c buff einstein lighting, beanbag posed, newborn, photography, session, photo shoot, houston, texas, kelli nicole photography, baby girl, color, newborn photography, houston newborn photographer, studio, newborn boy, newborn posing, newborn photography tutorial, studio newborn lighting, paul c buff einstein lighting, beanbag

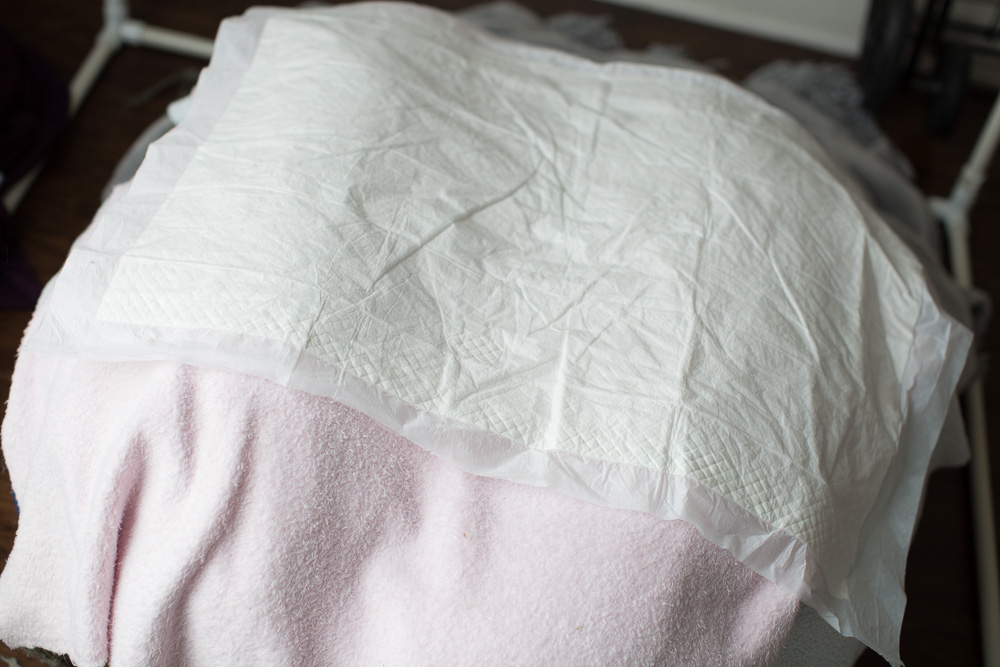
If the baby is naked I’ll put a puppy pad under the second layer. If the pad is directly underneath the top layer the wrinkles from the will show through. I will layer all the blankets I want to use on the beanbag before we start so that all I have to do is lift the baby gently, have someone strip the top layers, and then place the baby back down on the blanket I want to use next.

posed, newborn, photography, session, photo shoot, houston, texas, kelli nicole photography, baby girl, color, newborn photography, houston newborn photographer, studio, newborn boy, newborn posing, newborn photography tutorial, studio newborn lighting, paul c buff einstein lighting, beanbag

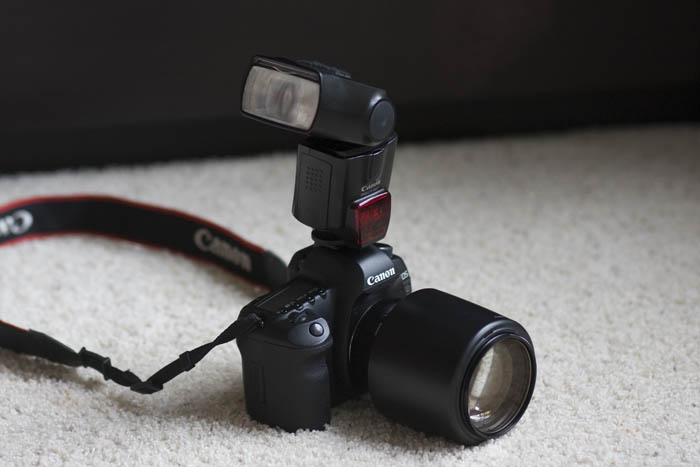
This next picture has very little editing done. In this situation I haven’t done anything to blur or lighten the background. 135mm 2.0 lens, ISO 160, 1/200th second, f2.8
posed, newborn, photography, session, photo shoot, houston, texas, kelli nicole photography, baby girl, color, newborn photography, houston newborn photographer, studio, newborn boy, newborn posing, newborn photography tutorial, studio newborn lighting, paul c buff einstein lighting, mom and baby, white background

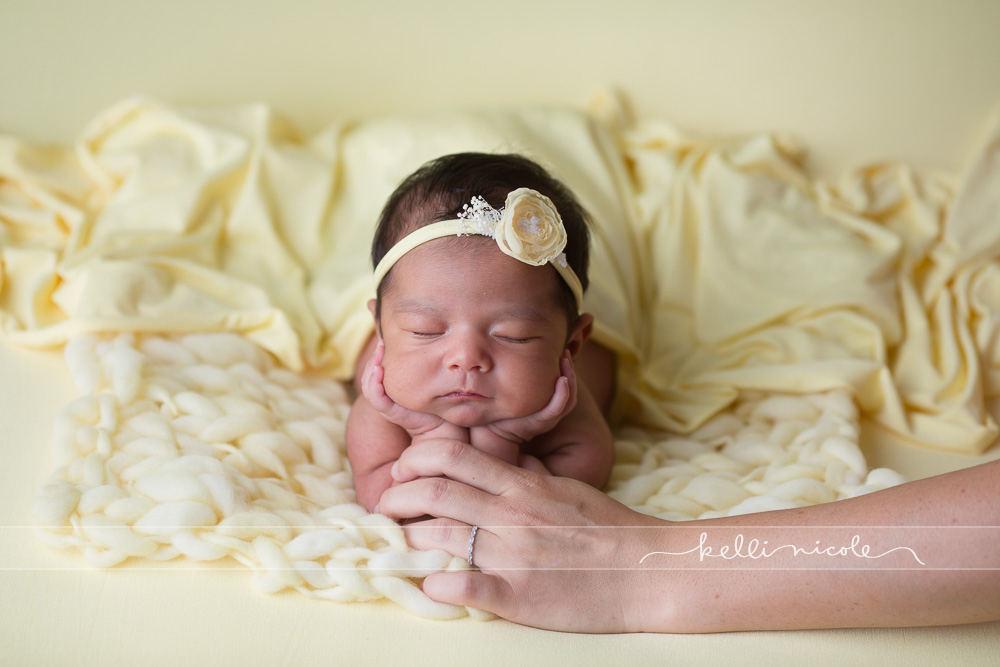
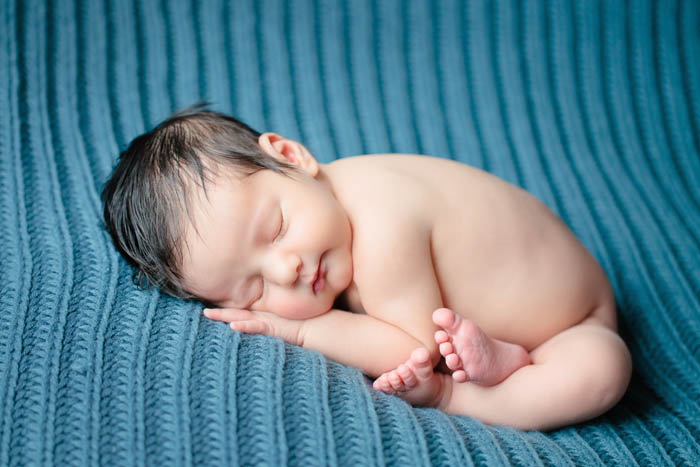
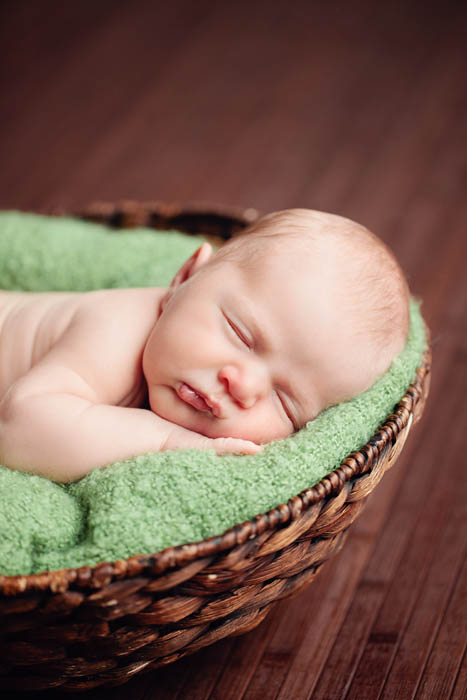
This pose is commonly called the froggy pose or the hands in chin pose. One thing I do differently from many people is that I don’t generally bring the feet up by the arms. That’s just a preference thing. I like using different textures, but I love the monochromatic look like in this image. Safety first with poses like this! I’ll have someone responsible hold the baby’s head in one picture and hands in another picture and then I’ll photoshop the two together. I do know some photographers who do this themselves and shoot with a wide angle lens so they can be close enough to the baby to hold it.
posed, newborn, photography, session, photo shoot, houston, texas, kelli nicole photography, baby girl, color, newborn photography, houston newborn photographer, studio, newborn boy, newborn posing, newborn photography tutorial, studio newborn lighting, paul c buff einstein lighting, mom and baby, froggy pose, hands in chin pose

135mm 2.0 lens, ISO 200, 1/200th sec, f2.8
posed, newborn, photography, session, photo shoot, houston, texas, kelli nicole photography, baby girl, color, newborn photography, houston newborn photographer, studio, newborn boy, newborn posing, newborn photography tutorial, studio newborn lighting, paul c buff einstein lighting, mom and baby, froggy pose, hands in chin poseposed, newborn, photography, session, photo shoot, houston, texas, kelli nicole photography, baby girl, color, newborn photography, houston newborn photographer, studio, newborn boy, newborn posing, newborn photography tutorial, studio newborn lighting, paul c buff einstein lighting, mom and baby, froggy pose, hands in chin poseposed, newborn, photography, session, photo shoot, houston, texas, kelli nicole photography, baby girl, color, newborn photography, houston newborn photographer, studio, newborn boy, newborn posing, newborn photography tutorial, studio newborn lighting, paul c buff einstein lighting, mom and baby, froggy pose, hands in chin pose

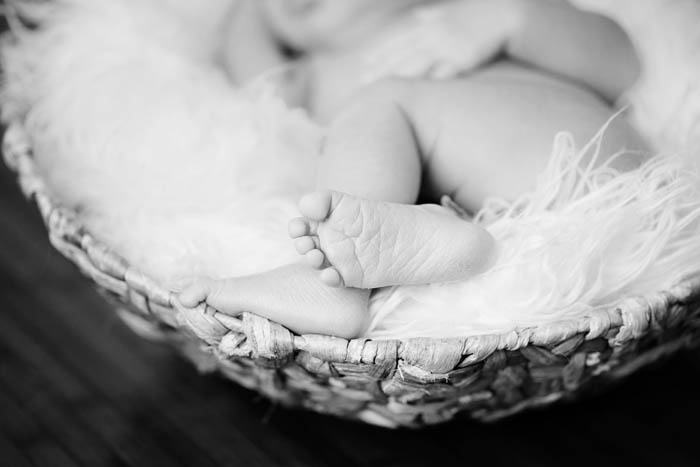
Please forgive that mess in the background! I love doing backlit photos, especially with this pose. I know a lot of people use fancy beans underneath babies, but I just use rolled up towels. You can see the outline of the large towels on either side of the baby here. I have smaller towels rolled up under her head and bum as well to keep her in place where I want her. posed, newborn, photography, session, photo shoot, houston, texas, kelli nicole photography, baby girl, color, newborn photography, houston newborn photographer, studio, newborn boy, newborn posing, newborn photography tutorial, studio newborn lighting, paul c buff einstein lighting, mom and baby, froggy pose, hands in chin pose, cream and pinkposed, newborn, photography, session, photo shoot, houston, texas, kelli nicole photography, baby girl, color, newborn photography, houston newborn photographer, studio, newborn boy, newborn posing, newborn photography tutorial, studio newborn lighting, paul c buff einstein lighting, mom and baby, froggy pose, hands in chin pose, cream and pink

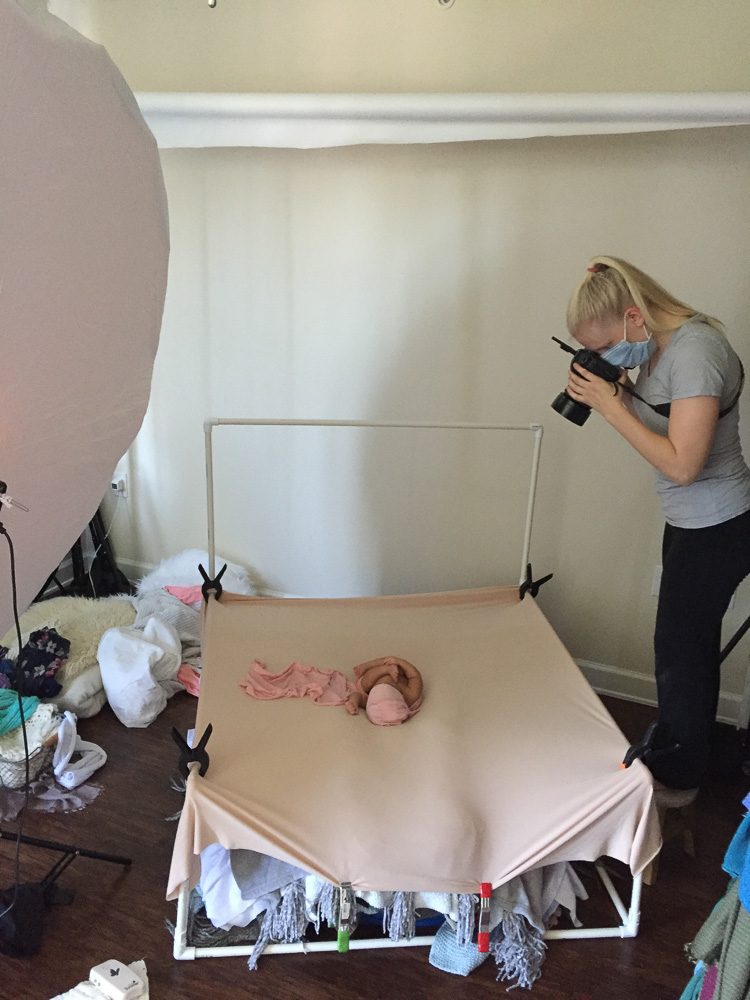
Sometimes during this pose diapers will look too big and bulky, so I will take it off and use disposable nursing pads in its place. When I took off this wrap the nursing pad was soaked, but the wrap and backdrop were dry! 

50mm 1.2 lens, ISO 200, 1/200th sec, f2.8
posed, newborn, photography, session, photo shoot, houston, texas, kelli nicole photography, baby girl, color, newborn photography, houston newborn photographer, studio, newborn boy, newborn posing, newborn photography tutorial, studio newborn lighting, paul c buff einstein lighting, mom and baby, froggy pose, hands in chin pose, cream and pink

85mm 1.8 lens, ISO 200, 1/200th sec, f2.8
posed, newborn, photography, session, photo shoot, houston, texas, kelli nicole photography, baby girl, color, newborn photography, houston newborn photographer, studio, newborn boy, newborn posing, newborn photography tutorial, studio newborn lighting, paul c buff einstein lighting, mom and baby, froggy pose, hands in chin pose, cream and pink

This is the picture above, but completely unedited, otherwise known as SOOC (straight out of camera). This is so that you can see that it’s best to do as much as possible in camera so you’re not spending too much time editing in post processing. We all make mistakes or have to deal with bad baby acne, so some pictures will take more editing than others, but it’s best to get the lighting, exposure, and posing right in camera when possible!
posed, newborn, photography, session, photo shoot, houston, texas, kelli nicole photography, baby girl, color, newborn photography, houston newborn photographer, studio, newborn boy, newborn posing, newborn photography tutorial, studio newborn lighting, paul c buff einstein lighting, mom and baby, froggy pose, hands in chin pose, cream and pink

This is the same setup as above, but in blue. Baby was starting to get a little squirmy so I had mom hold her legs to add a little variation! I still love this shot! 50mm 1.2 lens, ISO 250, 1/200th sec, f2.8posed, newborn, photography, session, photo shoot, houston, texas, kelli nicole photography, baby girl, color, newborn photography, houston newborn photographer, studio, newborn boy, newborn posing, newborn photography tutorial, studio newborn lighting, paul c buff einstein lighting, baby blue, newborn girl

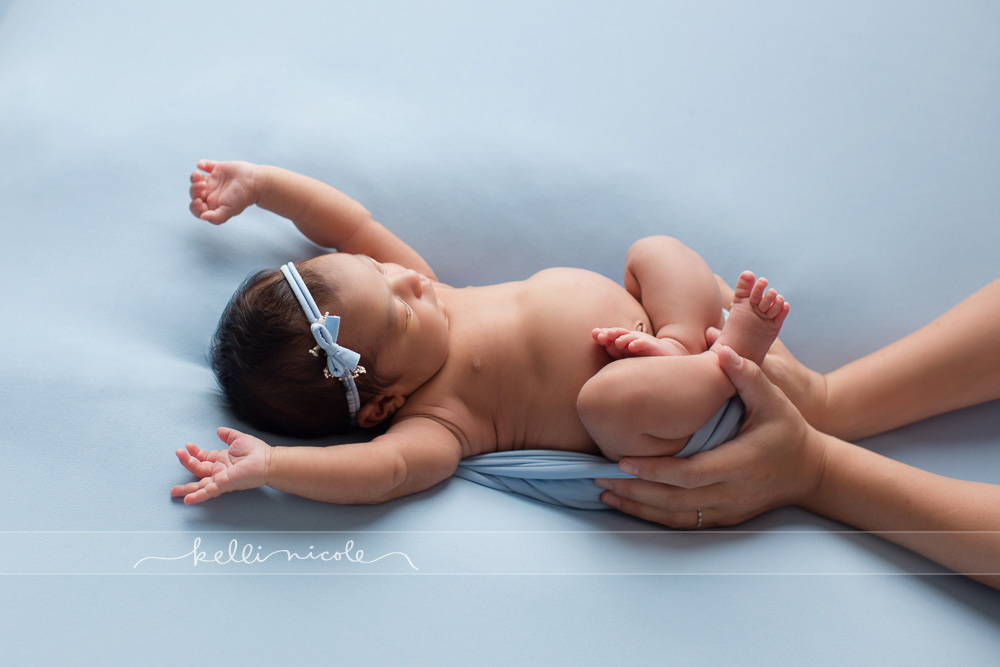
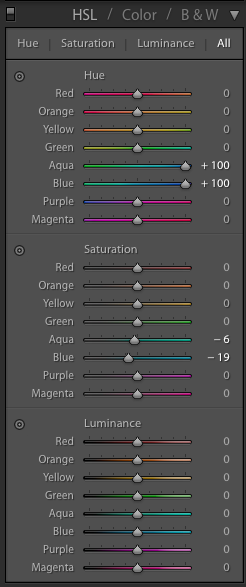
Blues and greens are great colors to use if you want to be able to change the color later because those are colors not found in human skin. As you can see below I was able to alter the colors of the blanket and headband in Lightroom only using the Hue and Saturation sliders. No other editing has been done, but if I was doing this for a client I would probably take it into Photoshop and do a little fine-tuning as well so make sure the color is uniform.posed, newborn, photography, session, photo shoot, houston, texas, kelli nicole photography, baby girl, color, newborn photography, houston newborn photographer, studio, newborn boy, newborn posing, newborn photography tutorial, studio newborn lighting, paul c buff einstein lighting, lavender, purple, newborn girl

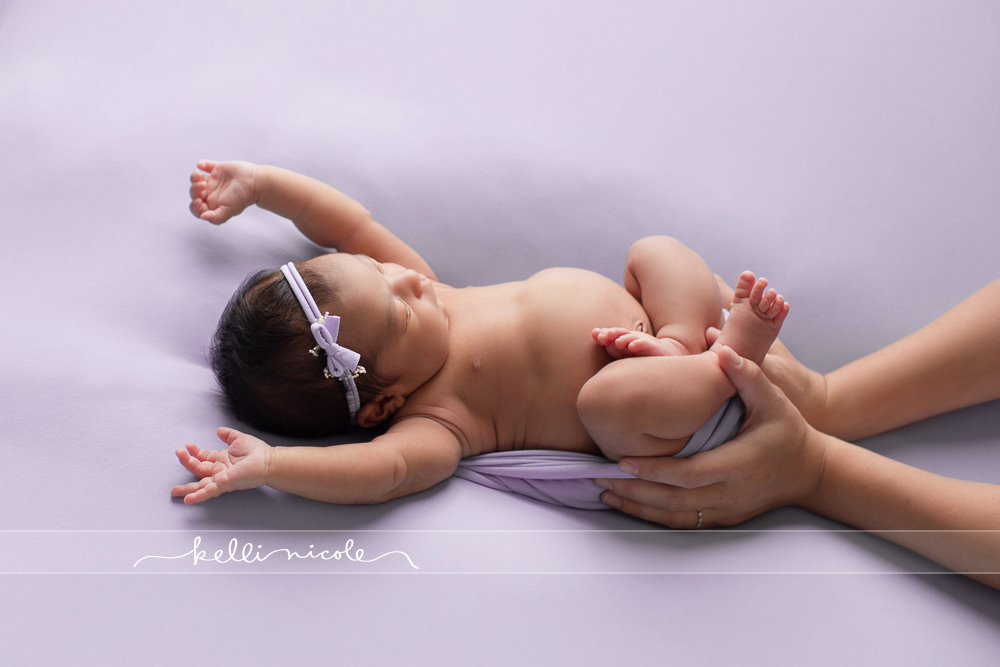
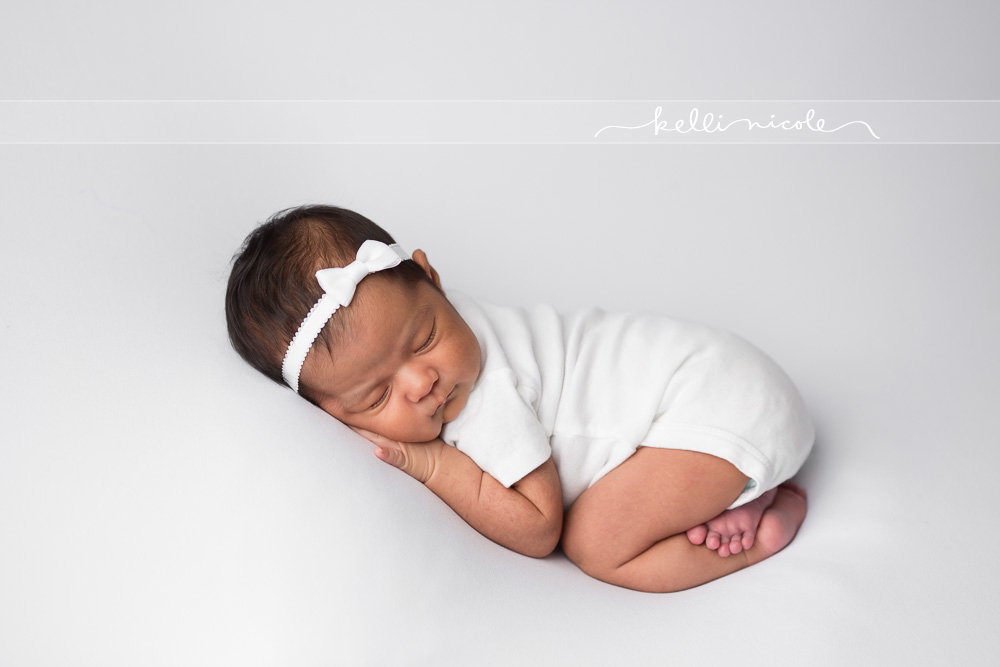
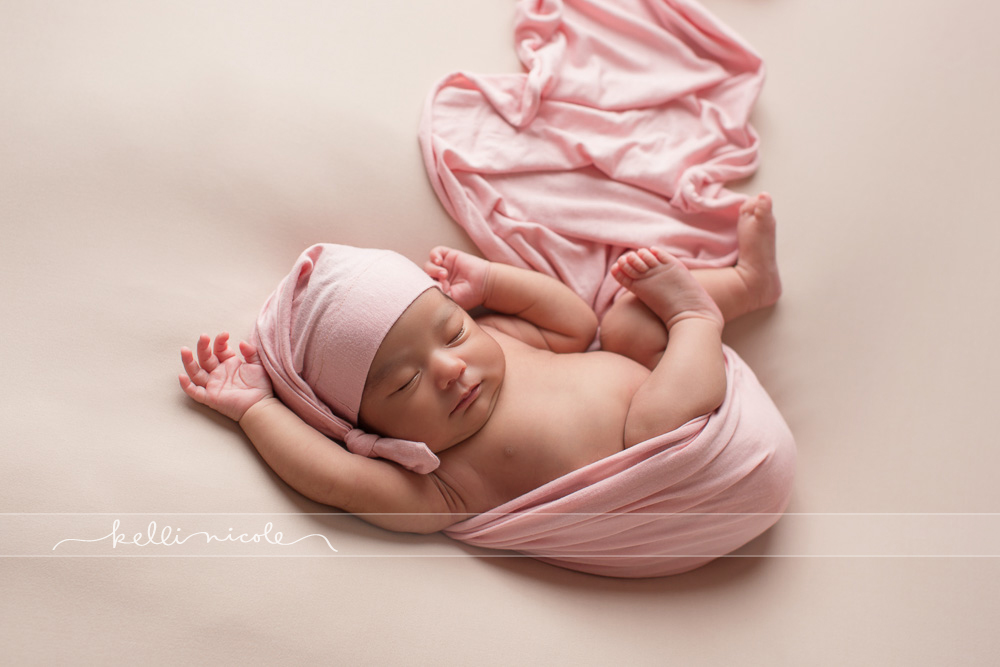
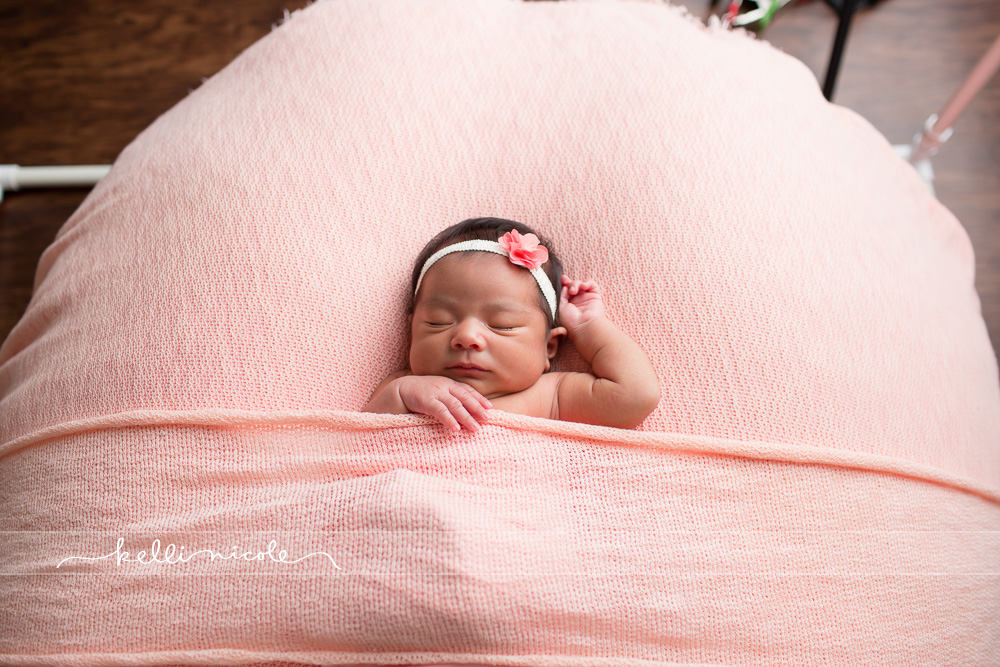
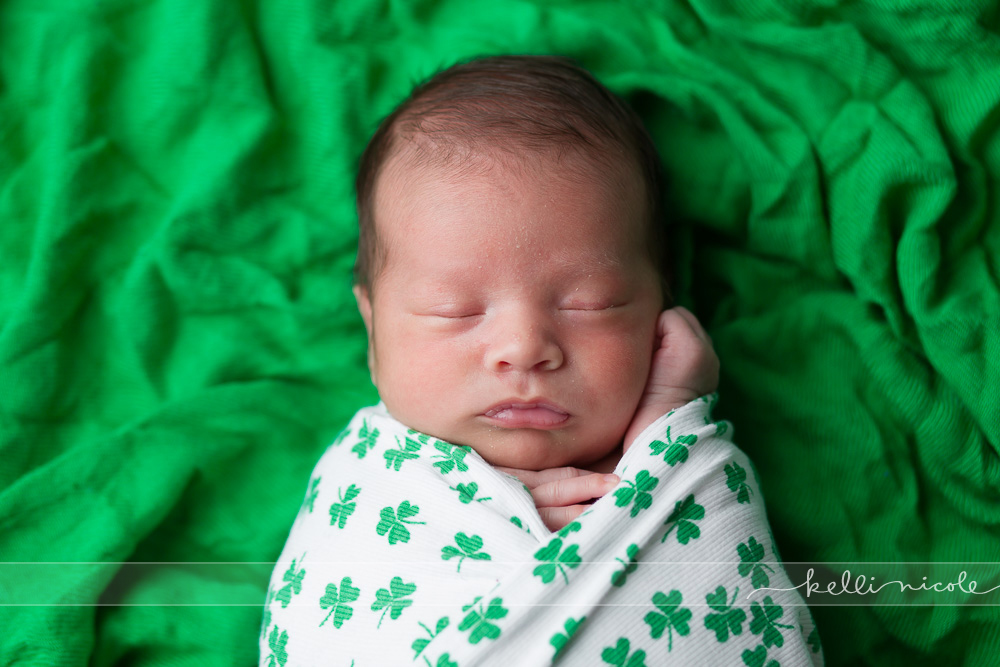
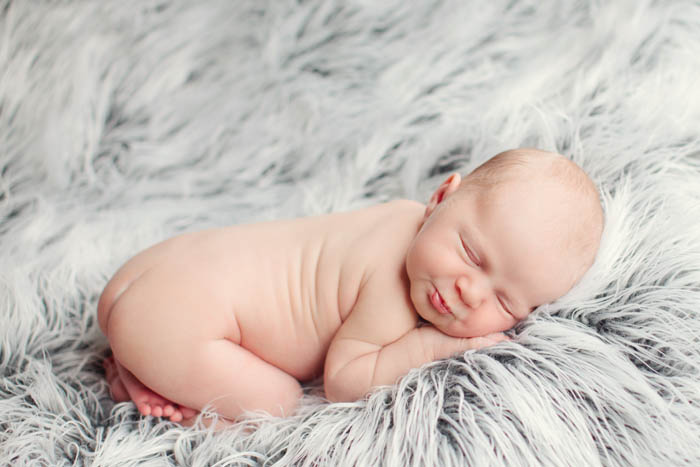
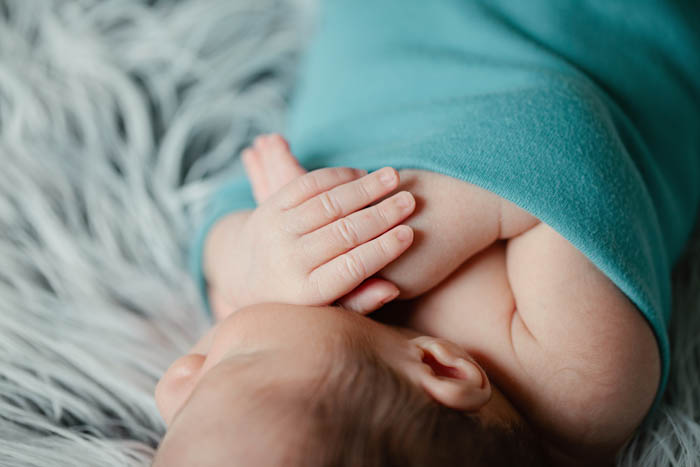
This is one of my favorite poses! I love this little tucked-in look. I always wrap the baby in the same wrap or a coordinating color underneath the top layer to help baby feel secure. You can also see the soother at her bum set to vibrate.
posed, newborn, photography, session, photo shoot, houston, texas, kelli nicole photography, baby girl, color, newborn photography, houston newborn photographer, studio, newborn boy, newborn posing, newborn photography tutorial, studio newborn lighting, paul c buff einstein lighting, pink, tucked in pose, newborn girl

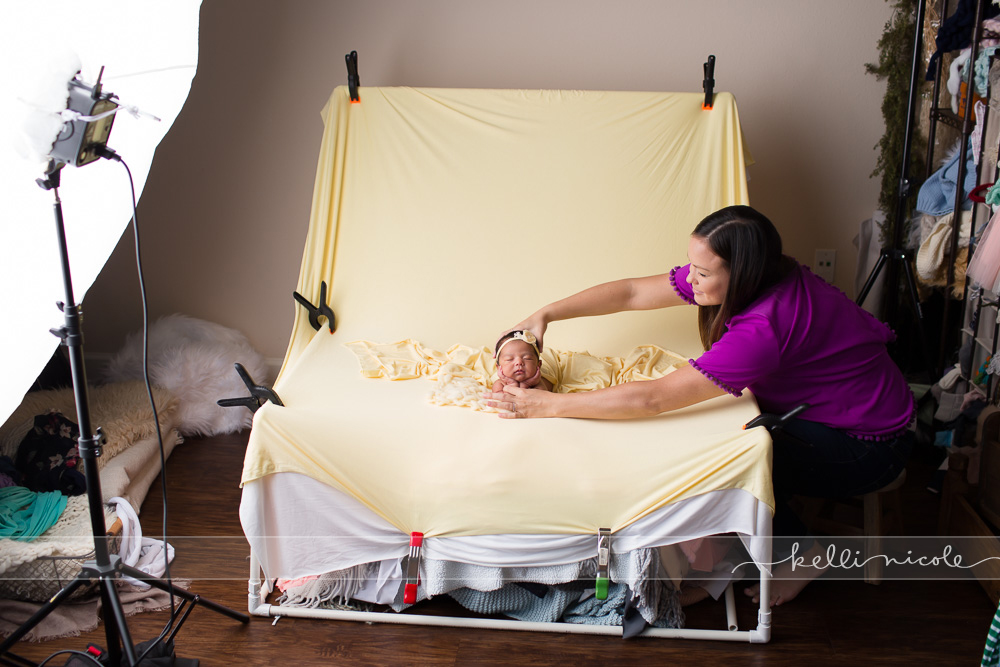
This shot below is when I was standing near her feet. As you can see you’re looking up the nose a little and I didn’t like that angle, so I switched my position.
posed, newborn, photography, session, photo shoot, houston, texas, kelli nicole photography, baby girl, color, newborn photography, houston newborn photographer, studio, newborn boy, newborn posing, newborn photography tutorial, studio newborn lighting, paul c buff einstein lighting, pink, tucked in pose, newborn girl

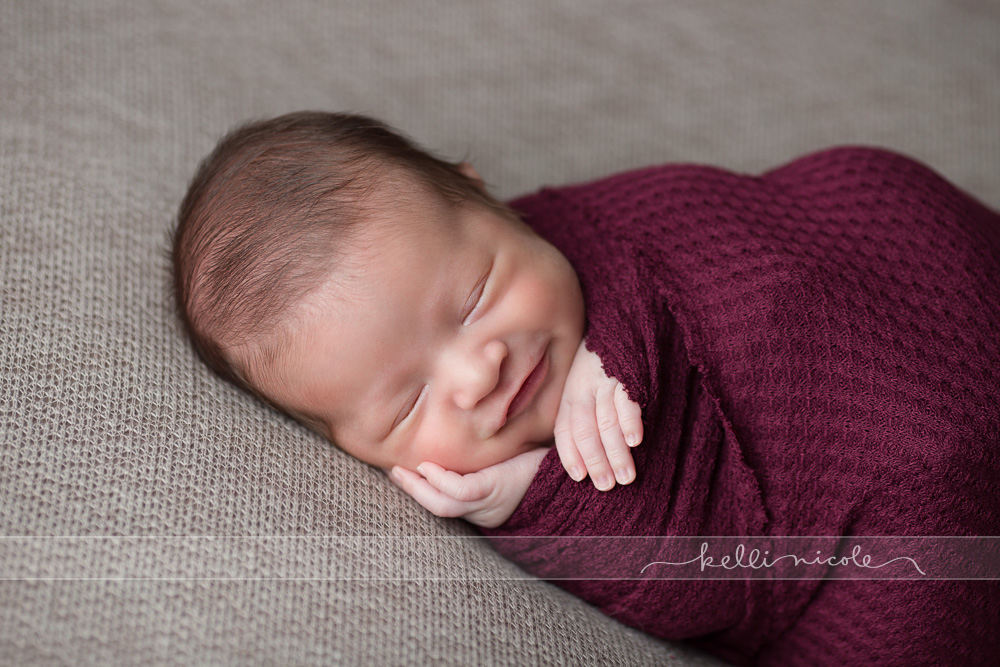
I’m much happier with this angle (below). This is where I was in the behind the scenes picture. You can sort of see how the blanket is clamped on either side to the pvc pipe. This make sure it’s nice and tight. posed, newborn, photography, session, photo shoot, houston, texas, kelli nicole photography, baby girl, color, newborn photography, houston newborn photographer, studio, newborn boy, newborn posing, newborn photography tutorial, studio newborn lighting, paul c buff einstein lighting, pink, tucked in pose, newborn girl

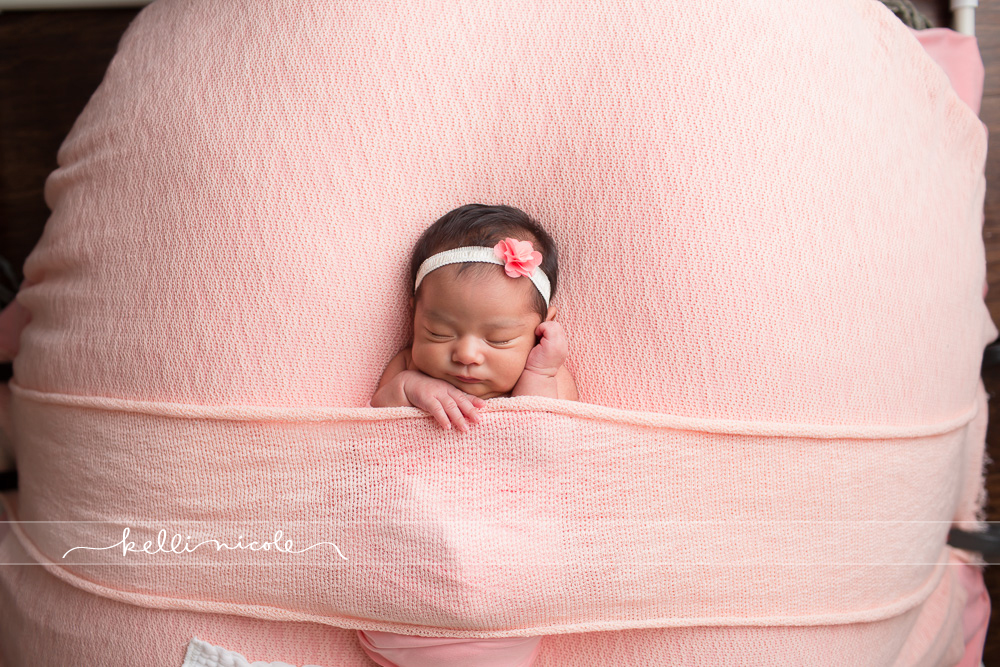
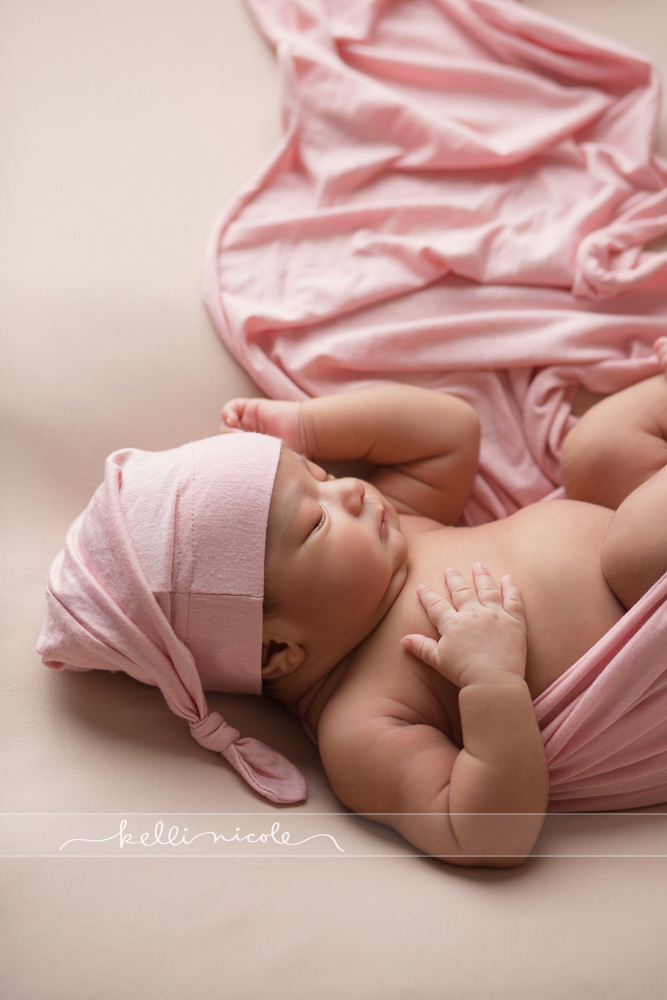
I switched lenses to get closer. 85mm 1.8 lens, ISO 200, 1/200th sec, f2.8posed, newborn, photography, session, photo shoot, houston, texas, kelli nicole photography, baby girl, color, newborn photography, houston newborn photographer, studio, newborn boy, newborn posing, newborn photography tutorial, studio newborn lighting, paul c buff einstein lighting, pink, tucked in pose, newborn girl

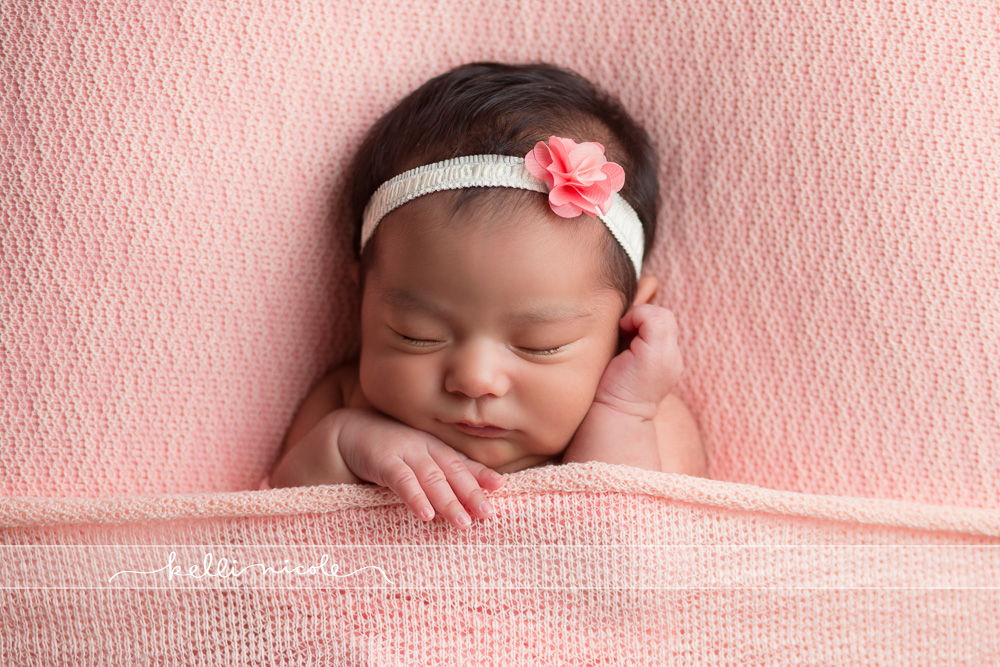
Get more out of a pose by changing angles. I love shooting from this angle as well! Same settings as above.posed, newborn, photography, session, photo shoot, houston, texas, kelli nicole photography, baby girl, color, newborn photography, houston newborn photographer, studio, newborn boy, newborn posing, newborn photography tutorial, studio newborn lighting, paul c buff einstein lighting, pink, tucked in pose, newborn girl

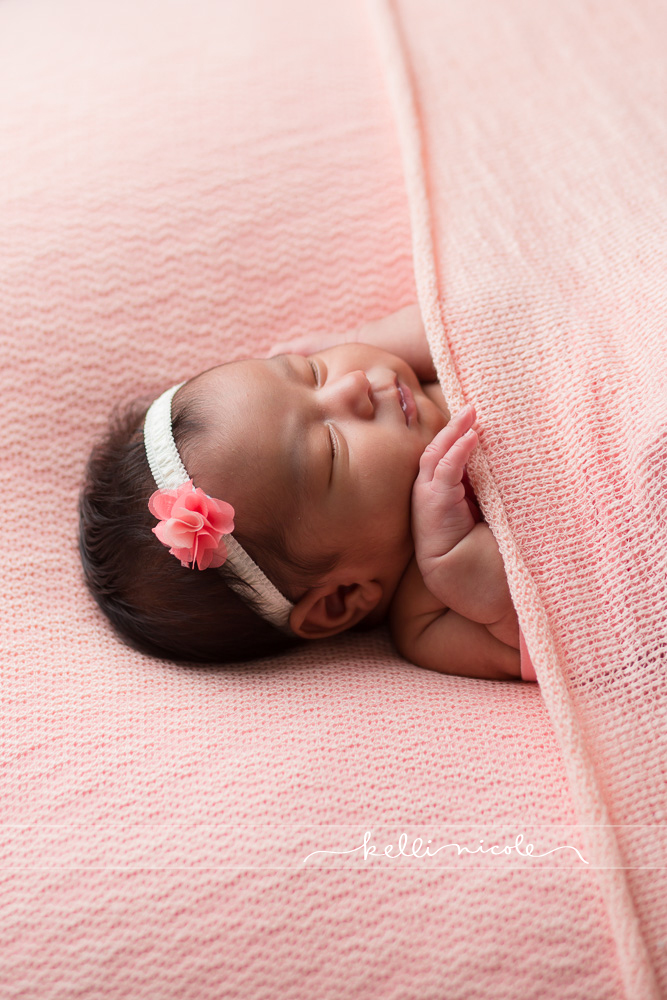
Once again, take note of where the light is in relation to the baby. You want the light to come from the top of the baby’s head and not the feet.posed, newborn, photography, session, photo shoot, houston, texas, kelli nicole photography, baby girl, color, newborn photography, houston newborn photographer, studio, newborn boy, newborn posing, newborn photography tutorial, studio newborn lighting, paul c buff einstein lighting, newborn boy, burgundy, taupe, wrapped newborn

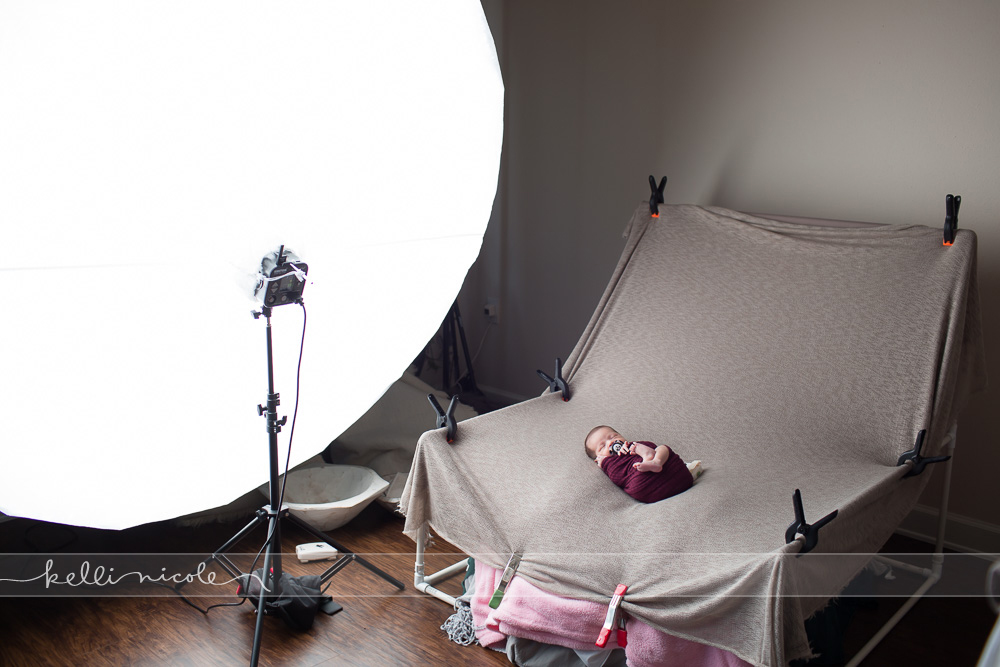
This is the correct way to light the baby. 135mm 2.0 lens, ISO 160, 1/200th sec, f2.8 (same for all the shots in the same setup).posed, newborn, photography, session, photo shoot, houston, texas, kelli nicole photography, baby girl, color, newborn photography, houston newborn photographer, studio, newborn boy, newborn posing, newborn photography tutorial, studio newborn lighting, paul c buff einstein lighting, newborn boy, burgundy, taupe, wrapped newborn

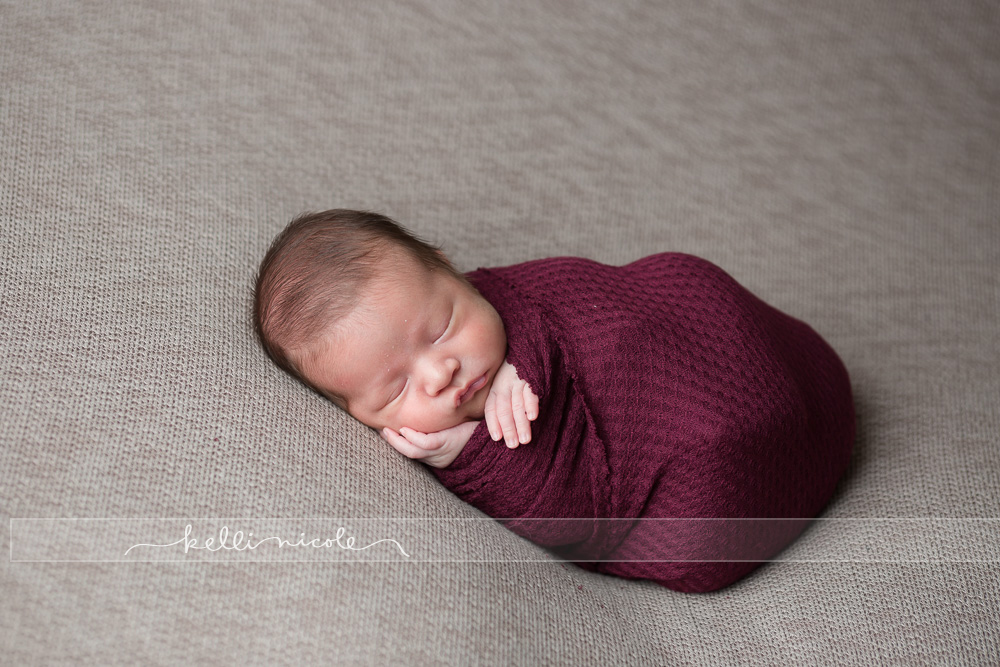
In this picture I turned the baby the opposite direction so the light is coming from his feet. Notice the weird shadows above his nose an don his cheeks. You don’t want that.posed, newborn, photography, session, photo shoot, houston, texas, kelli nicole photography, baby girl, color, newborn photography, houston newborn photographer, studio, newborn boy, newborn posing, newborn photography tutorial, studio newborn lighting, paul c buff einstein lighting, newborn boy, burgundy, taupe, wrapped newborn

Another thing to pay attention to is angles. You generally don’t want to look up baby’s nose. This picture is still cute and isn’t the best example, but you can see the difference for yourself between the two images.posed, newborn, photography, session, photo shoot, houston, texas, kelli nicole photography, baby girl, color, newborn photography, houston newborn photographer, studio, newborn boy, newborn posing, newborn photography tutorial, studio newborn lighting, paul c buff einstein lighting, newborn boy, burgundy, taupe, wrapped newbornposed, newborn, photography, session, photo shoot, houston, texas, kelli nicole photography, baby girl, color, newborn photography, houston newborn photographer, studio, newborn boy, newborn posing, newborn photography tutorial, studio newborn lighting, paul c buff einstein lighting, newborn boy, burgundy, taupe, wrapped newborn
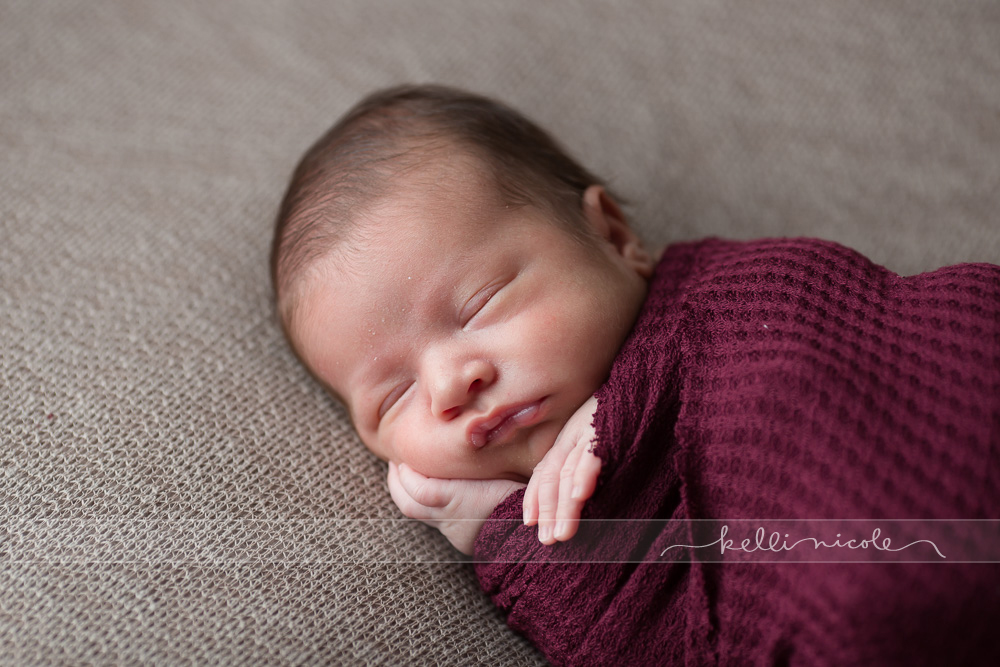
Here’s one last beanbag shot.
posed, newborn, photography, session, photo shoot, houston, texas, kelli nicole photography, baby girl, color, newborn photography, houston newborn photographer, studio, newborn boy, newborn posing, newborn photography tutorial, studio newborn lighting, paul c buff einstein lighting, newborn boy, navy, taupe, wrapped newborn

85mm lens, ISO 160, 1/200th sec, f 2.8
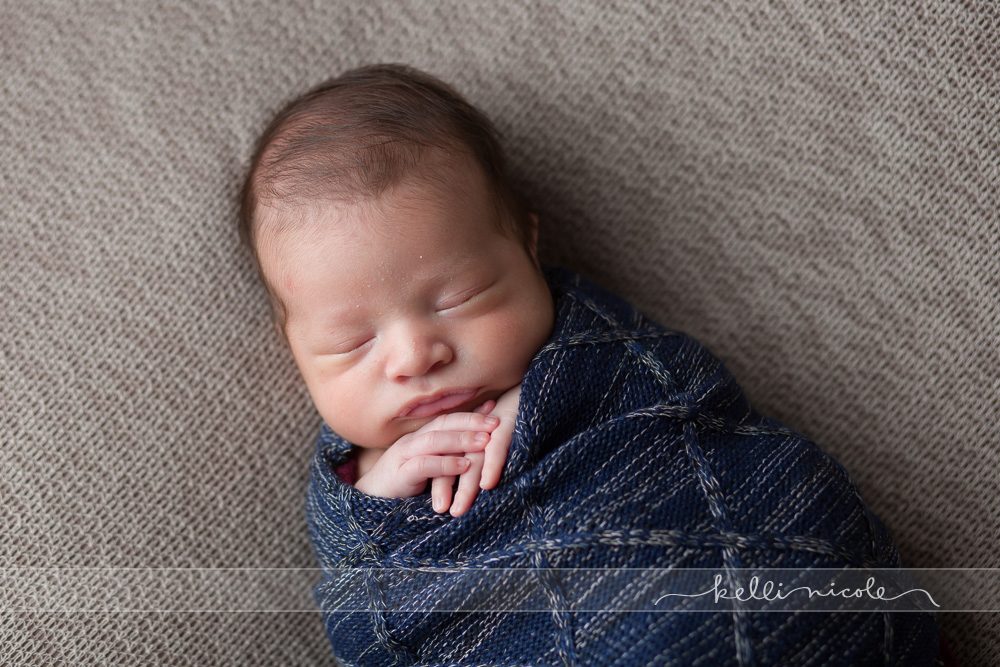
posed, newborn, photography, session, photo shoot, houston, texas, kelli nicole photography, baby girl, color, newborn photography, houston newborn photographer, studio, newborn boy, newborn posing, newborn photography tutorial, studio newborn lighting, paul c buff einstein lighting, newborn boy, navy, taupe, wrapped newborn

Floor Props

I love prop shots! I have way too many props, haha, but it’s a great way to add a lot of variety to a session. I usually do about 3-4 prop shots per session, depending on what the parents want and how the baby does. 

85mm 1.8 lens, ISO 200, 1/200th sec, f2.8

You can see here that the boards I use are reversible! When I want to switch I just flip them over. I just got four 8-foot boards at Home Depot and had them cut in half. I painted one side white and stained one side dark walnut. Make sure you use a stain primer if you do this yourself! I’d like to get more boards to use against the wall as well.

I usually sit behind baby to get this pose down. There’s usually a lot of patting, shushing, and pacifier use and then I’ll go to the front and fix any other little problems with baby’s hands. posed, newborn, photography, session, photo shoot, houston, texas, kelli nicole photography, baby girl, color, newborn photography, houston newborn photographer, studio, newborn boy, newborn posing, newborn photography tutorial, studio newborn lighting, paul c buff einstein lighting, newborn boy, floor prop, white boards, bucket, baby in a bucket

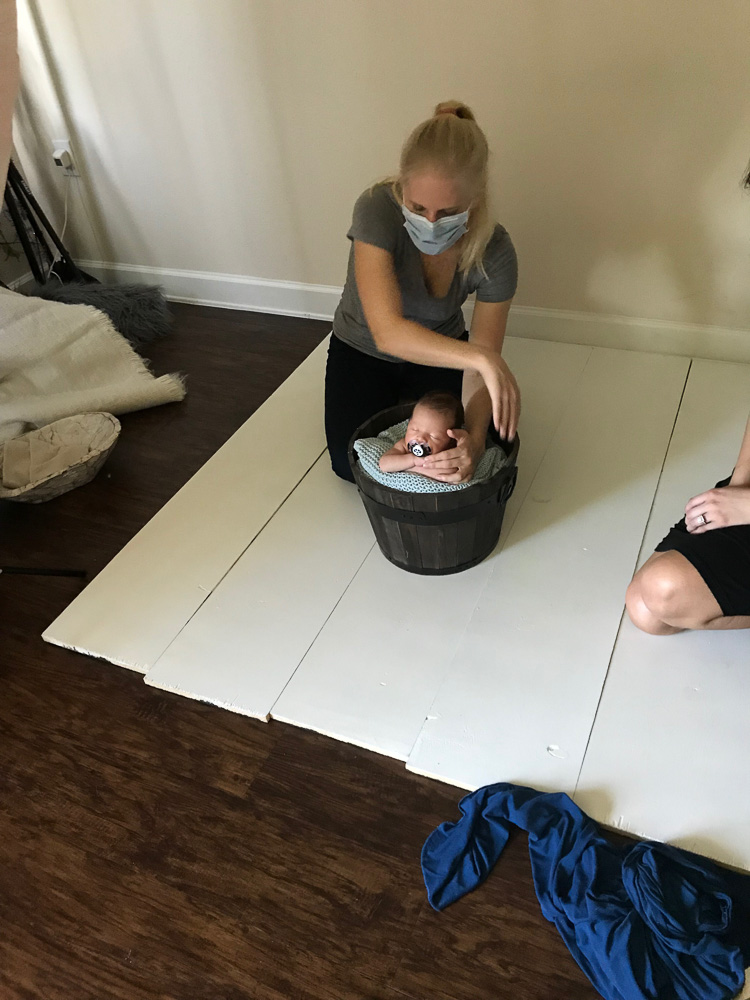
This is how the baby turned out the first time so I took a safe shot (just in case baby freaked out and we couldn’t get anymore pictures) and then tried again. 
posed, newborn, photography, session, photo shoot, houston, texas, kelli nicole photography, baby girl, color, newborn photography, houston newborn photographer, studio, newborn boy, newborn posing, newborn photography tutorial, studio newborn lighting, paul c buff einstein lighting, newborn boy, floor prop, white boards, bucket, baby in a bucket

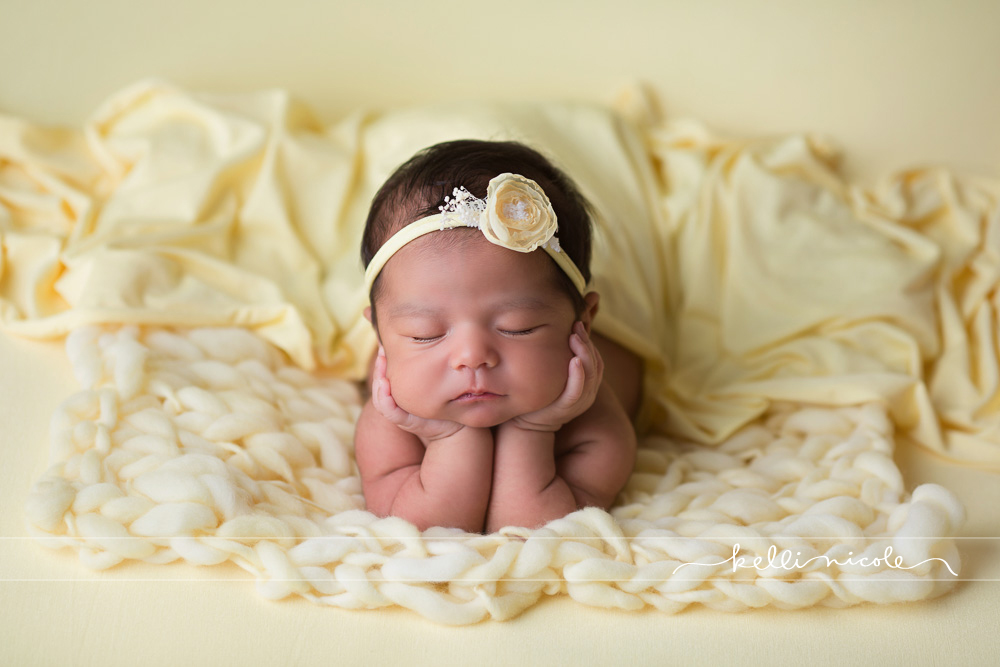
Perfect! I like the chin right on top of the wrist/hands.
posed, newborn, photography, session, photo shoot, houston, texas, kelli nicole photography, baby girl, color, newborn photography, houston newborn photographer, studio, newborn boy, newborn posing, newborn photography tutorial, studio newborn lighting, paul c buff einstein lighting, newborn boy, floor prop, white boards, bucket, baby in a bucket

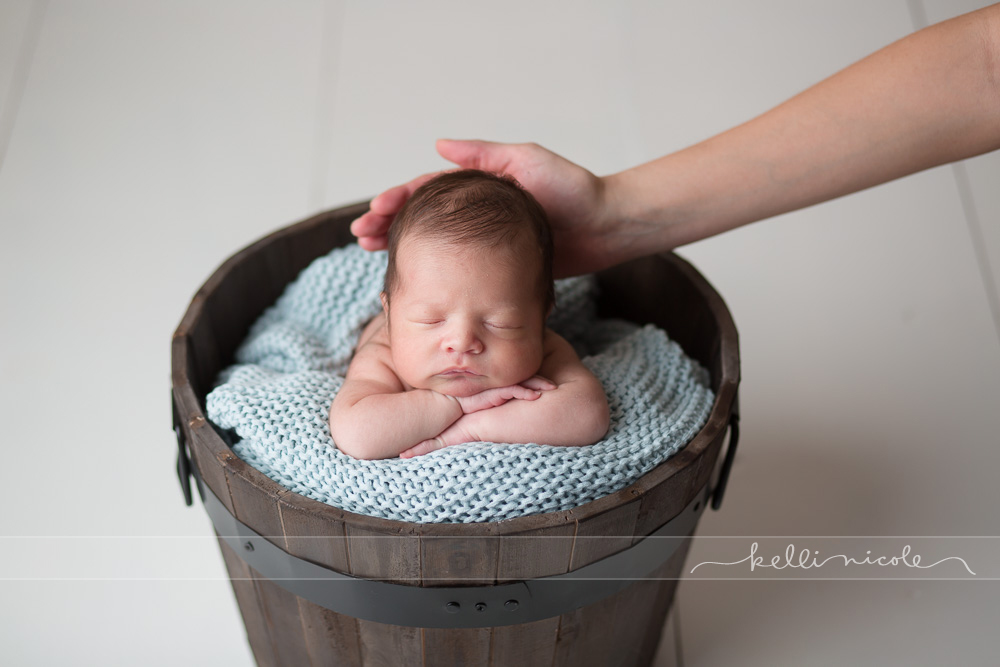
Mom pulled her hand away, but hovered right outside the frame just in case baby decided to move :).posed, newborn, photography, session, photo shoot, houston, texas, kelli nicole photography, baby girl, color, newborn photography, houston newborn photographer, studio, newborn boy, newborn posing, newborn photography tutorial, studio newborn lighting, paul c buff einstein lighting, newborn boy, floor prop, white boards, bucket, baby in a bucket

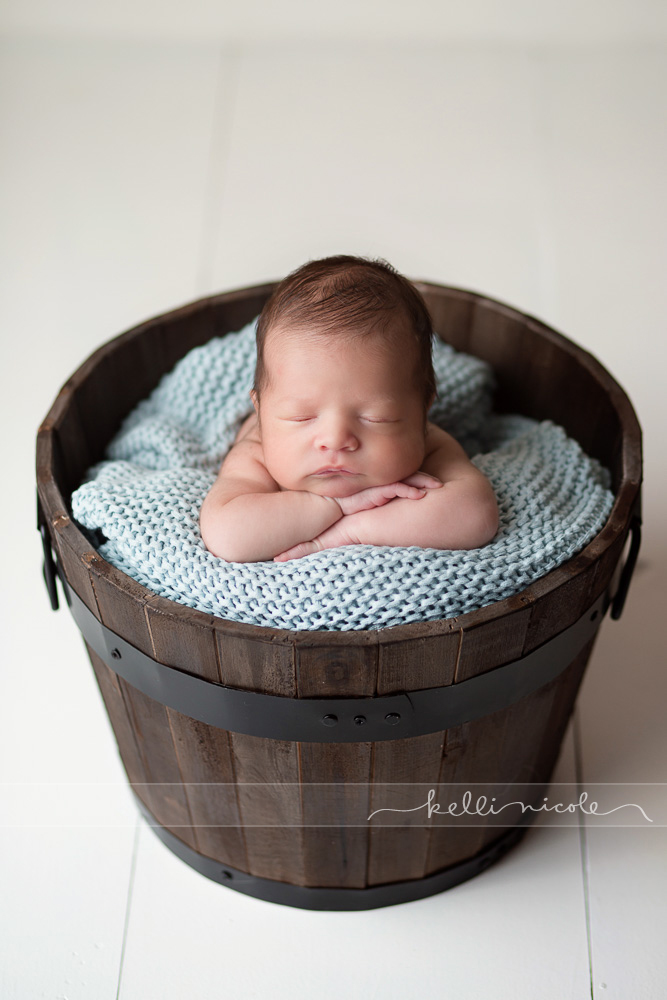
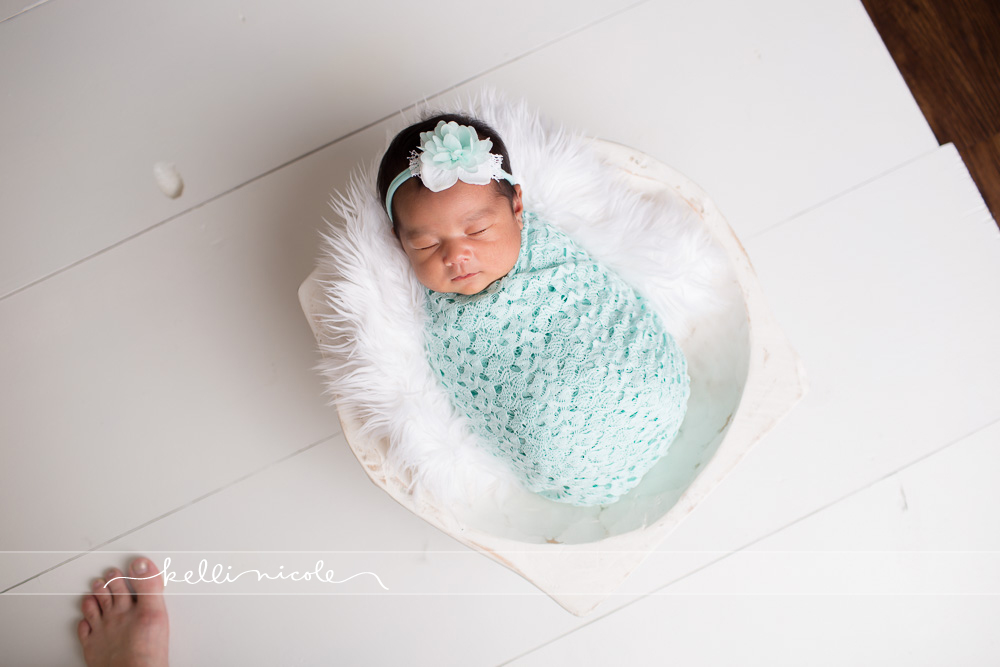
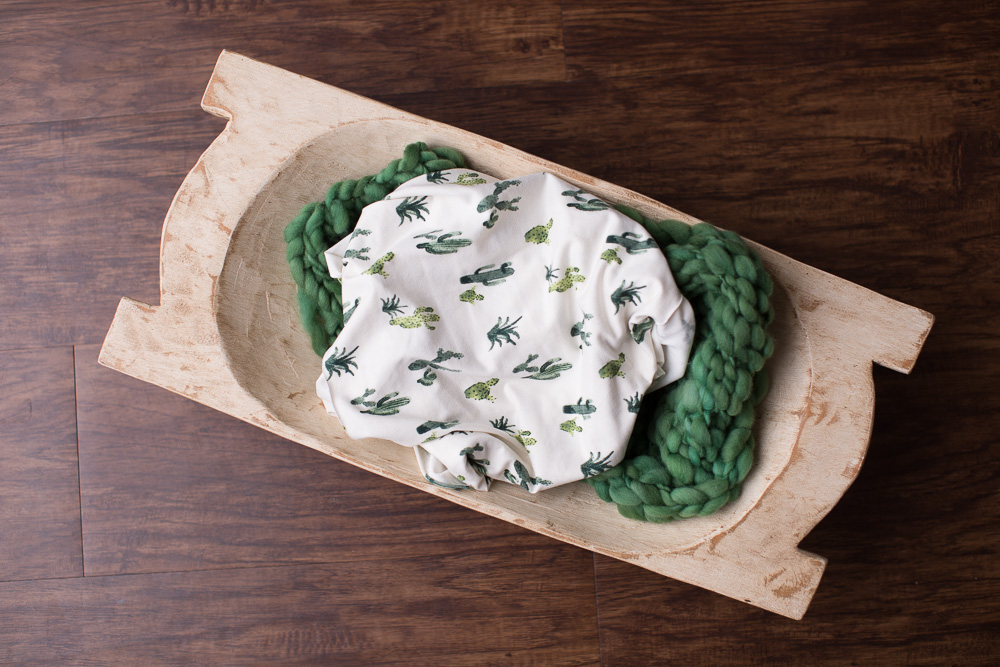
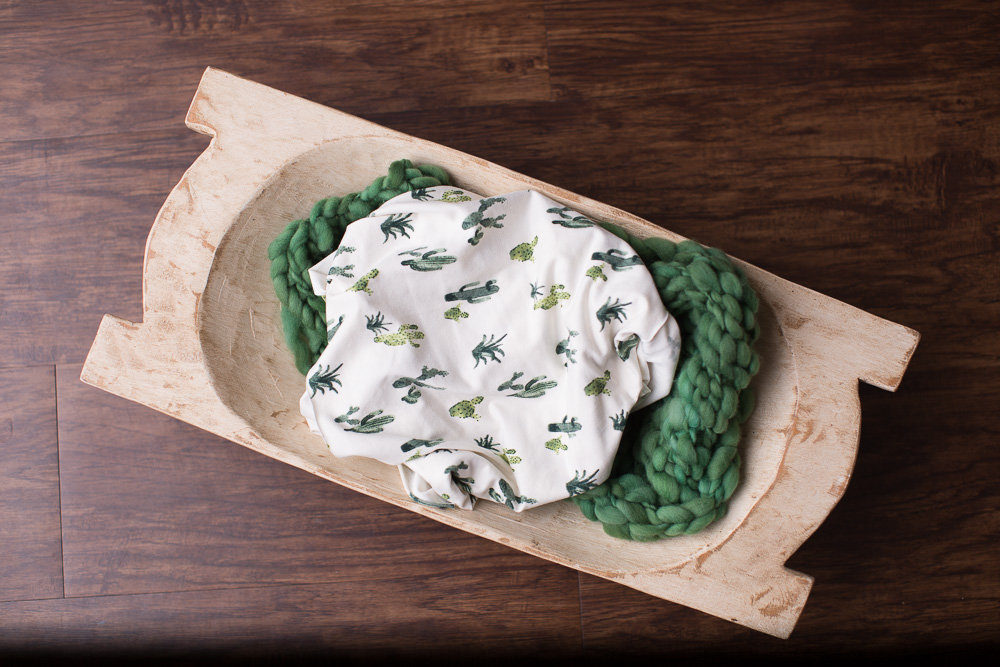
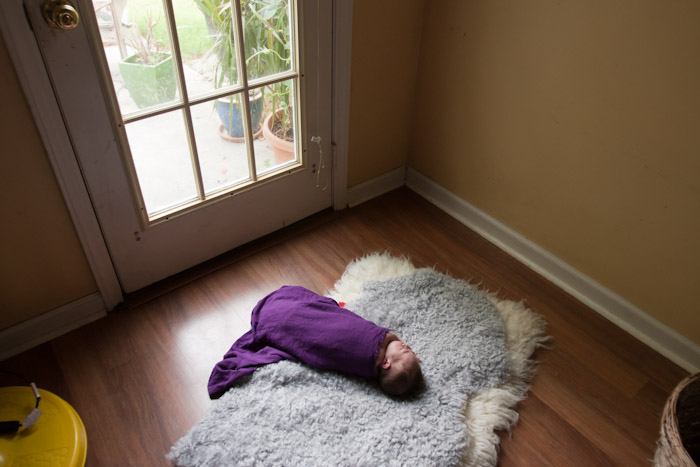
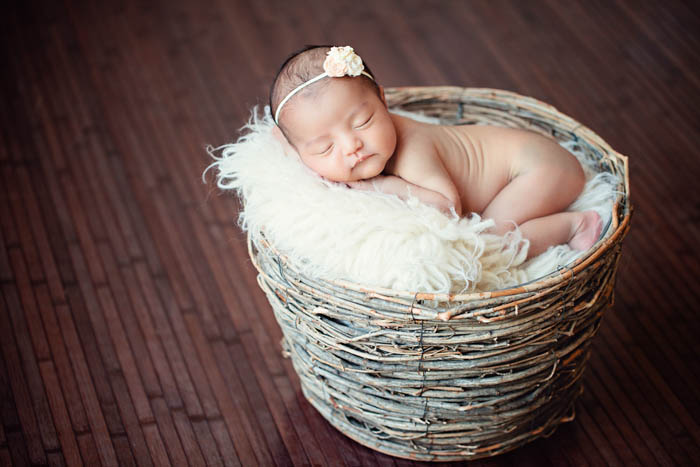
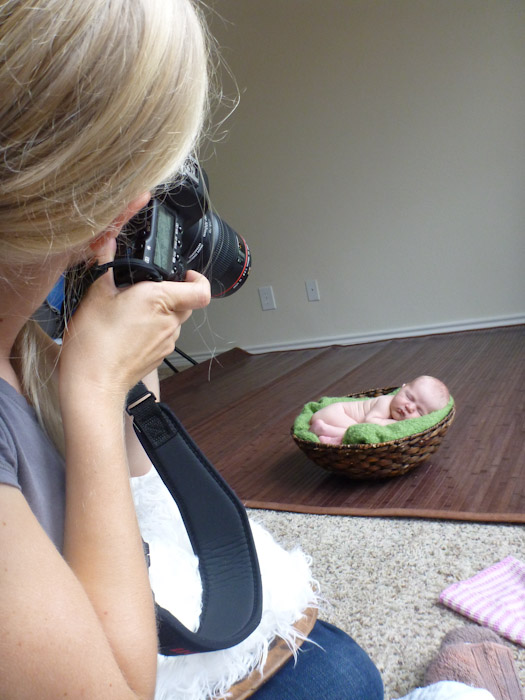
For this next shot I used a flokati as a background and I like to use a bowl like this underneath to keep the baby in place. You can also put padding around the outside of the bowl, like towels or blankets to keep the flokati on the same level.posed, newborn, photography, session, photo shoot, houston, texas, kelli nicole photography, baby girl, color, newborn photography, houston newborn photographer, studio, newborn boy, newborn posing, newborn photography tutorial, studio newborn lighting, paul c buff einstein lighting, newborn boy, floor prop, flokati

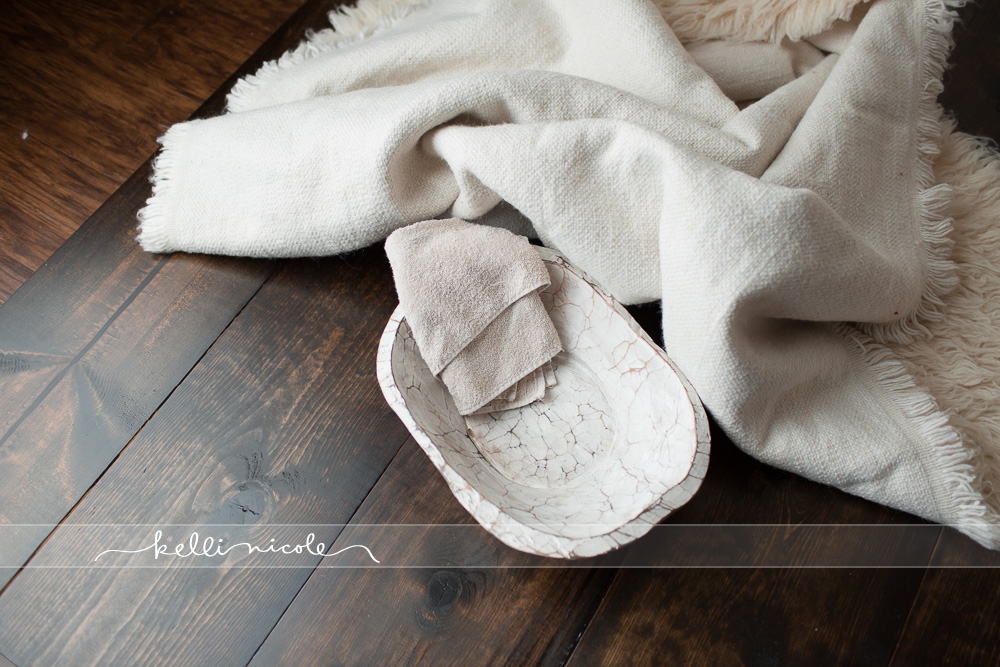
Baby took a little bit of soothing!posed, newborn, photography, session, photo shoot, houston, texas, kelli nicole photography, baby girl, color, newborn photography, houston newborn photographer, studio, newborn boy, newborn posing, newborn photography tutorial, studio newborn lighting, paul c buff einstein lighting, newborn boy, floor prop, flokati

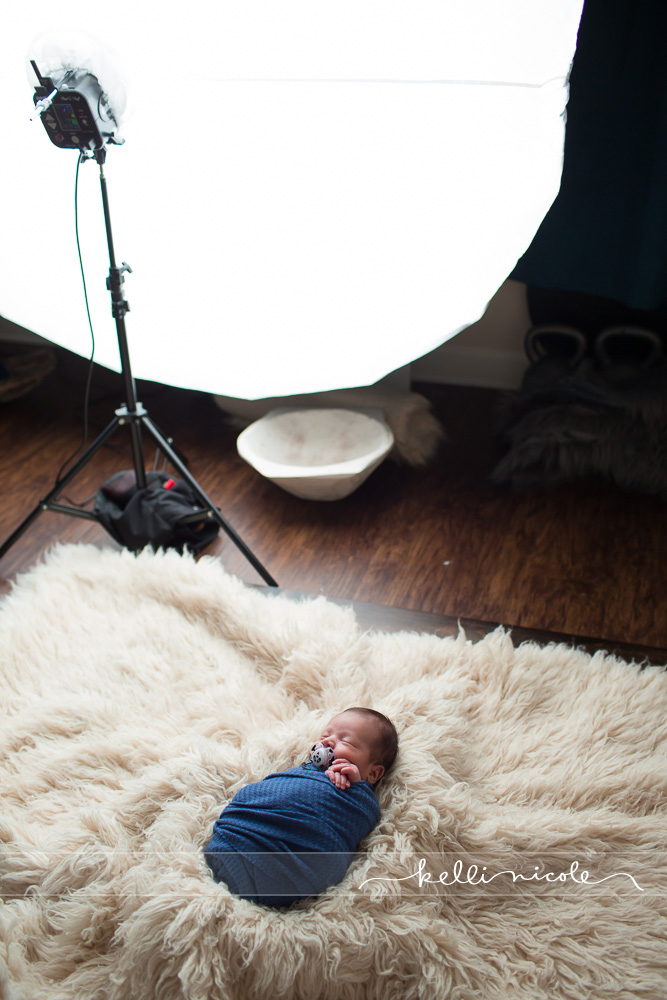
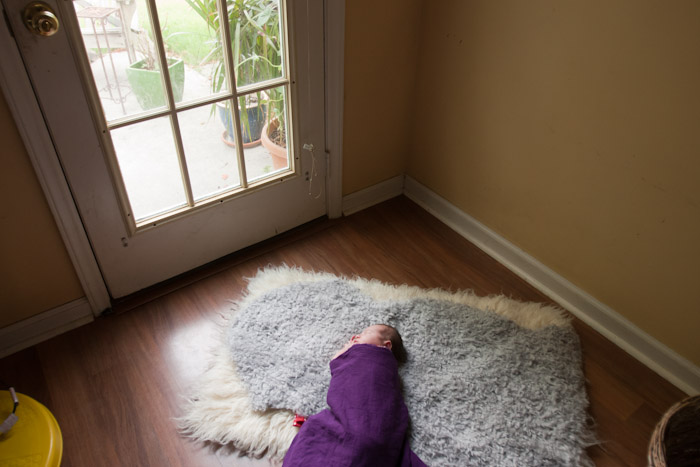
Here you can see the placement of the baby in relation to the light.
posed, newborn, photography, session, photo shoot, houston, texas, kelli nicole photography, baby girl, color, newborn photography, houston newborn photographer, studio, newborn boy, newborn posing, newborn photography tutorial, studio newborn lighting, paul c buff einstein lighting, newborn boy, floor prop, flokati

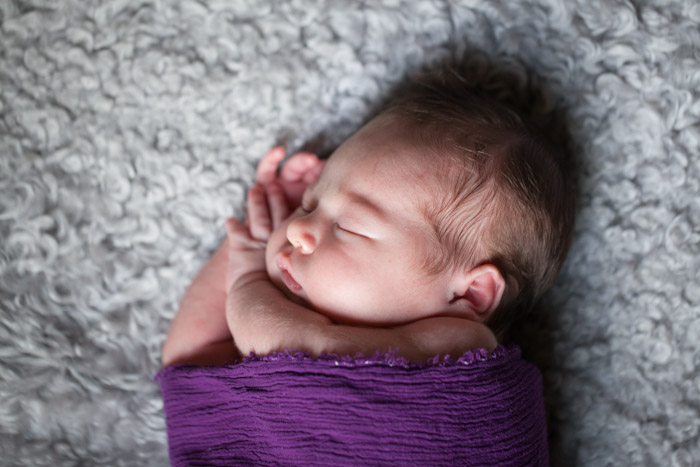
And the final image! 35mm 1.4, ISO 160, 1/200th sec, f2.8posed, newborn, photography, session, photo shoot, houston, texas, kelli nicole photography, baby girl, color, newborn photography, houston newborn photographer, studio, newborn boy, newborn posing, newborn photography tutorial, studio newborn lighting, paul c buff einstein lighting, newborn boy, floor prop, flokati

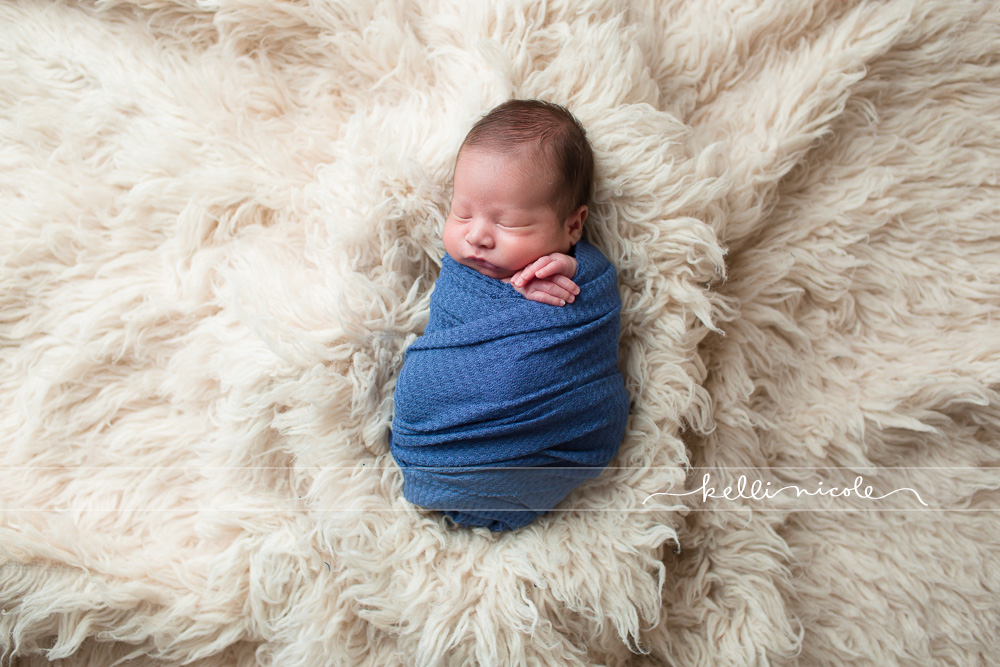
These two shots are also on the floor and baby is laying in a bowl, but it’s the white bowl in the images below.


posed, newborn, photography, session, photo shoot, houston, texas, kelli nicole photography, baby girl, color, newborn photography, houston newborn photographer, studio, newborn boy, newborn posing, newborn photography tutorial, studio newborn lighting, paul c buff einstein lighting, white fur, white background
posed, newborn, photography, session, photo shoot, houston, texas, kelli nicole photography, baby girl, color, newborn photography, houston newborn photographer, studio, newborn boy, newborn posing, newborn photography tutorial, studio newborn lighting, paul c buff einstein lighting, white fur, white background, aqua

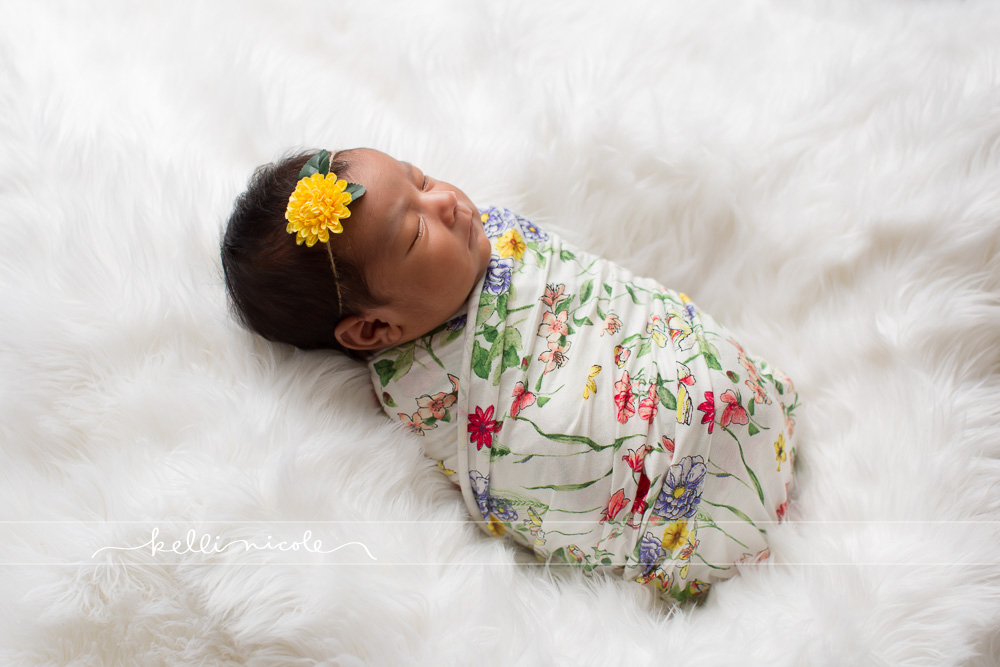
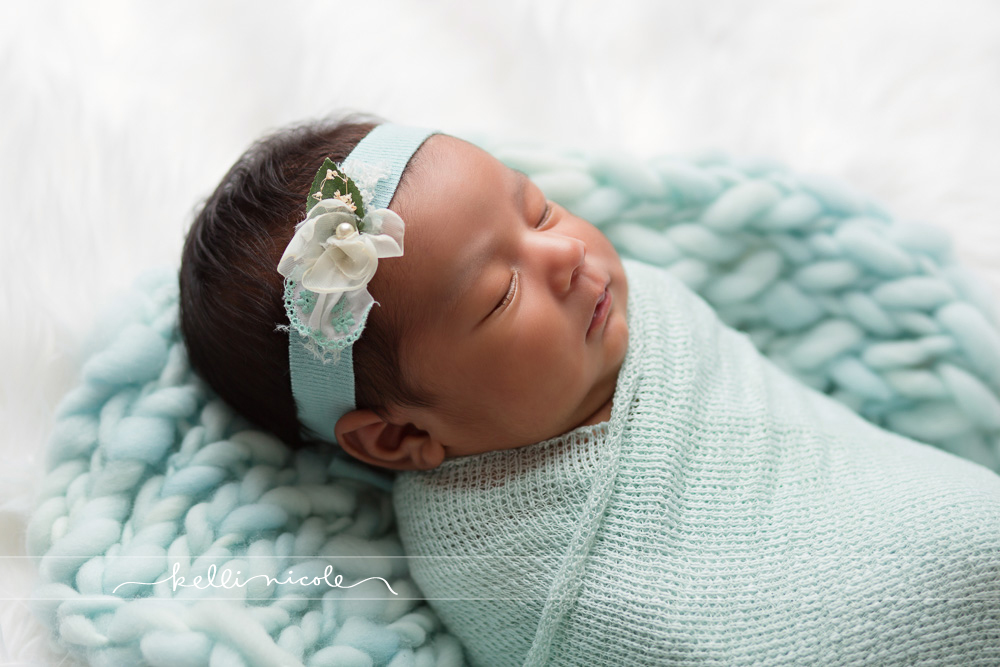
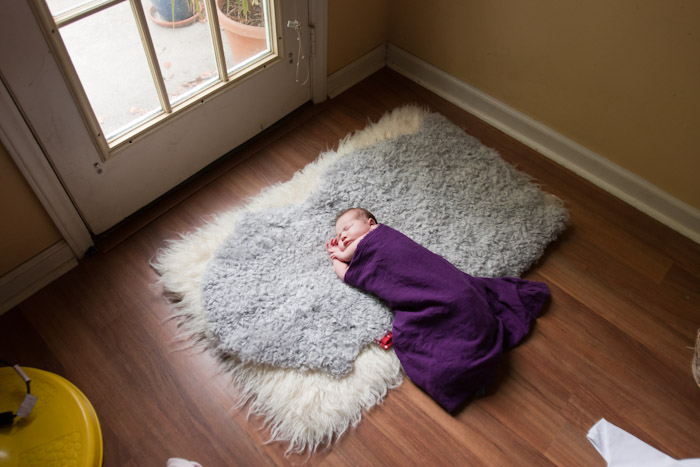
Take not of the position of the light in this image. You want the light to come from the top/side of the baby’s head like this.
posed, newborn, photography, session, photo shoot, houston, texas, kelli nicole photography, baby girl, color, newborn photography, houston newborn photographer, studio, newborn boy, newborn posing, newborn photography tutorial, studio newborn lighting, paul c buff einstein lighting, white fur, white background, white bowl, white flooring, aqua wrap, mint

And it will create beautiful images like this!posed, newborn, photography, session, photo shoot, houston, texas, kelli nicole photography, baby girl, color, newborn photography, houston newborn photographer, studio, newborn boy, newborn posing, newborn photography tutorial, studio newborn lighting, paul c buff einstein lighting, white fur, white background, white bowl, white flooring, aqua wrap, mint

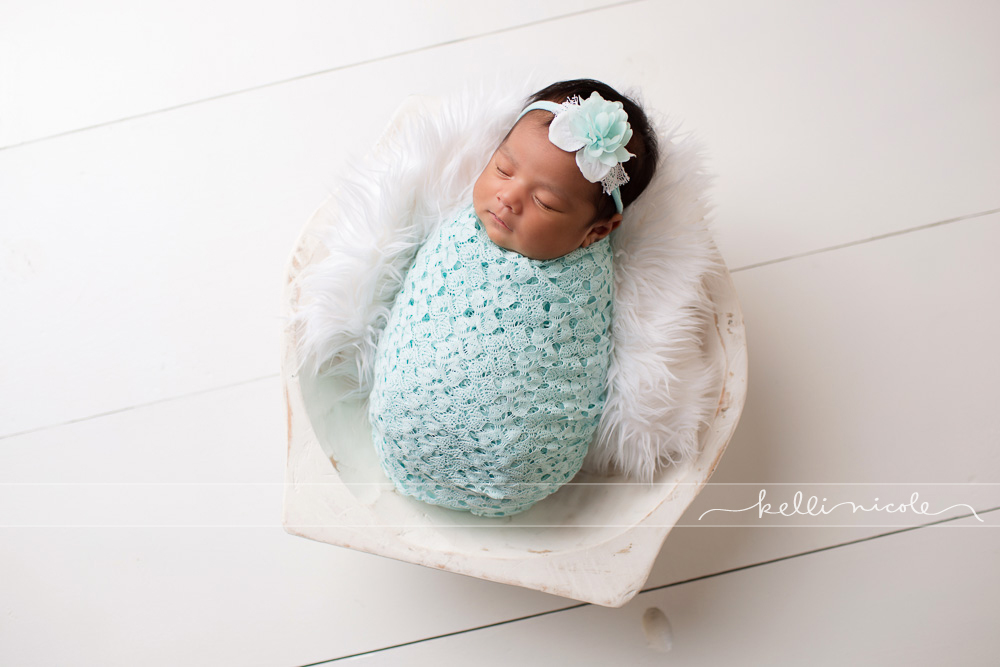
This is the wrong way to light a baby. posed, newborn, photography, session, photo shoot, houston, texas, kelli nicole photography, baby girl, color, newborn photography, houston newborn photographer, studio, newborn boy, newborn posing, newborn photography tutorial, studio newborn lighting, paul c buff einstein lighting, white fur, white background, white bowl, white flooring, aqua wrap, mint

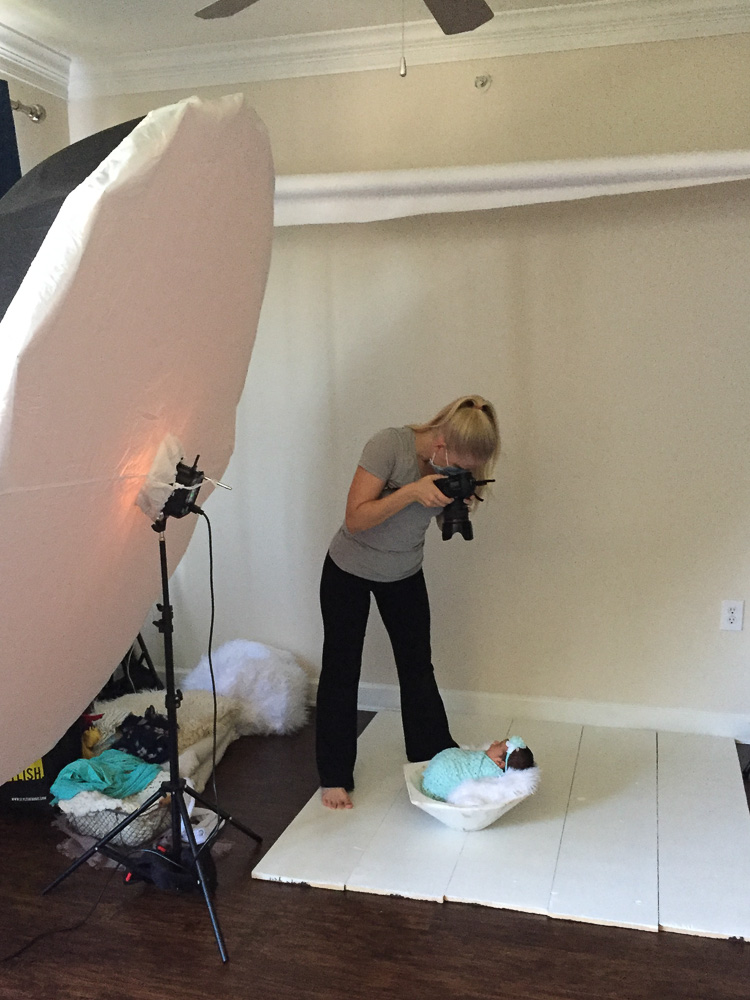
You can see the shadows above the nose. The lighting is not as pretty in my opinion.
posed, newborn, photography, session, photo shoot, houston, texas, kelli nicole photography, baby girl, color, newborn photography, houston newborn photographer, studio, newborn boy, newborn posing, newborn photography tutorial, studio newborn lighting, paul c buff einstein lighting, white fur, white background, white bowl, white flooring, aqua wrap, mint

One last example of bad lighting…posed, newborn, photography, session, photo shoot, houston, texas, kelli nicole photography, baby girl, color, newborn photography, houston newborn photographer, studio, newborn boy, newborn posing, newborn photography tutorial, studio newborn lighting, paul c buff einstein lighting, white fur, white background, kelly green, shamrocks, st patrick's day newborn, four leaf clovers

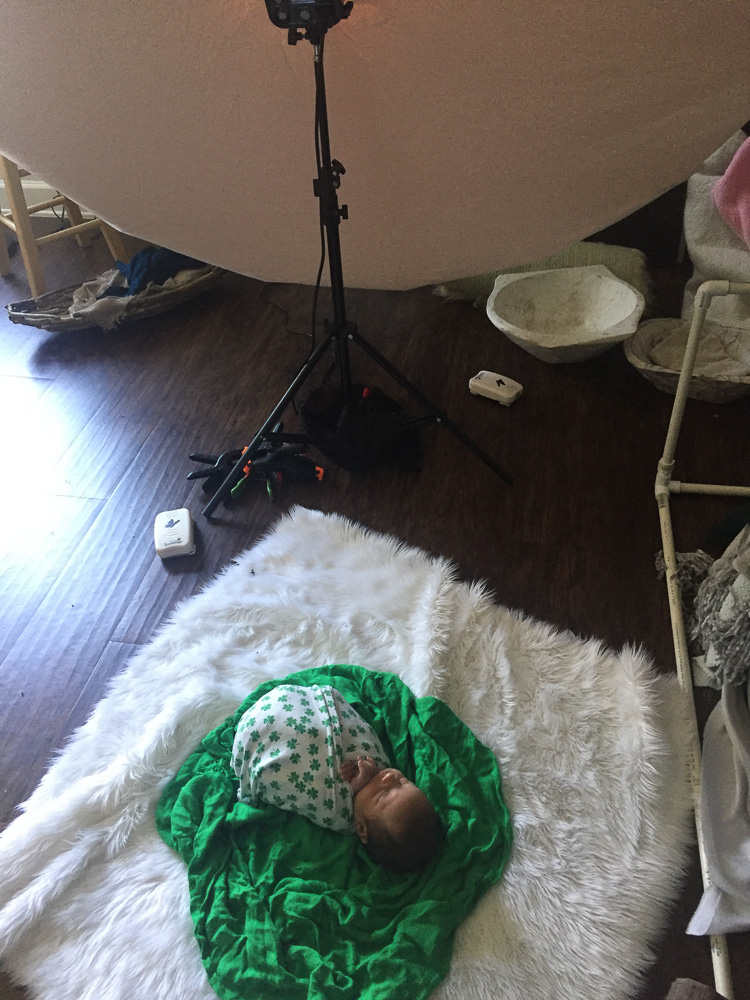
As well as bad hand positioning. The baby’s left hand looks awkward and is covering his face too much. You want to try and get the hands under the chin and/or beside the face. posed, newborn, photography, session, photo shoot, houston, texas, kelli nicole photography, baby girl, color, newborn photography, houston newborn photographer, studio, newborn boy, newborn posing, newborn photography tutorial, studio newborn lighting, paul c buff einstein lighting, white fur, white background, kelly green, shamrocks, st patrick's day newborn, four leaf clovers

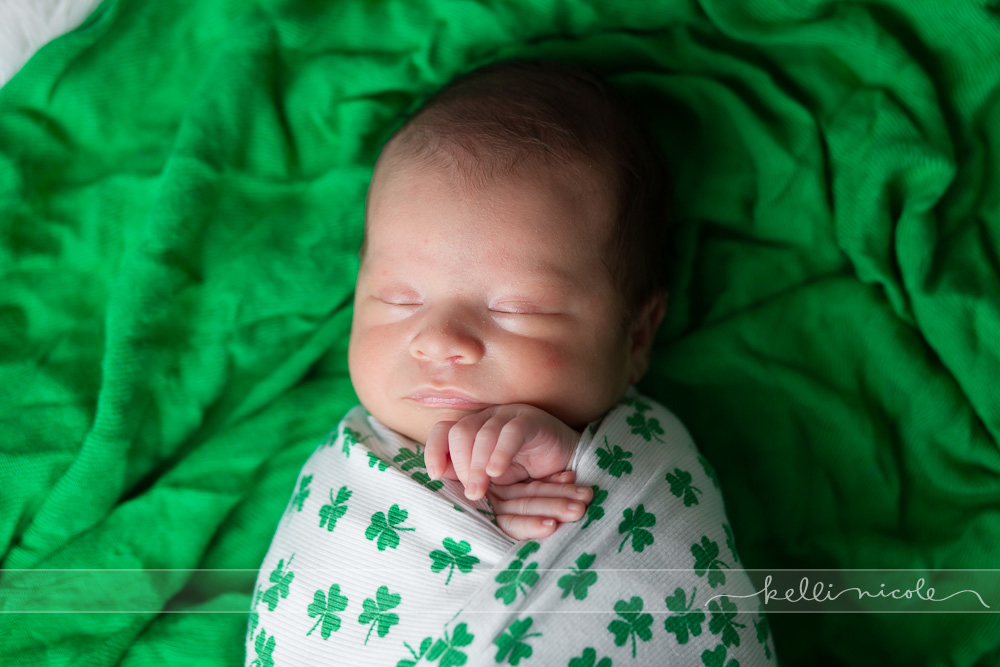
This is a better way to position the baby.posed, newborn, photography, session, photo shoot, houston, texas, kelli nicole photography, baby girl, color, newborn photography, houston newborn photographer, studio, newborn boy, newborn posing, newborn photography tutorial, studio newborn lighting, paul c buff einstein lighting, white fur, white background, kelly green, shamrocks, st patrick's day newborn, four leaf clovers

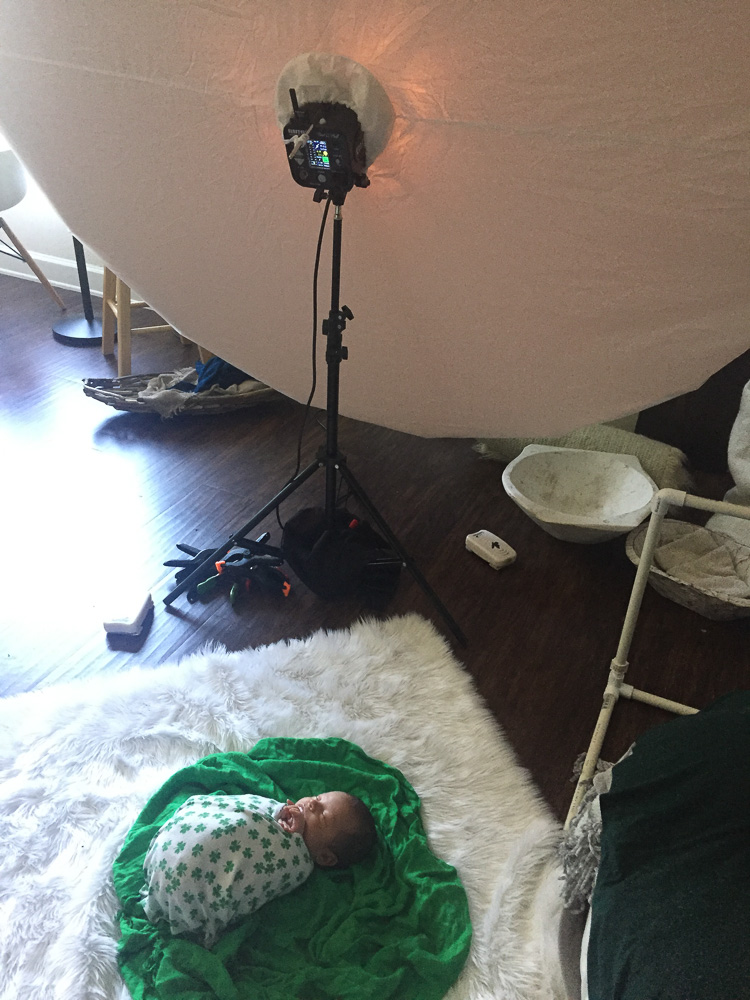
This is better lighting, but now we’re looking up the baby’s nose, so it’s not a great angle. posed, newborn, photography, session, photo shoot, houston, texas, kelli nicole photography, baby girl, color, newborn photography, houston newborn photographer, studio, newborn boy, newborn posing, newborn photography tutorial, studio newborn lighting, paul c buff einstein lighting, white fur, white background, kelly green, shamrocks, st patrick's day newborn, four leaf clovers

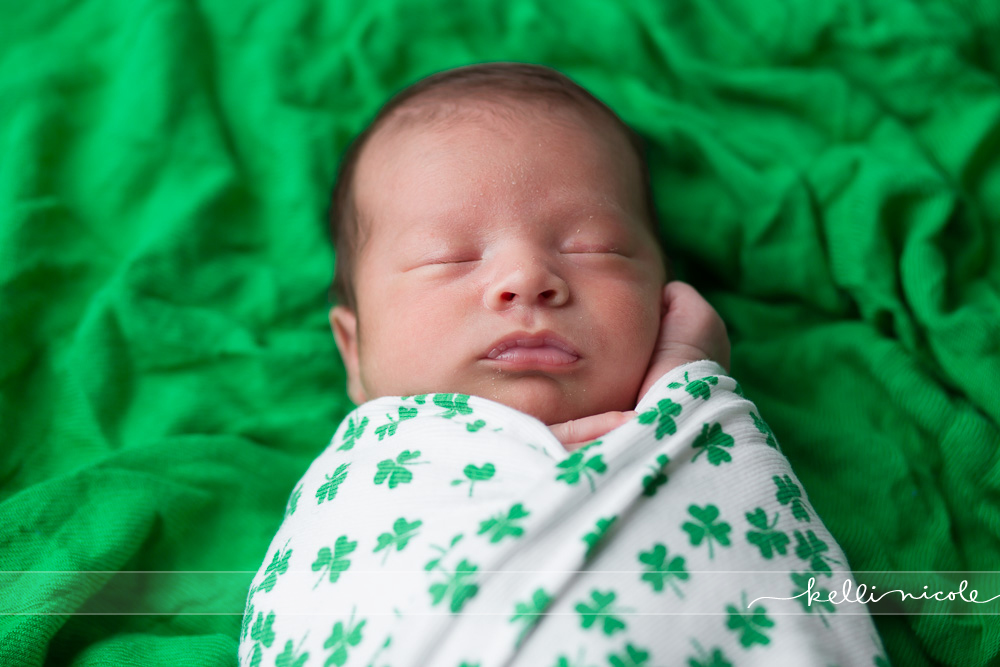
This is a much better angle!
posed, newborn, photography, session, photo shoot, houston, texas, kelli nicole photography, baby girl, color, newborn photography, houston newborn photographer, studio, newborn boy, newborn posing, newborn photography tutorial, studio newborn lighting, paul c buff einstein lighting, white fur, white background, kelly green, shamrocks, st patrick's day newborn, four leaf clovers

Let me know if you have any questions and I’ll do my best to answer them! Happy posing!

Setting up your Paul C Buff Einstein and PLM!

A post for the photographers! This is for anyone who is new to studio lighting and needs a little help getting setup. It’s a step-by-step guide in picture form of how to setup your Paul C Buff Einstein and PLM umbrella! This is the lighting system I use and I love it (along with many other newborn photographers). First, though, one of the most important things you need to be aware of is the sync speed for your camera. I currently shoot with a Canon 5DMKIV and I know that I can shoot up to 1/200th second with no problems, but if I shoot at 1/250th second you’ll see a black box at the bottom of my pictures. The black part will get bigger the faster your shutter speed gets. I generally shoot at 1/160th in case I accidentally bump the shutter speed during a session. 

This was shot at 1/200th second. Nothing is wrong.einstein, paul c buff, plm, 86 inch plm, houston photographer, houston newborn photographer, kelli nicole photography, umbrella, studio lighting, studio newborn photography, einstein setup, setting up an Einstein and plm, setting up paul c buff lighting and umbrella

1/250th second. This one can sometimes be easy to miss even if you’re checking the back of your camera. It’s a good idea to lock your camera so you can’t accidentally change the shutter speed.einstein, paul c buff, plm, 86 inch plm, houston photographer, houston newborn photographer, kelli nicole photography, umbrella, studio lighting, studio newborn photography, einstein setup, setting up an Einstein and plm, setting up paul c buff lighting and umbrella

1/320th second. Obviously a problem.einstein, paul c buff, plm, 86 inch plm, houston photographer, houston newborn photographer, kelli nicole photography, umbrella, studio lighting, studio newborn photography, einstein setup, setting up an Einstein and plm, setting up paul c buff lighting and umbrella

Now, to get started, you’ll need a light stand, of course! I’ve had this one for so many years  I don’t know where I got it anymore. If you have a stand like this you need to have it weighted down. This is not optional. You can get specific bags for this. I’m using my scuba weights because they might as well be used somehow. Just make sure you’re using enough weight, the stand is safe, and it cannot tip over.

*Note, I have since changed my light stand to this one. The base is bigger, but it’s FAR more stable and so much easier to move the light up and down. 

einstein, paul c buff, plm, 86 inch plm, houston photographer, houston newborn photographer, kelli nicole photography, umbrella, studio lighting, studio newborn photography, einstein setup, setting up an Einstein and plm, setting up paul c buff lighting and umbrella

I love this case! If you ever have a need to take down your light or moving it this is great for keeping it safe. einstein, paul c buff, plm, 86 inch plm, houston photographer, houston newborn photographer, kelli nicole photography, umbrella, studio lighting, studio newborn photography, einstein setup, setting up an Einstein and plm, setting up paul c buff lighting and umbrella einstein, paul c buff, plm, 86 inch plm, houston photographer, houston newborn photographer, kelli nicole photography, umbrella, studio lighting, studio newborn photography, einstein setup, setting up an Einstein and plm, setting up paul c buff lighting and umbrella

Behold the Einsteineinstein, paul c buff, plm, 86 inch plm, houston photographer, houston newborn photographer, kelli nicole photography, umbrella, studio lighting, studio newborn photography, einstein setup, setting up an Einstein and plm, setting up paul c buff lighting and umbrella

Set it on your light stand and make sure it’s tight and secure! I like to keep it at an angle like this, but I know people who use it straightened out as well. Play around with it!einstein, paul c buff, plm, 86 inch plm, houston photographer, houston newborn photographer, kelli nicole photography, umbrella, studio lighting, studio newborn photography, einstein setup, setting up an Einstein and plm, setting up paul c buff lighting and umbrella

This is important! You’ll need to take this back cover off before you put the umbrella or any other modifier on and before turning the power on. If you don’t take it off the modeling light will heat up and burn a hole in the plastic, which can obviously cause problems. Lift the little lever (there’s one on each side, use two hands for this) and carefully remove the black cover. Keep it in the carrying case or a safe place you won’t forget. einstein, paul c buff, plm, 86 inch plm, houston photographer, houston newborn photographer, kelli nicole photography, umbrella, studio lighting, studio newborn photography, einstein setup, setting up an Einstein and plm, setting up paul c buff lighting and umbrella

This is where I keep my umbrella when I’m not using it (the case it came with). einstein, paul c buff, plm, 86 inch plm, houston photographer, houston newborn photographer, kelli nicole photography, umbrella, studio lighting, studio newborn photography, einstein setup, setting up an Einstein and plm, setting up paul c buff lighting and umbrella

Look at the size of this thing! It really is huge, but there’s nothing better! I have this umbrella and this black cover. Just open it and lock it like any regular umbrella. einstein, paul c buff, plm, 86 inch plm, houston photographer, houston newborn photographer, kelli nicole photography, umbrella, studio lighting, studio newborn photography, einstein setup, setting up an Einstein and plm, setting up paul c buff lighting and umbrella

I keep the black cover on at all times. The picture below shows how you secure it to the edges.einstein, paul c buff, plm, 86 inch plm, houston photographer, houston newborn photographer, kelli nicole photography, umbrella, studio lighting, studio newborn photography, einstein setup, setting up an Einstein and plm, setting up paul c buff lighting and umbrella

Next is the diffuser. I have this one. Put it around the middle and then pull it over the edges a little at a time until you get it around the whole thing.
einstein, paul c buff, plm, 86 inch plm, houston photographer, houston newborn photographer, kelli nicole photography, umbrella, studio lighting, studio newborn photography, einstein setup, setting up an Einstein and plm, setting up paul c buff lighting and umbrella
einstein, paul c buff, plm, 86 inch plm, houston photographer, houston newborn photographer, kelli nicole photography, umbrella, studio lighting, studio newborn photography, einstein setup, setting up an Einstein and plm, setting up paul c buff lighting and umbrella einstein, paul c buff, plm, 86 inch plm, houston photographer, houston newborn photographer, kelli nicole photography, umbrella, studio lighting, studio newborn photography, einstein setup, setting up an Einstein and plm, setting up paul c buff lighting and umbrella

To put the umbrella on the light make sure the top screw is loose so there’s room to fit the pole in and then slide it in! After you do that tighten the screw on top so it stays in place and pull and tighten the diffuser around the Einstein so the light doesn’t burn it. 

  1. Loosen screw on top
  2. Put umbrella pole in the hole
  3. Tighten screw on top to a point where it feels secure, but don’t force it
  4.  Make sure diffuser is pulled around the light case so it’s not touching the frosted glass dome.
    einstein, paul c buff, plm, 86 inch plm, houston photographer, houston newborn photographer, kelli nicole photography, umbrella, studio lighting, studio newborn photography, einstein setup, setting up an Einstein and plm, setting up paul c buff lighting and umbrella
    einstein, paul c buff, plm, 86 inch plm, houston photographer, houston newborn photographer, kelli nicole photography, umbrella, studio lighting, studio newborn photography, einstein setup, setting up an Einstein and plm, setting up paul c buff lighting and umbrella

This sync cord (below) will come with the Einstein. You can use it if you have the right camera for it, but I highly recommend getting a trigger system. The part on the right plugs into the Einstein.einstein, paul c buff, plm, 86 inch plm, houston photographer, houston newborn photographer, kelli nicole photography, umbrella, studio lighting, studio newborn photography, einstein setup, setting up an Einstein and plm, setting up paul c buff lighting and umbrella

Like this. einstein, paul c buff, plm, 86 inch plm, houston photographer, houston newborn photographer, kelli nicole photography, umbrella, studio lighting, studio newborn photography, einstein setup, setting up an Einstein and plm, setting up paul c buff lighting and umbrella einstein, paul c buff, plm, 86 inch plm, houston photographer, houston newborn photographer, kelli nicole photography, umbrella, studio lighting, studio newborn photography, einstein setup, setting up an Einstein and plm, setting up paul c buff lighting and umbrella

This part plugs into your camera, as long as you have the right port. einstein, paul c buff, plm, 86 inch plm, houston photographer, houston newborn photographer, kelli nicole photography, umbrella, studio lighting, studio newborn photography, einstein setup, setting up an Einstein and plm, setting up paul c buff lighting and umbrella

My camera does have it. If you look at the side of your camera look for that little lightening bolt/flash symbol. einstein, paul c buff, plm, 86 inch plm, houston photographer, houston newborn photographer, kelli nicole photography, umbrella, studio lighting, studio newborn photography, einstein setup, setting up an Einstein and plm, setting up paul c buff lighting and umbrella

Lift up the flap and that middle port with the lightning bolt/flash symbol is where you plug in the sync cord (the middle port).einstein, paul c buff, plm, 86 inch plm, houston photographer, houston newborn photographer, kelli nicole photography, umbrella, studio lighting, studio newborn photography, einstein setup, setting up an Einstein and plm, setting up paul c buff lighting and umbrella

I recommend getting these instead, though! A cord is a pain because it gets tangled in things, kids trip over it and can damage the cord or pull down your light or camera. Unless you’re photographing products or something that never moves, get these. Don’t wait. The transmitter is on the left and goes on your camera and the transceiver is on the right and goes on the Einstein.

einstein, paul c buff, plm, 86 inch plm, houston photographer, houston newborn photographer, kelli nicole photography, umbrella, studio lighting, studio newborn photography, einstein setup, setting up an Einstein and plm, setting up paul c buff lighting and umbrella

Put the transceiver in that spot on top of the Einstein.

einstein, paul c buff, plm, 86 inch plm, houston photographer, houston newborn photographer, kelli nicole photography, umbrella, studio lighting, studio newborn photography, einstein setup, setting up an Einstein and plm, setting up paul c buff lighting and umbrellaeinstein, paul c buff, plm, 86 inch plm, houston photographer, houston newborn photographer, kelli nicole photography, umbrella, studio lighting, studio newborn photography, einstein setup, setting up an Einstein and plm, setting up paul c buff lighting and umbrella einstein, paul c buff, plm, 86 inch plm, houston photographer, houston newborn photographer, kelli nicole photography, umbrella, studio lighting, studio newborn photography, einstein setup, setting up an Einstein and plm, setting up paul c buff lighting and umbrella

This transmitter goes on your camera’s hot shoe.einstein, paul c buff, plm, 86 inch plm, houston photographer, houston newborn photographer, kelli nicole photography, umbrella, studio lighting, studio newborn photography, einstein setup, setting up an Einstein and plm, setting up paul c buff lighting and umbrella

But first you’ll need to take the cover off and insert the CR2032 Lithium coin cell battery that should come with it. You can get extras anywhere (like these). Then put the cover back on. I recommend using a rubber band around the cover as they are extremely prone to breaking.

einstein, paul c buff, plm, 86 inch plm, houston photographer, houston newborn photographer, kelli nicole photography, umbrella, studio lighting, studio newborn photography, einstein setup, setting up an Einstein and plm, setting up paul c buff lighting and umbrella

Then you can put it on the hot shoe of your camera. I didn’t have to do anything to turn it on, it just worked after one or two test shots. 
einstein, paul c buff, plm, 86 inch plm, houston photographer, houston newborn photographer, kelli nicole photography, umbrella, studio lighting, studio newborn photography, einstein setup, setting up an Einstein and plm, setting up paul c buff lighting and umbrella

Plug in the power cord to the Einstein and to the wall or power source and you’re ready to go!einstein, paul c buff, plm, 86 inch plm, houston photographer, houston newborn photographer, kelli nicole photography, umbrella, studio lighting, studio newborn photography, einstein setup, setting up an Einstein and plm, setting up paul c buff lighting and umbrella

To turn on the light hit the power button. The modeling light is what is always on, and is much dimmer than the actual flash, which only flashes when you take a picture. To adjust both at the same time hit the adjust button while that top box is blue. 

einstein, paul c buff, plm, 86 inch plm, houston photographer, houston newborn photographer, kelli nicole photography, umbrella, studio lighting, studio newborn photography, einstein setup, setting up an Einstein and plm, setting up paul c buff lighting and umbrella

If you want to adjust the modeling light and make it stronger, but leave the flash dim so you can use a shallow depth of field, hit the function button until the box that is blue is the one shown below. While that box is blue you can hit the adjust button and it will only adjust the modeling light while leaving the flash at a lower power. You can see in this image that the modeling light (the yellow line) is at a higher power. 

einstein, paul c buff, plm, 86 inch plm, houston photographer, houston newborn photographer, kelli nicole photography, umbrella, studio lighting, studio newborn photography, einstein setup, setting up an Einstein and plm, setting up paul c buff lighting and umbrella

Hit function again several times until the box that says READY is blue (like below) and then you can turn on and off the beep and whether or not the modeling light powers down between shots. I keep this set at off. 

einstein, paul c buff, plm, 86 inch plm, houston photographer, houston newborn photographer, kelli nicole photography, umbrella, studio lighting, studio newborn photography, einstein setup, setting up an Einstein and plm, setting up paul c buff lighting and umbrella

Last thing to note, eventually your modeling light and flash tube will burn out, just like any other light. I keep extras on hand for when that happens! You can get the modeling light here and the flash tube here.

Now you’re ready to experiment! Have fun! If you need some tips on how to light a newborn session you can look at this post!

Comprehensive list of everything I linked above:
Lightstand (this is what I currently use)
Avenger Lightstand (another stand people like, but I don’t have)
Carrying bag
Einstein Flash unit
86″ Umbrella
Black outer cover
Diffusion fabric
Transmitter
Transceiver
Modeling lamp (extra)
Flashtube (extra)
Batteries


Tutorial: Photographing Newborns in Natural Light

UPDATE: I switched to studio lighting last year and recently created a blog post about my lighting setup here and a new post about photographing newborns with studio lighting here. Continue on for good information about natural light photography, though :). 

For photographers who want to take better newborn pictures or moms who want to take their own, here are some tips for a successful newborn session!

Photograph the baby early!  I like to photograph newborns between 6-14 days.  With preemies you can obviously stretch that out, depending on how early they were born. I’ve done newborn sessions on babies several months old! However, around 3 weeks many start getting baby acne, peeling skin, cradle cap and often lose their hair (usually, right on top so they get that nice old man look).  

Keep it warm.  Newborns are used to very warm temperatures after spending so much time inside their mamas and they have difficultly regulating their body temperature, so if you want to keep them happy while naked you have to turn the temperature up!  I use a space heater to help warm up the area where I’m shooting.  Shut any doors to the room you’re in, close a/c vents, and if it’s hot outside you can just open the window.  Somewhere around 80 degrees or so is ideal.

White noise.  I use a white noise machine to help drown out the sound of the camera shutter and talking.  It usually also helps babies to sleep as they’re used to constant noise and they might not stay asleep if it’s too quiet.  The womb is not a very quiet place.

Make sure baby has a full belly.  Before you start a feeding undress the baby so he’s in only a diaper and wrap him loosely in a blanket (if you swaddle too tightly he may fall asleep too quickly and won’t be full enough).  If you need to take a feeding break at any point during the session, take it!  Some babies will want to eat again after 45 minutes and some take 45 minutes to eat.  Don’t try to cut the baby off early.  Patience is key. If baby is exclusively breastfed make sure mama has a good supply and no feeding issues or it will be too stressful for mama and baby. I often wait until at least 10 days old, but sometimes longer may be necessary.

Bounce, rock, shush, pat. There are different ways to soothe a newborn, and these usually work really well.  Do you have a yoga ball? If I’m working with a baby that won’t go to sleep I hold the baby close to me, park my butt on a yoga ball, and bounce.  It mimics the motion of the mother walking when the baby was in the womb and if the baby is ready to go to sleep he’ll usually be out in about 5 minutes or so.  I also use the vibrating piece from a bouncy seat to help keep babies sleeping during posing when they start fussing and it works really well!

In this shot I’m using the vibrating thing (I’ve since removed those bars) to help keep the baby asleep.  I always put a blanket or burp cloth between the baby and the vibrating thing so the cold plastic doesn’t rub against the baby. (update: I currently use a lullavibe vibrating pad)

After I removed it she stayed asleep!

The beanbag.  You can now purchase bean bags specifically for photographing newborns, but you can also just purchase a regular child’s bean bag and over-stuff it.  I have one from overstock.com (similar to this one), but I also used to use one from Target (I bought two and took a lot of the filling from one and put it in the other).  You can probably buy filling or make your own as well. (Update: I currently use a large dog bed, but you can use many things besides a beanbag! A large couch cushion could work as well in a pinch, just make sure to cover it with pee pads :)). 

When I photographed one of my nieces (where many of the following pictures are coming from…she’s 3 now :P), I couldn’t bring a bean bag on the plane, so my sister got this kid-sized $20 one from Target (which her other kids loved) and we tied off one section with a rubber band so it would be tight and give the appearance of being overstuffed.

I  always layer several blankets so it looks smoother…

and then place a puppy pad on the top one to catch any accidents and make sure there’s no leakage to the blankets below.

I then layer all the blankets that I’m going to use, with a puppy pad between each one.  If you have a holey blanket on top make sure you have something underneath that you don’t mind showing through a bit (a similar color if you can).  I also have a backdrop stand that I use to pull the blanket tight (when I don’t have access to one I use a chair or something that I can clip the blankets to, such as in this case).

Light.  You can see a post I did on indoor light here.  Basically, look for a large source of bright light without hot spots (and turn off all indoor lights as they’re a different color than outside light).  North facing or south facing windows are best.  East-facing windows work in the afternoon, and west-facing windows work in the morning.  You typically get more/better light on a floor higher than the 1st, but not always.  Removing screens lets in more light.  Sliding glass doors are perfect. I usually shoot at 10 am if I have north facing light. 

These are shots of a set-up in a client’s home (take note of how low the windows are and where the beanbag/prop lay in relation to the window):

These are resulting shots from the set-ups above:

The way you face the baby is very important.

You can see in this next shot how the baby is positioned facing away from the window.  Don’t do that.

Facing the baby this way creates unpleasant and unnatural shadows (the nose shadow should always be below or beside the nose, not above it).

Facing the baby towards the window, like this, is much prettier.

Here’s another example of how to angle the light.  In this first shot the light is coming from the bottom of the baby and it makes all these weird shadows.

The next two angles are much better.

This next angle is my favorite.

Don’t shoot up the nose.  I see this all the time on facebook and most of the time it’s very unflattering (even for a baby).

We don’t need to see up her nose.  This next shot is much nicer. Also, this shot would be better if I was able to get her hand under her cheek! Sometimes I’ll take a “safe shot” first in case the baby freaks out when I try to move their hand. 

Here’s my actual setup in my current studio (a spare bedroom).  The rest of the pictures (with the exception of a couple of the siblings shots) were taken in this room.

Here are a few shots taken at my studio.  Note that when the babies are naked they are often on their bellies.  They’re much more likely to stay asleep when you’re posing them and moving them around when they’re on their bellies.

This next photo is a favorite and can be a little difficult at times! Make sure the baby’s butt is lower than their head and their head/arms have a more firm support. Something like a boppy is too soft, but you can use a rolled-up bath towel underneath a few blankets. 

You can see that when I photograph the baby on her belly I pretty much always pull out her hand underneath her cheek.  It helps you to see the baby’s whole face so she’s not burrowed into the blanket. You want to make sure we can see both eyes!

When I setup a shot with the parents I often pose with their baby so they know what to do and I put their hands into position before I hand over the baby (below).  Take note of the puppy pads underneath the mom so if the baby has an accident it doesn’t get all over the carpet.

Then I place the baby and remove the diaper!  This is sometimes disconcerting :). With many poses you can place a disposable breast-pad where the diaper would normally go, and it can help soak up little accidents!
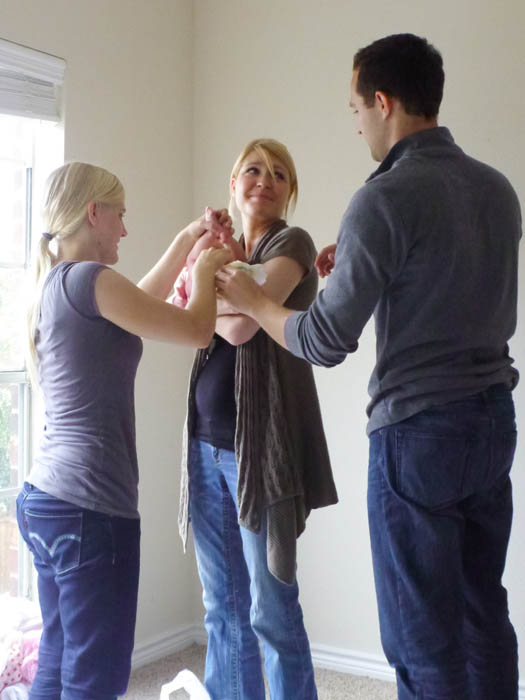
I get everything just right with the baby’s arms and legs and then I hop on my step-stool and shoot away (I’m really short and the most flattering angle to photograph other people is from above).

Here’s another image from that session.  You can see that I’m standing close to the window (the source of light) rather than in the middle of the room (though I occasionally do that for a back-lit shot).

And the resulting shot!  Their little heads are heavier than the rest of their bodies, so I often put a rolled-up towel underneath the blanket to prop up their heads (I did in this image).  You want to keep the head higher than the bum.

Often, I’ll put a baby in a prop and the baby fusses.  Instead of taking the baby out I try to calm her where she is.  Here, you can see that I’m patting the baby’s bum and cradling her head while the mom is letting her suck on her finger (a pacifier works great too!).  I’m probably also rocking her a little with my legs.

One more action shot!  You’ll see that I don’t have a hardwood floor in my studio so I use a bamboo mat underneath the prop pictures.

Don’t forget to leave enough space for the baby’s body! Make sure there’s a big hole for the body to rest in and have a support for the head under the blanket (like a rolled up hand towel). 

Get in close.  Don’t forget to capture those tiny baby parts!

If the baby is fussy and moving around swaddling is a good way to get some cute shots while helping him settle down.

I often get the best smiles right after a feeding when they’re swaddled!

Embrace awakeness.  Everyone loves to see your newborn’s eyes.  Go ahead and shoot away if your little one’s eyes are open.  If her arms are flailing around swaddle her to keep her hands down.  You’ll have to take A LOT and get rid of the bad ones.  They often move their eyes and lips so rapidly that you might not know what you’ve got until you’re looking at the images later. Make sure there’s a lot of light or the movement will cause blurry body parts!

Sibling shots!  Photographing a rambunctious toddler with a newborn is not always easy.  There are a few poses I usually try when I’m working with siblings.

The first one is when the older child is sitting in a chair, on the floor, or on a bed.  I lay the baby’s head down on the sibling’s lap with her butt/legs on the side for younger children (on her back if she’s swaddled, on her belly if she’s naked) and I always keep a parent very close in case the big brother/sister decides to push the baby off.

Another pose I try is laying the siblings down together on their backs.  Sometimes I have the older sibling hold the baby and sometimes I lay their heads next to each other. This pose can often be difficult with children under about 3. Sometimes showing them a photo of what you want them to do will help! This pose is much easier to do when the baby is swaddled. 

If we can’t get one of those to work I’ll put the baby in a prop and try to get the older sibling to hug/kiss/look at the baby. If the sibling still doesn’t want to get close I’ll try hiding something small and fun (like a coin or a fruit snack) behind the baby and encourage the toddler to go find it. 

The most important thing to keep in mind during a newborn session is the safety of the baby.  Don’t do anything that will jeopardize the baby’s safety.  If you’re using a prop that’s high like this next one, make sure there’s always someone spotting the baby and making sure he doesn’t accidentally wiggle off. Often, in my own photos I’ve photoshopped parents out of the image!  Never leave the baby unattended!

I hope this helps!  Happy photographing!

Finding Indoor Light for Portraits

When I do an indoor shoot (such as for my newborn sessions), I always wander around the location looking for the best light.  I know many people aren’t sure what “great light” really means, so I hope this post helps!

When I do an indoor shoot I always shoot right next to a window or glass door if possible.  Most photographers love huge north-facing windows (one of the first things I learned about photography when I was about 15, thanks mom!).  North-facing is so great because you never get harsh, direct sunlight.

The pictures below are all from my own apartment, which has east-facing windows.  In the morning the sun goes directly into the windows and creates what we call “hot-spots.”  Hot-spots are terrible for taking photographs.  In this first shot, you can see the the light is slightly diffused by the blinds, but it still creates bright light with many funky shadows.

As the day progresses, this hot-spot will move closer and closer to the window/door until it’s gone.  This next picture was taken at about 10 am and the bright spots are almost gone!  You can see that to properly expose for the light, the rest of the room looks very dark.  Bright light like this creates harsh shadows on faces and causes people to squint.

Ah, isn’t this better?  The blinds are still down, but the light is much softer.  You can just barely see the shadows the blinds leave on the floor.  You may also notice that this area is decently sized and uncluttered.  I often move furniture around to get a big enough space to work with!

This is much better!  The blinds are up, allowing for the most light.  I also removed the screen outside to bring in more light, which is soft and pretty.  This is the type of light you’d get from north or south-facing windows all day.  If the window is east-facing, you’d get this light in the late morning/afternoon.  If the window is west-facing you’d get this light in the morning/early afternoon.

You can see that there’s still a shadow by the wall at the bottom of the window, which is okay, but I would move my subject out of that shadow and into the light.  The best light will come from windows/doors that reach all the way to the floor (I love sliding glass doors for this reason), but you can still get good light next to a window that’s higher up as long as raise your subject somehow or move them over out of the shadow.

Here are some shots of my hands (I’m jealous right now of people with children; insta-models!).  This is in harsh light found in the first two pictures.  The blinds are up and the shadows from the window pane are harsh and dark.  The light is super bright and the kind that would make a person squint.

Doesn’t my hand (and the background!) look so much lovelier?  This is in the light from the afternoon.  No harsh shadows, no bright lights, and no squinting :)!

And now for a real live (small) person.  This picture was taken in the exact same spot in the afternoon.

Another thing to consider when looking for good light is to look for things outside the window that could possible block a large portion of that good light from making it through, such as a tree or several bushes.  The best light comes from a window that doesn’t have anything like a porch or other overhang outside of it (though mine does have a balcony right outside, so it’s not awful, just not the best).

Happy light-hunting!

Q&A #ONE!

Okay, I know, I’m finally getting around to doing this! The more questions I get, the more often I’ll try to do things like this :). Let me know what you think! Oh, there IS one thing, I want to make sure it’s okay for me to use your first name if you asked a question, so this time I’ll keep it anonymous. Let me know in the future!

First up, what type of camera do you use? I have two camera bodies that I take shooting, one as a main body and one as a back-up. I’ve been to two weddings where one of my cameras failed for no apparent reason (one right in the middle of the cake-cutting) so it is so absolutely necessary to bring back-up gear with you to important events! My main body is the Canon 5D Mark II and my back-up is my “old” Canon 40D. If you have specific questions about what camera YOU should get, email me. While I’ve always been a Canon shooter I have no qualms recommending a Nikon or Canon camera, both are great options and have different strengths and weaknesses.

Do you save the RAW file and the final version? And how are you organizing your backup? When I upload pictures from a shoot they immediately go into a program called Adobe Lightroom. All my files start out as RAW images and are .CR2’s instead of .JPEG’s (ie image_0001.CR2). When I upload to Lightroom they all get converted to .DNG files. DNG’s are like a universal lossless compact RAW file. In 10 years Photoshop and other programs probably won’t carry support for the type of file that my current camera shoots, but it will always support a DNG file. I always delete the CR2 files and save the DNG’s. I don’t save JPEG’s as I can easily export them later, but I do save any JPEG’s that I’ve edited and retouched. I organize all my pictures by year and month and I’m lucky enough to have my own built-in IT guy who made me a server for back-up. I didn’t even ask. In my actual desktop I have two 1-TB drives (one that backs-up automatically) and then I transfer to the server in a separate location for additional back-up. Before this system I owned about 13 external hard drives (I still have most of those actually…) and I just made sure I had at least two copies of everything.

I have my Mom’s nice camera…is there a setting that’s best for doing indoor shots? Either I don’t use the flash and my pictures are blurry, or I end up using it, and then they look, well, like I’ve flashed a bright light at my kids right before taking the picture (not good). …what would be your advice for getting good shots indoors? For instance, my two boys were snuggling with each other in bed tonight, and I wanted to get a cute picture of them, but there’s not much lighting in that room, what would you have done? It sounds like you have a dSLR? This is a bit of a tricky question, as every indoor setting will be different and there are several things that could be done, based on the equipment you own. The first thing, however, is to take it off of auto so you can be in control. In a dark situation without flash you’ll first need to raise the ISO. Check your manual (you should be able to find them online) if you don’t know where these buttons are! The higher the ISO the more “noisy” or “grainy” the picture will look, but it’s better than blurry. There should be a few different semi-manual settings, two of which are called AV and TV (on Canon, A or S on Nikon I believe). AV lets you choose the aperture and the camera chooses the shutter speed, while TV (or S) lets you choose the shutter speed and the camera chooses the aperture. In this situation you would want to choose the shutter speed. The rule of thumb for choosing a shutter speed that results in a sharp picture is to take the length of the lens and stick it in the denominator of a 1/X fraction. SO, if you have a lens that is 100mm you would try to keep the shutter speed at 1/100th second or faster. You can experiment to see what you’re able to hand-hold. I once hand-held a 200mm lens at 1/15th sec, but I had to be super steady! I typically don’t shoot below 1/200th sec if I can help it. As far as using the flash, the best option is to get a flash that doesn’t pop-up from the camera.
This is what
I would do in your situation: Take a flash that sits on top of the camera and point it either to the ceiling or a wall (as long as the wall is a neutral light color like white, grey, or even light yellow). The flash will bounce off of the wall and land softly and nicely on your children :). When you use a flash the shutter speed rule doesn’t typically apply. You can use longer shutter speeds if you have a flash. This is an example of a picture where it was too dark inside and I bounced my flash off a wall:
This is how the flash will look:
Or like this:

What actions do you use?
I nearly exclusively use Totally Rad Actions. The only exception to that rule are actions that I made myself. When I’m editing a picture I’ll generally create anywhere from 5 to 20 different layers with somewhere around 3 to 8 different actions used. I alter the opacity of different actions and layers. Some good actions if you can’t afford it or don’t want to spend the money are Pioneer Woman’s actions. I highly recommend downloading them! Here’s one example of one of my pictures before and after action use:
(this one is SOOC – Straight out of Camera)
Actions used: Lux (soft) at 60%, Oh Snap! at 46%, Yin (from Yin/Yang) on select areas at a low opacity, Green With Envy on select areas at a low opacity, one of my own that just affects some color toning, Antique Tone at 30%, and Select-O-Sharp on select areas at different opacities. I know there’s not a huge difference (and I think it’s even less noticeable on the blog), but I don’t like to over-process. Every picture on this blog has been edited in photoshop, most of them with TRA. Let me know if you’d like to see more examples!

What I was bummed about in my photos was the sun. In some of the photos the faces turned out too dark or too light. Maybe you can spend some time on the proper usage of light. I could talk about light all day! I will probably come back to this at a later time and discuss it more, but I’ll touch on it lightly today. The most important thing is to take your camera off of the auto-mode (it looks like you use a Nikon so I don’t know exactly what your camera looks like, but it will probably be on the dial on the top left of your camera). From your description it sounds like some of your pictures were back-lit (the sun was behind them) and in others the sun was probably directly on them, making them too light. In these situations it’s important to make sure you expose (your use of putting together the aperture and the shutter speed) for their faces and not the whole scene. You can do this by shooting on manual and choosing both the aperture and the shutter speed based on what your light meter tells you. I’m only going to touch on one way to fix this for now. The section I marked below “Light Meter/Exposure compensation” is very useful for manual or semi-manual (AV, TV, or P on Canon; A, S, or P on Nikon). As I said above, AV (A) lets you choose the aperture, TV (S) lets you choose the shutter speed, and P (program) is basically an auto-mode, but lest you use some of the other features on the camera (oh, and M is for completely manual). If your subject is back-lit by the sun and you’re in one of the semi-manual modes you can use the exposure compensation to your advantage. When the little line is in the middle (it goes from -2 to +2) it basically means it’s properly exposed according to the camera. By dialing it up to +1 or so, the faces will be lighter and by dialing it down to -1 they’ll be darker. On my camera I dial it up by using the wheel on the back after pressing the third button on the top. The picture below is a good example. If I had let the camera do all the thinking the couple would be really dark and the background would look properly exposed. But I did it the way I wanted to do things and I don’t care that the background isn’t exposed correctly because the people are. I have some more questions to answer, but I just realized how long this is getting! I’m sure I bored most of you to death, so I’ll try to get better at being more concise!